NETWORK GUIDE
Method 2:
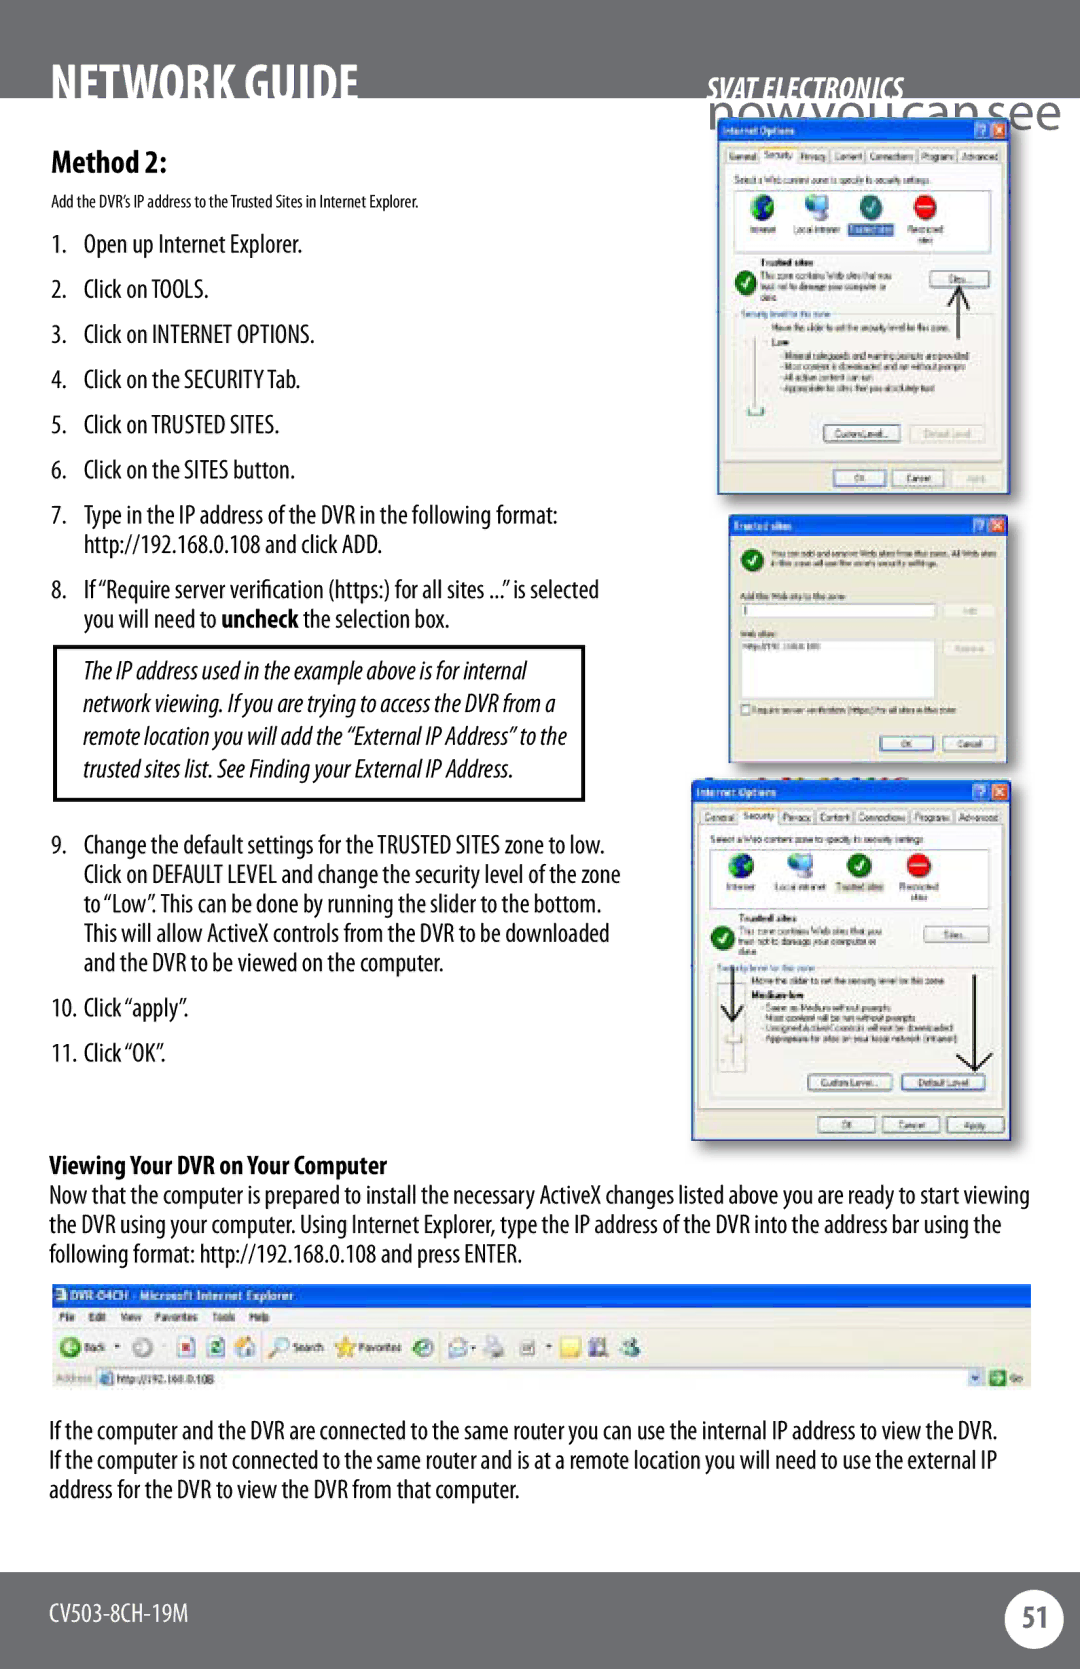
Add the DVR’s IP address to the Trusted Sites in Internet Explorer.
1.Open up Internet Explorer.
2.Click on TOOLS.
3.Click on INTERNET OPTIONS.
4.Click on the SECURITY Tab.
5.Click on TRUSTED SITES.
6.Click on the SITES button.
7.Type in the IP address of the DVR in the following format: http://192.168.0.108 and click ADD.
8.If “Require server verification (https:) for all sites ...” is selected you will need to uncheck the selection box.
The IP address used in the example above is for internal network viewing. If you are trying to access the DVR from a remote location you will add the “External IP Address” to the trusted sites list. See Finding your External IP Address.
9.Change the default settings for the TRUSTED SITES zone to low. Click on DEFAULT LEVEL and change the security level of the zone to “Low”. This can be done by running the slider to the bottom. This will allow ActiveX controls from the DVR to be downloaded and the DVR to be viewed on the computer.
10.Click “apply”.
11.Click “OK”.
SVAT ELECTRONICS
nowyoucansee
Viewing Your DVR on Your Computer
Now that the computer is prepared to install the necessary ActiveX changes listed above you are ready to start viewing the DVR using your computer. Using Internet Explorer, type the IP address of the DVR into the address bar using the following format: http://192.168.0.108 and press ENTER.
If the computer and the DVR are connected to the same router you can use the internal IP address to view the DVR. If the computer is not connected to the same router and is at a remote location you will need to use the external IP address for the DVR to view the DVR from that computer.
51 | |
|
|