SECTION 3 : Identifying the Parts
15
12
18
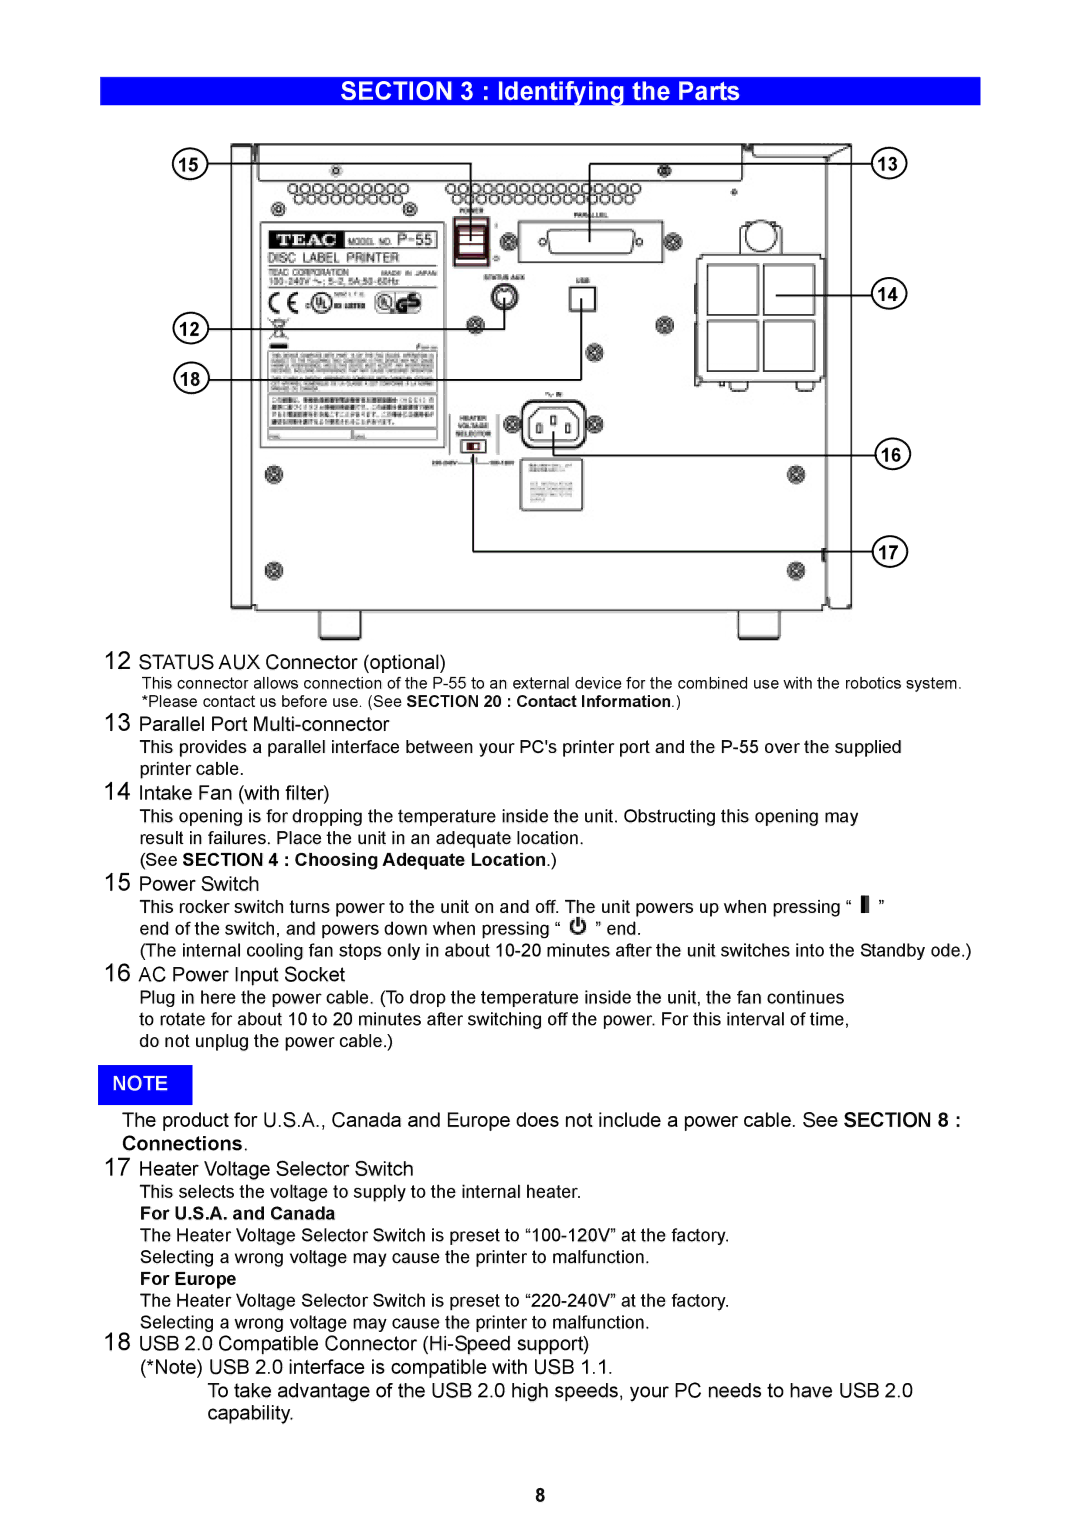
12STATUS AUX Connector (optional)
13
14
16
17
This connector allows connection of the
13Parallel Port Multi-connector
14
15
16
This provides a parallel interface between your PC's printer port and the
Intake Fan (with filter)
This opening is for dropping the temperature inside the unit. Obstructing this opening may result in failures. Place the unit in an adequate location.
(See SECTION 4 : Choosing Adequate Location.)
Power Switch
This rocker switch turns power to the unit on and off. The unit powers up when pressing “ ![]() ” end of the switch, and powers down when pressing “
” end of the switch, and powers down when pressing “ ![]() ” end.
” end.
(The internal cooling fan stops only in about
AC Power Input Socket
Plug in here the power cable. (To drop the temperature inside the unit, the fan continues to rotate for about 10 to 20 minutes after switching off the power. For this interval of time, do not unplug the power cable.)
NOTE
The product for U.S.A., Canada and Europe does not include a power cable. See SECTION 8 : Connections.
17
18
Heater Voltage Selector Switch
This selects the voltage to supply to the internal heater.
For U.S.A. and Canada
The Heater Voltage Selector Switch is preset to
For Europe
The Heater Voltage Selector Switch is preset to
USB 2.0 Compatible Connector
To take advantage of the USB 2.0 high speeds, your PC needs to have USB 2.0 capability.
8