1.0 Quick Start Instructions
Important – The
1ea
1ea
1ea
1ea user’s manual
When unpacking the PowerPod, the package will
contain everything you need.
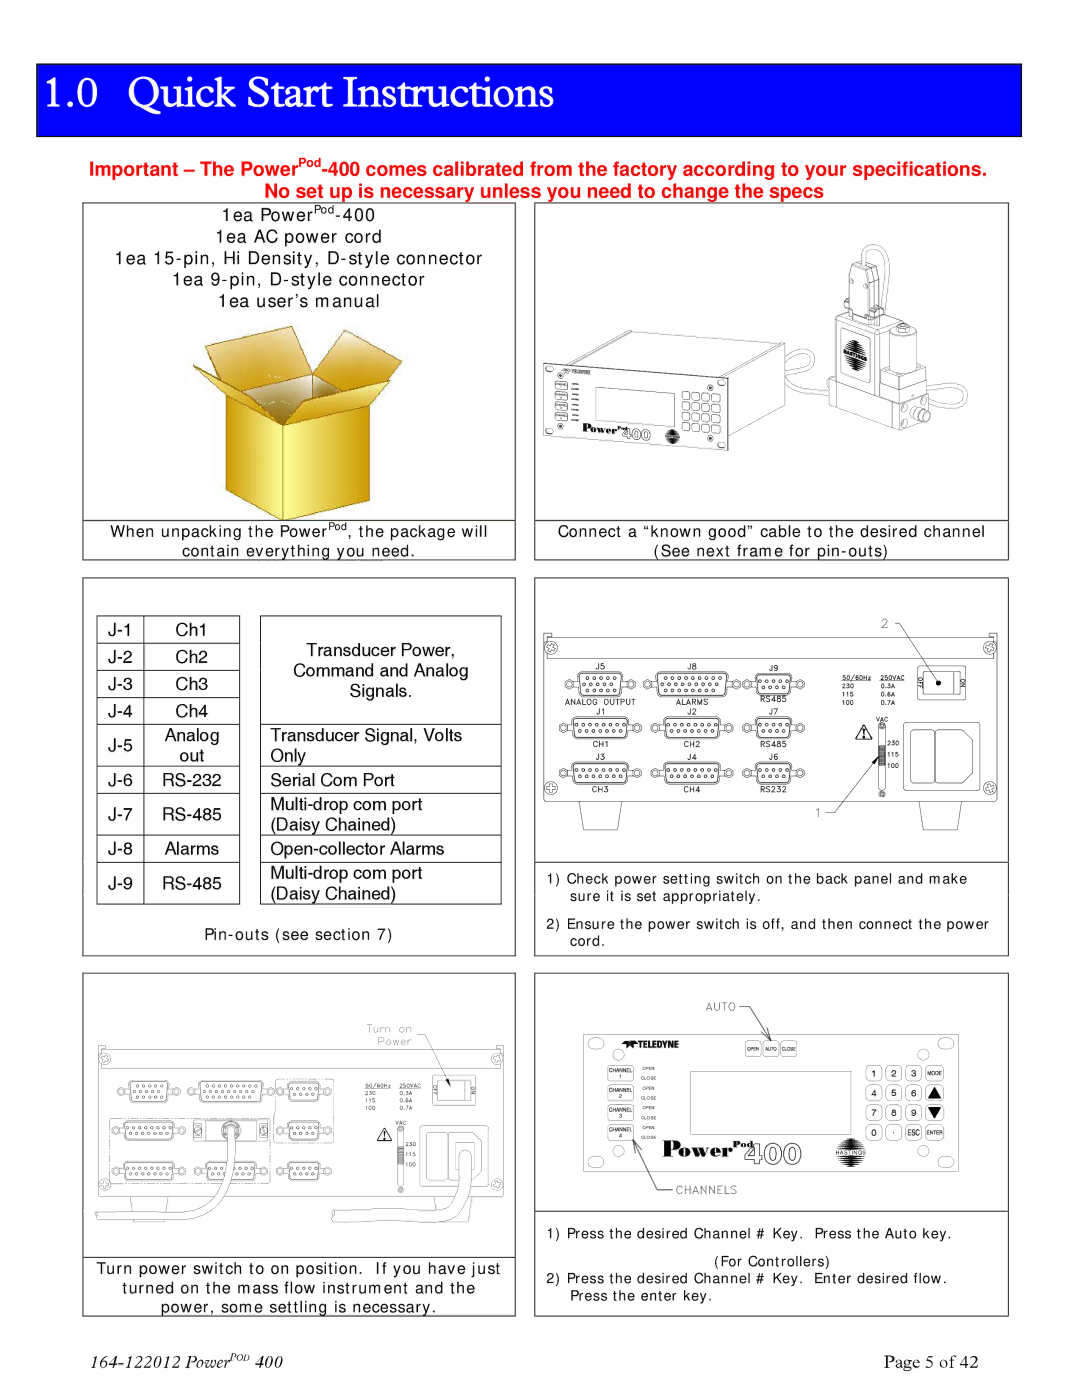
Connect a “known good” cable to the desired channel |
(See next frame for |
Ch1 | ||
|
| |
Ch2 | ||
|
| |
Ch3 | ||
|
| |
Ch4 | ||
|
| |
Analog | ||
out | ||
| ||
|
| |
|
| |
Alarms | ||
|
| |
|
|
Transducer Power,
Command and Analog
Signals.
Transducer Signal, Volts Only
Serial Com Port
1) | Check power setting switch on the back panel and make |
| sure it is set appropriately. |
2) | Ensure the power switch is off, and then connect the power |
cord. |
Turn power switch to on position. If you have just
turned on the mass flow instrument and the
power, some settling is necessary.
| OPEN | 1 | 2 | 3 | |
1 | CLOSE | ||||
|
|
| |||
| OPEN | 4 | 5 | 6 | |
2 | CLOSE | ||||
|
|
| |||
| OPEN | 7 | 8 | 9 | |
3 | CLOSE | ||||
0 . |
| ||||
| OPEN |
| |||
4 | CLOSE | Power |
|
| |
|
|
|
| ||
|
| Pod |
|
| |
HASTINGS
1) Press the desired Channel # Key. Press the Auto key. (For Controllers)
2)Press the desired Channel # Key. Enter desired flow. Press the enter key.
Page 5 of 42 |