INSTALLING THE RECORDER
Follow steps A to C below. Your recorder will be ready to display digital programs on your TV.
STEP A: CONNECTIONS
DO NOT PLUG THE RECORDER INTO THE MAINS YET.
Before you use this recorder, it is necessary to connect it to your TV.
1 CONNECTING TO TV
1-1. Connection to Antenna
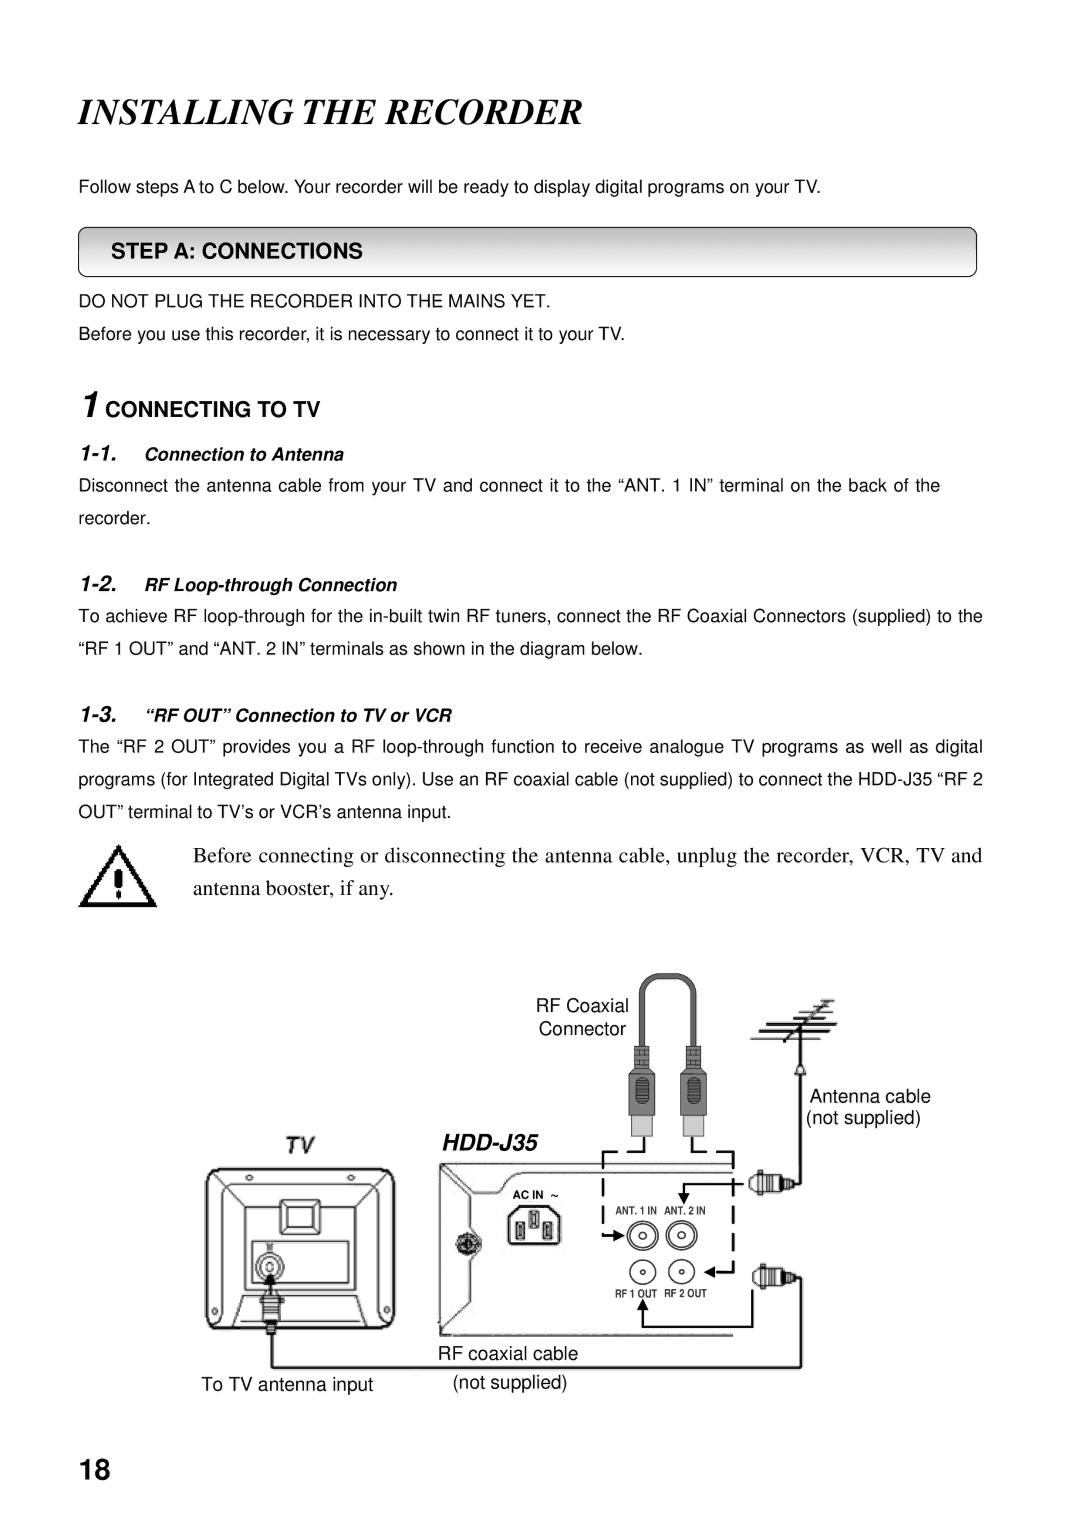
Disconnect the antenna cable from your TV and connect it to the “ANT. 1 IN” terminal on the back of the recorder.
1-2. RF Loop-through Connection
To achieve RF
1-3. “RF OUT” Connection to TV or VCR
The “RF 2 OUT” provides you a RF
Before connecting or disconnecting the antenna cable, unplug the recorder, VCR, TV and
antenna booster, if any.
RF Coaxial
Connector
HDD-J35
Antenna cable (not supplied)
AC IN ~
ANT. 1 IN ANT. 2 IN
RF 1 OUT RF 2 OUT
| RF coaxial cable |
To TV antenna input | (not supplied) |
18