Preparations
Parts of the main unit
(1)
(1)
(2)
![]() (6)
(6)
| (3) |
| |
| (4) | (7) | |
| (4) | ||
(5) | (10) | ||
| |||
| (9) | (8) |
Bottom
![]() (10)
(10)
(11)
(15)
(12)
(14)
(13)
| Name | : Function |
|
|
|
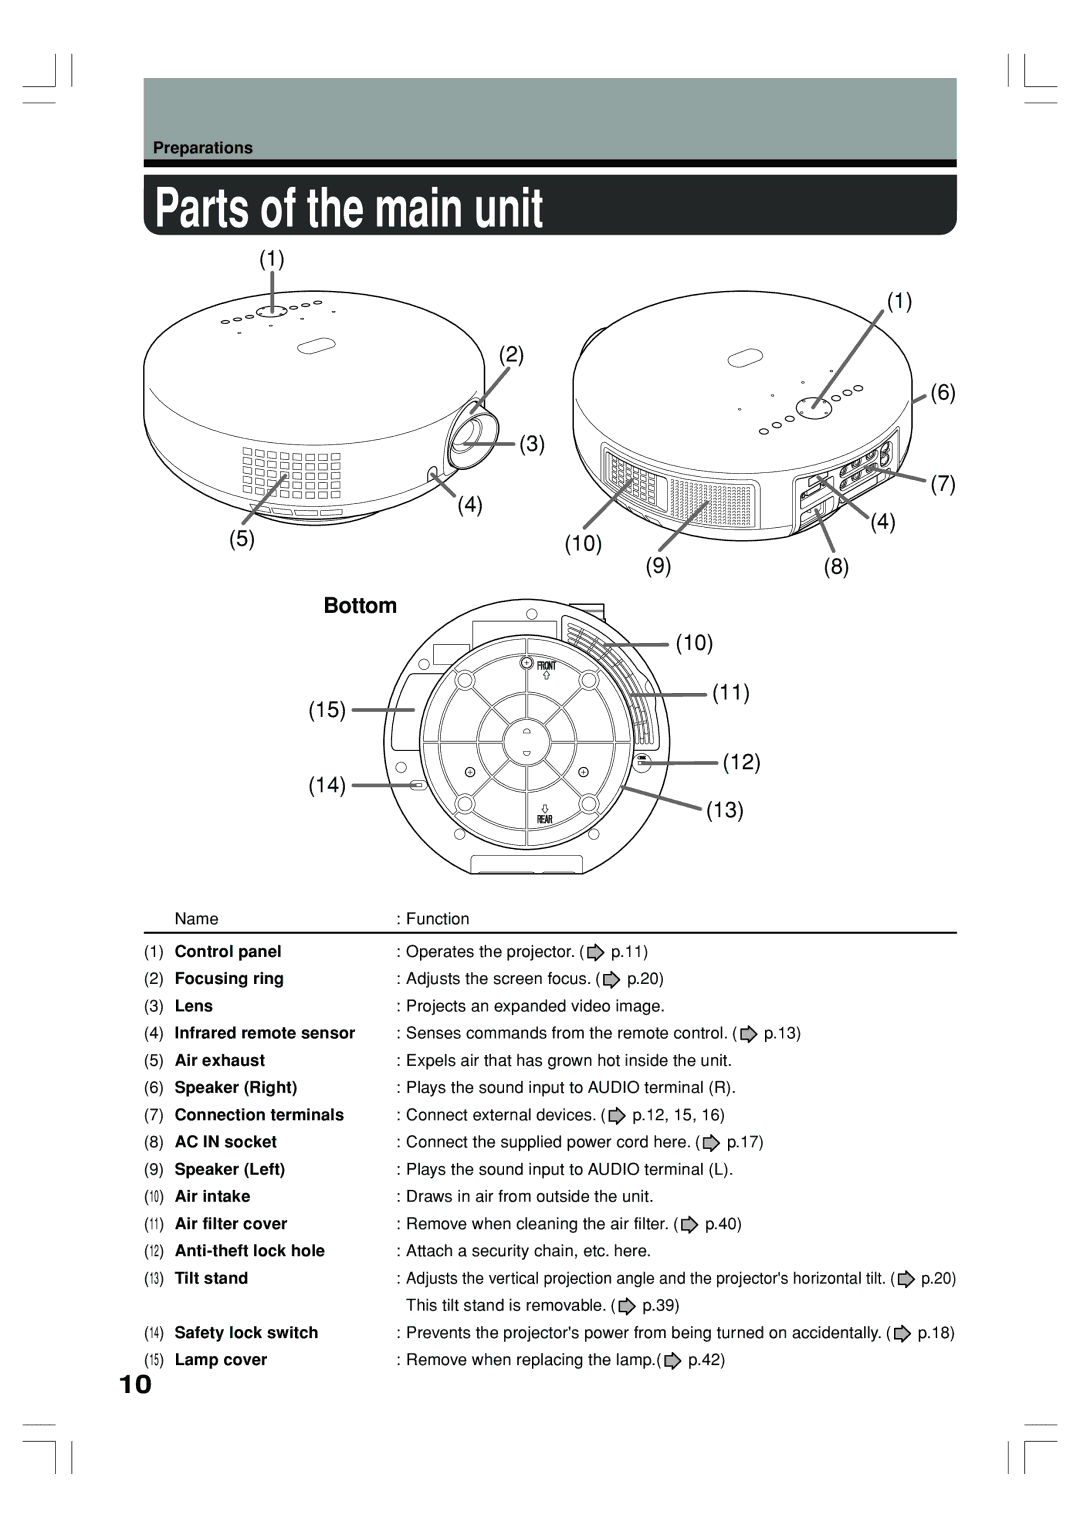
(1) | Control panel | : Operates the projector. ( | p.11) |
|
|
(2) | Focusing ring | : Adjusts the screen focus. ( | p.20) |
|
|
(3) | Lens | : Projects an expanded video image. |
|
| |
(4) | Infrared remote sensor | : Senses commands from the remote control. ( p.13) |
| ||
(5) | Air exhaust | : Expels air that has grown hot inside the unit. |
| ||
(6) | Speaker (Right) | : Plays the sound input to AUDIO terminal (R). |
| ||
(7) | Connection terminals | : Connect external devices. ( | p.12, 15, 16) |
| |
(8) | AC IN socket | : Connect the supplied power cord here. ( p.17) |
| ||
(9) | Speaker (Left) | : Plays the sound input to AUDIO terminal (L). |
| ||
(10) | Air intake | : Draws in air from outside the unit. |
|
| |
(11) | Air filter cover | : Remove when cleaning the air filter. ( | p.40) |
| |
(12) | : Attach a security chain, etc. here. |
|
| ||
(13) | Tilt stand | : Adjusts the vertical projection angle and the projector's horizontal tilt. ( | p.20) | ||
|
| This tilt stand is removable. ( p.39) |
|
| |
(14) | Safety lock switch | : Prevents the projector's power from being turned on accidentally. ( | p.18) | ||
(15) | Lamp cover | : Remove when replacing the lamp.( | p.42) |
| |
10
