Preparations
Placing the projector
•Always obey the instructions listed in IMPORTANT SAFETY INSTRUCTIONS when placing the unit.
•If you wish to mount the projector on the ceiling, be sure to ask your dealer to do so. Mounting the projector on a ceiling requires special ceiling brackets (sold separately) and specialized knowledge. Improper mounting could cause the projector to fall, resulting in an accident.
•If you wish to mount the projector on the ceiling, remove the tilt stand attached to this unit. Mounting the projector with the tilt stand on the ceiling could cause it to fall, resulting in an accident.
•If the projector is
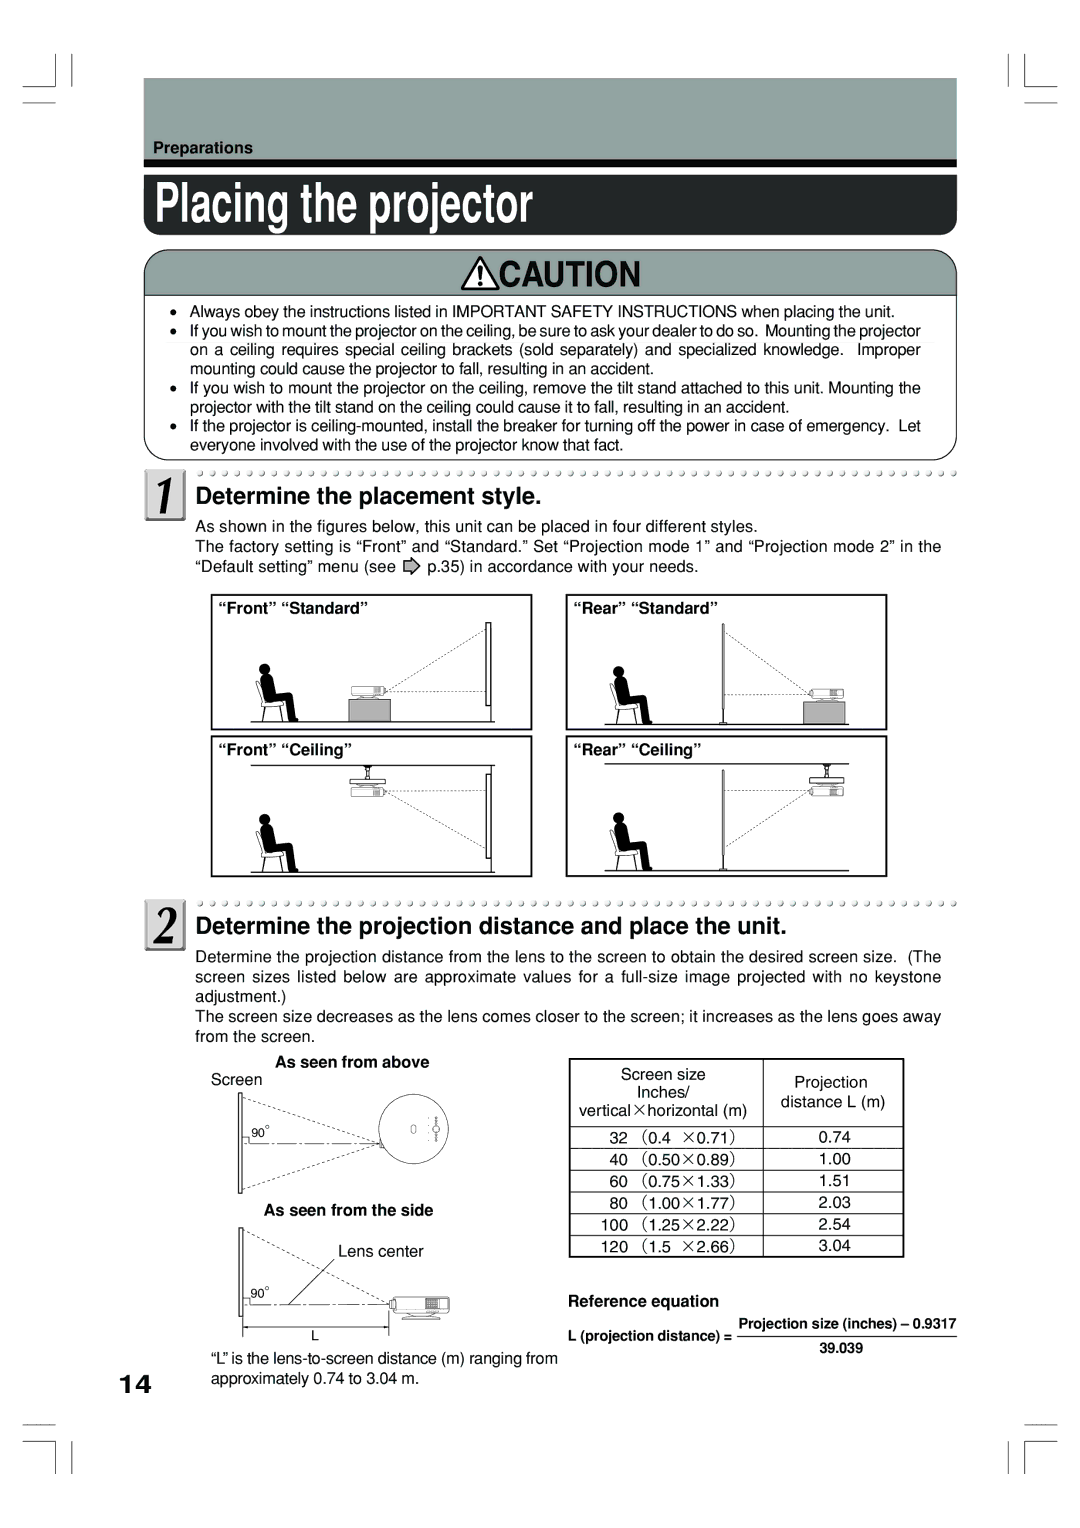
Determine the placement style.
As shown in the figures below, this unit can be placed in four different styles.
The factory setting is “Front” and “Standard.” Set “Projection mode 1” and “Projection mode 2” in the
“Default setting” menu (see ![]() p.35) in accordance with your needs.
p.35) in accordance with your needs.
“Front” “Standard”
“Front” “Ceiling” |
“Rear” “Standard” |
“Rear” “Ceiling” |
 Determine the projection distance and place the unit.
Determine the projection distance from the lens to the screen to obtain the desired screen size. (The screen sizes listed below are approximate values for a
The screen size decreases as the lens comes closer to the screen; it increases as the lens goes away from the screen.
As seen from above
Screen
90°
As seen from the side
| Lens center |
| 90° |
| L |
| “L” is the |
14 | approximately 0.74 to 3.04 m. |
|
Screen size | Projection | ||
| Inches/ | ||
| distance L (m) | ||
vertical×horizontal (m) | |||
| |||
|
|
| |
32 | (0.4 ×0.71) | 0.74 | |
40 | (0.50×0.89) | 1.00 | |
60 | (0.75×1.33) | 1.51 | |
80 | (1.00×1.77) | 2.03 | |
100 | (1.25×2.22) | 2.54 | |
120 | (1.5 ×2.66) | 3.04 | |
Reference equation
Projection size (inches) – 0.9317
L (projection distance) =
39.039