Computer System HyperTools | Tevion | |
|
|
|
5.3.6 Changing the Index Picture of a TV Program Recorded on HDD
In addition to entering a new name for a recorded program you may be able to recognise it just by means of its
So, you may want to change the Index Picture of the recording to make it easier to find it.
1.On TRC press ![]()
![]()
![]()
![]() Power button to turn on the TV (if not already on).
Power button to turn on the TV (if not already on).
2.On TRC pressed ![]() button until
button until ![]()
![]() 2 is shown.
2 is shown.
3.On DRC press STANDBY/ON button to turn on the DVR and wait until “Hello” display on front panel has been replaced by “No disc” message shown on screen.
4.On DRC press HDD button to show TV programs recorded on the Hard Disk.
5.On DRC use the Down Arrow or Up Arrow button to highlight the data about the program you wish to delete:
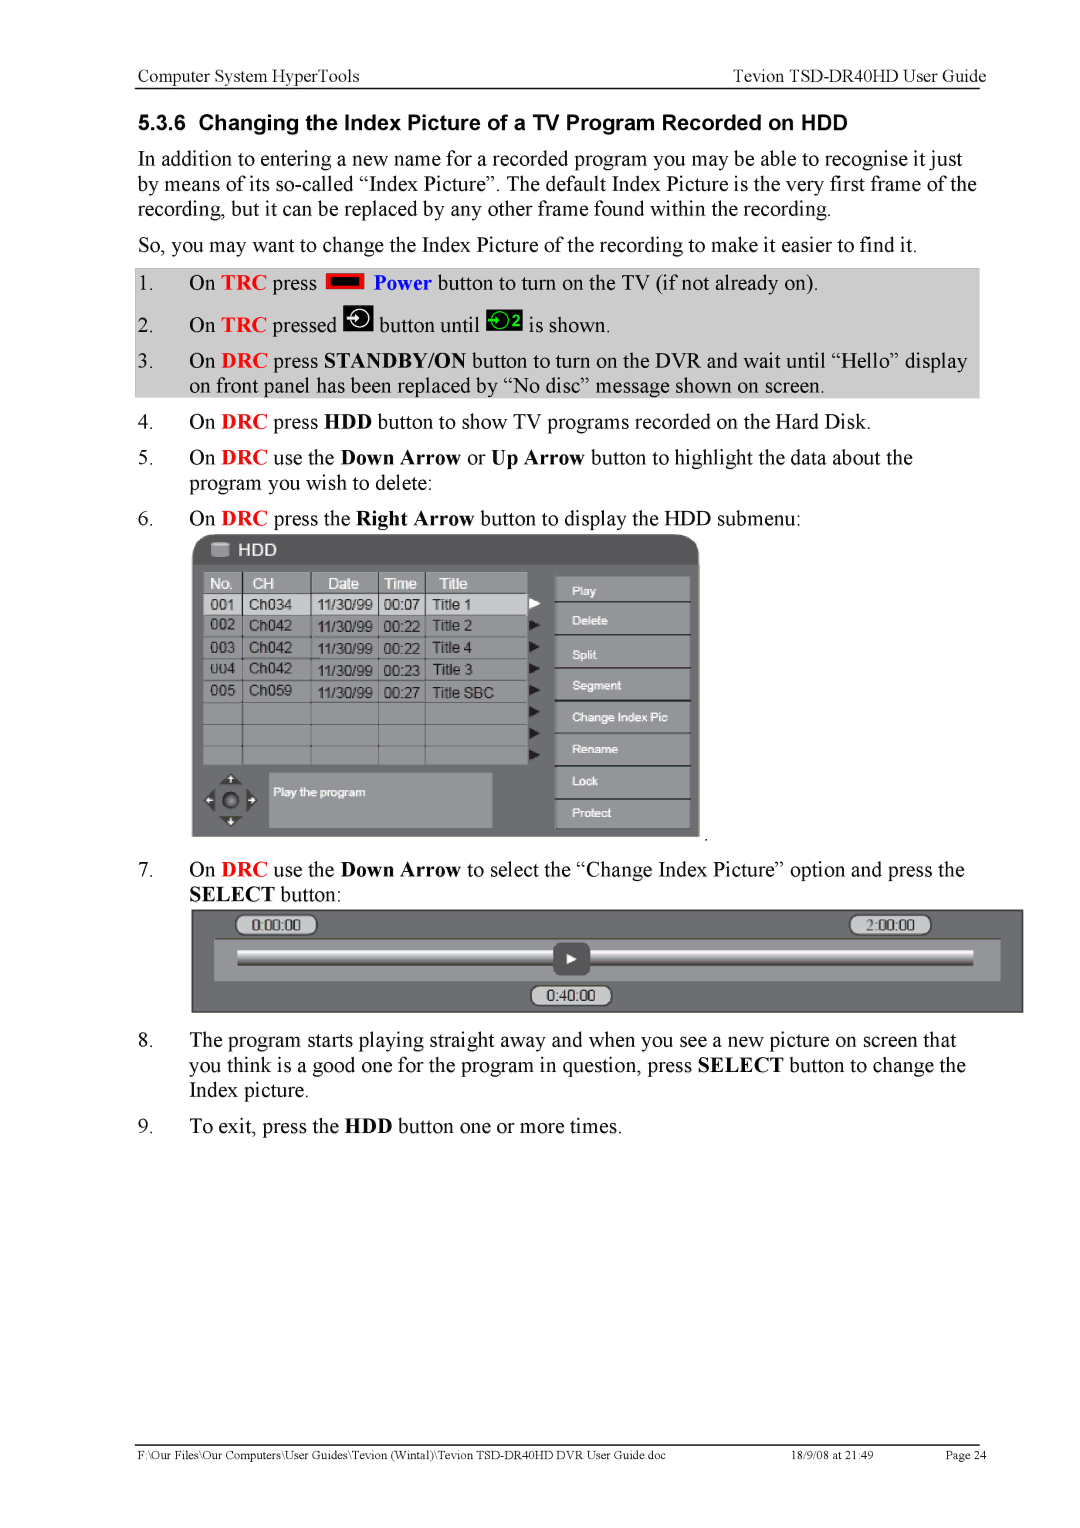
6.On DRC press the Right Arrow button to display the HDD submenu:
 .
.
7.On DRC use the Down Arrow to select the “Change Index Picture” option and press the SELECT button:
8.The program starts playing straight away and when you see a new picture on screen that you think is a good one for the program in question, press SELECT button to change the Index picture.
9.To exit, press the HDD button one or more times.
F:\Our Files\Our Computers\User Guides\Tevion (Wintal)\Tevion | 18/9/08 at 21:49 | Page 24 |