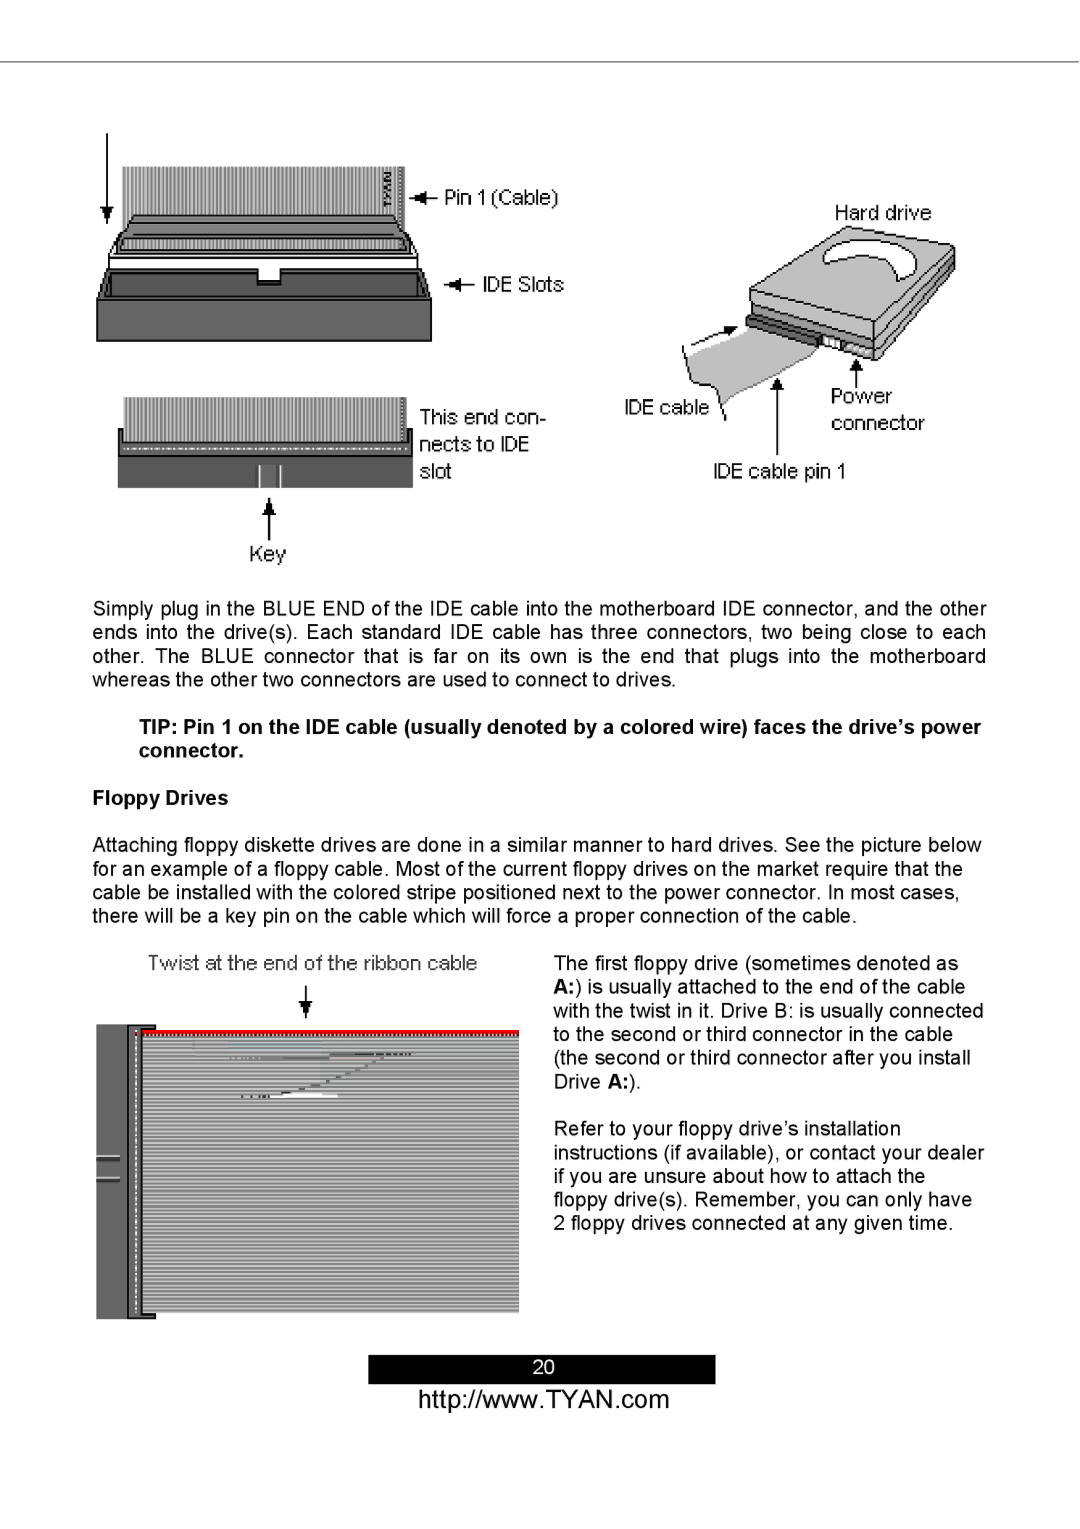
Simply plug in the BLUE END of the IDE cable into the motherboard IDE connector, and the other ends into the drive(s). Each standard IDE cable has three connectors, two being close to each other. The BLUE connector that is far on its own is the end that plugs into the motherboard whereas the other two connectors are used to connect to drives.
TIP: Pin 1 on the IDE cable (usually denoted by a colored wire) faces the drive’s power connector.
Floppy Drives
Attaching floppy diskette drives are done in a similar manner to hard drives. See the picture below for an example of a floppy cable. Most of the current floppy drives on the market require that the cable be installed with the colored stripe positioned next to the power connector. In most cases, there will be a key pin on the cable which will force a proper connection of the cable.
The first floppy drive (sometimes denoted as A:) is usually attached to the end of the cable with the twist in it. Drive B: is usually connected to the second or third connector in the cable (the second or third connector after you install Drive A:).
Refer to your floppy drive’s installation instructions (if available), or contact your dealer if you are unsure about how to attach the floppy drive(s). Remember, you can only have 2 floppy drives connected at any given time.
20
http://www.TYAN.com