Osprey 240e/450e User Guide
All computer cards are sensitive to electrostatic discharge. Slight electrostatic discharges from clothing or even from the normal work environment can adversely affect these cards. By following these simple guidelines, however, you can minimize the chance of damaging the Osprey video capture card.
∙Handle cards only by the
∙Do not touch the card components or any other metal parts.
∙Wear a grounding strap while handling the cards (especially when located in a high static area).
∙Properly ground your computer to avoid static discharge.
∙Ensure the workstation is powered off before installing any components.
∙If you are not familiar with how to install a PCI Express® bus card, refer to the system’s documentation for more complete,
∙Install the card only in UL Listed computers that include instructions for
To install the video capture card:
1.Power down and unplug your computer.
2.Remove the computer’s cover and locate an empty PCI Express slot.
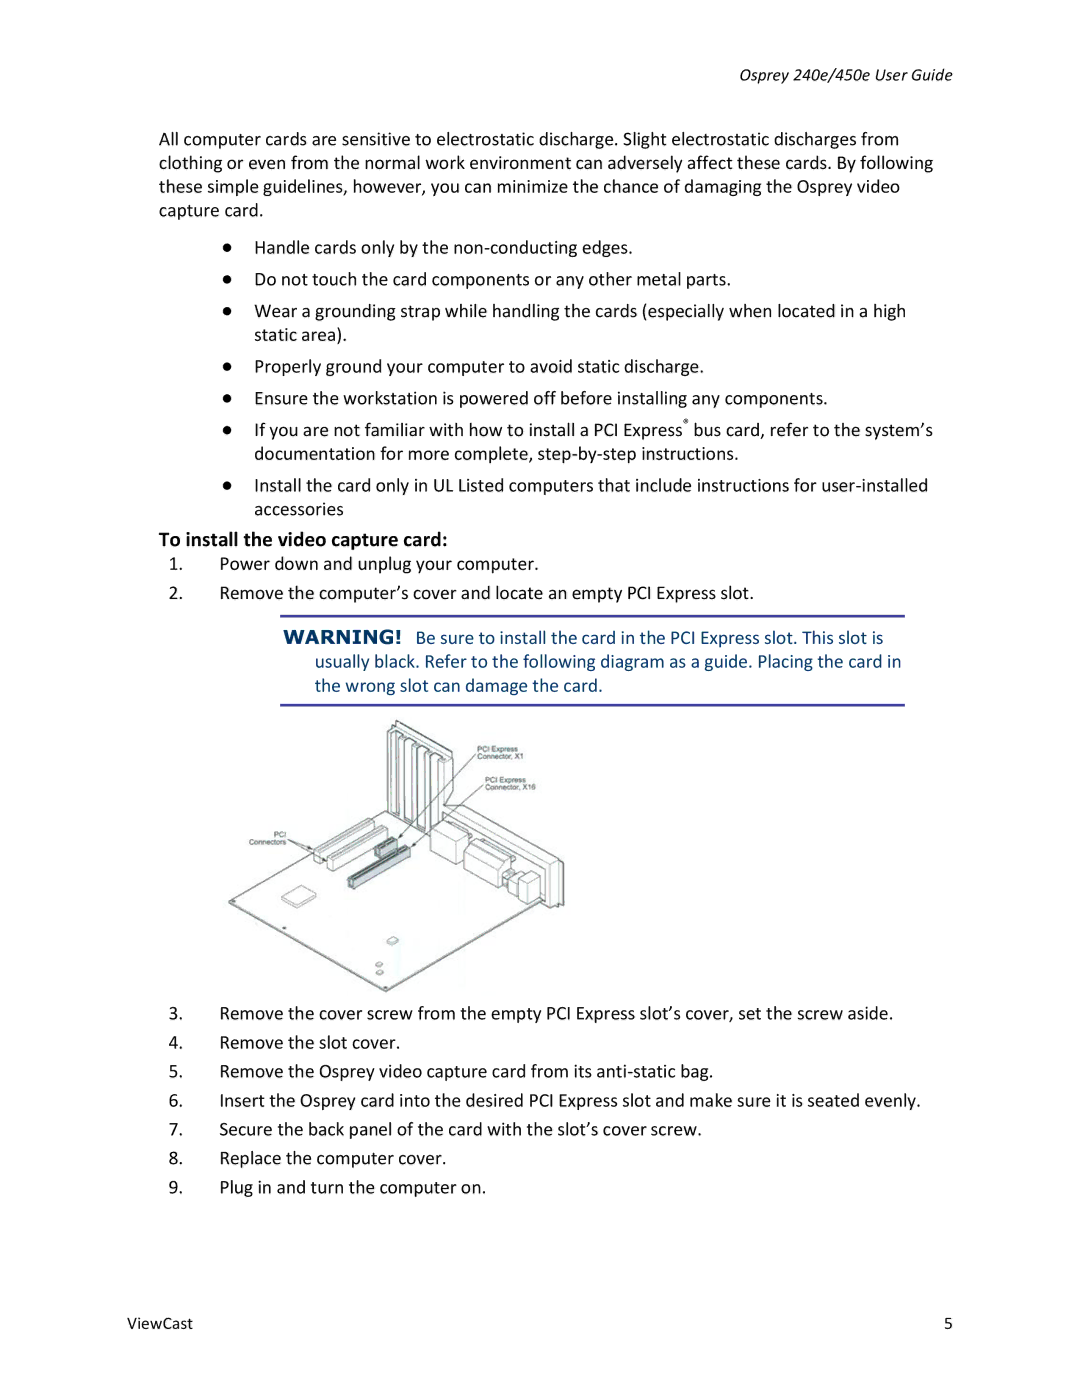
WARNING! Be sure to install the card in the PCI Express slot. This slot is usually black. Refer to the following diagram as a guide. Placing the card in the wrong slot can damage the card.
3.Remove the cover screw from the empty PCI Express slot’s cover, set the screw aside.
4.Remove the slot cover.
5.Remove the Osprey video capture card from its
6.Insert the Osprey card into the desired PCI Express slot and make sure it is seated evenly.
7.Secure the back panel of the card with the slot’s cover screw.
8.Replace the computer cover.
9.Plug in and turn the computer on.
ViewCast | 5 |