INSTALLATION
4)Carefully remove the logs, embers and rock- wool.
5)Remove burner.
Note: Use a magnetic type screwdriver if possible.
6)Remove burner orifice with a 1/2" wrench and discard.
LOG INSTALLATION
WARNING: Dangerous operating condi- tions may occur if these logs are not positioned in their approved locations. Read the instructions below carefully and refer to the diagrams. If logs are broken do not use the unit until they are replaced. Broken logs can interfere with the pilot and burner operation.
a)Front Right Log - Part #
b)Front Left Log - Part #
c)Rear log - Part #
d)Embers - Part #
e)Lava - Part #
(Part #
1)Remove the logs from the box and carefully unwrap them. The logs are fragile, handle with care - DO NOT FORCE into position.
2)Place the rear log, carefully sliding it down onto the pins, with the flat side of the log facing the back of the unit. See diagram 1.
Diagram 3
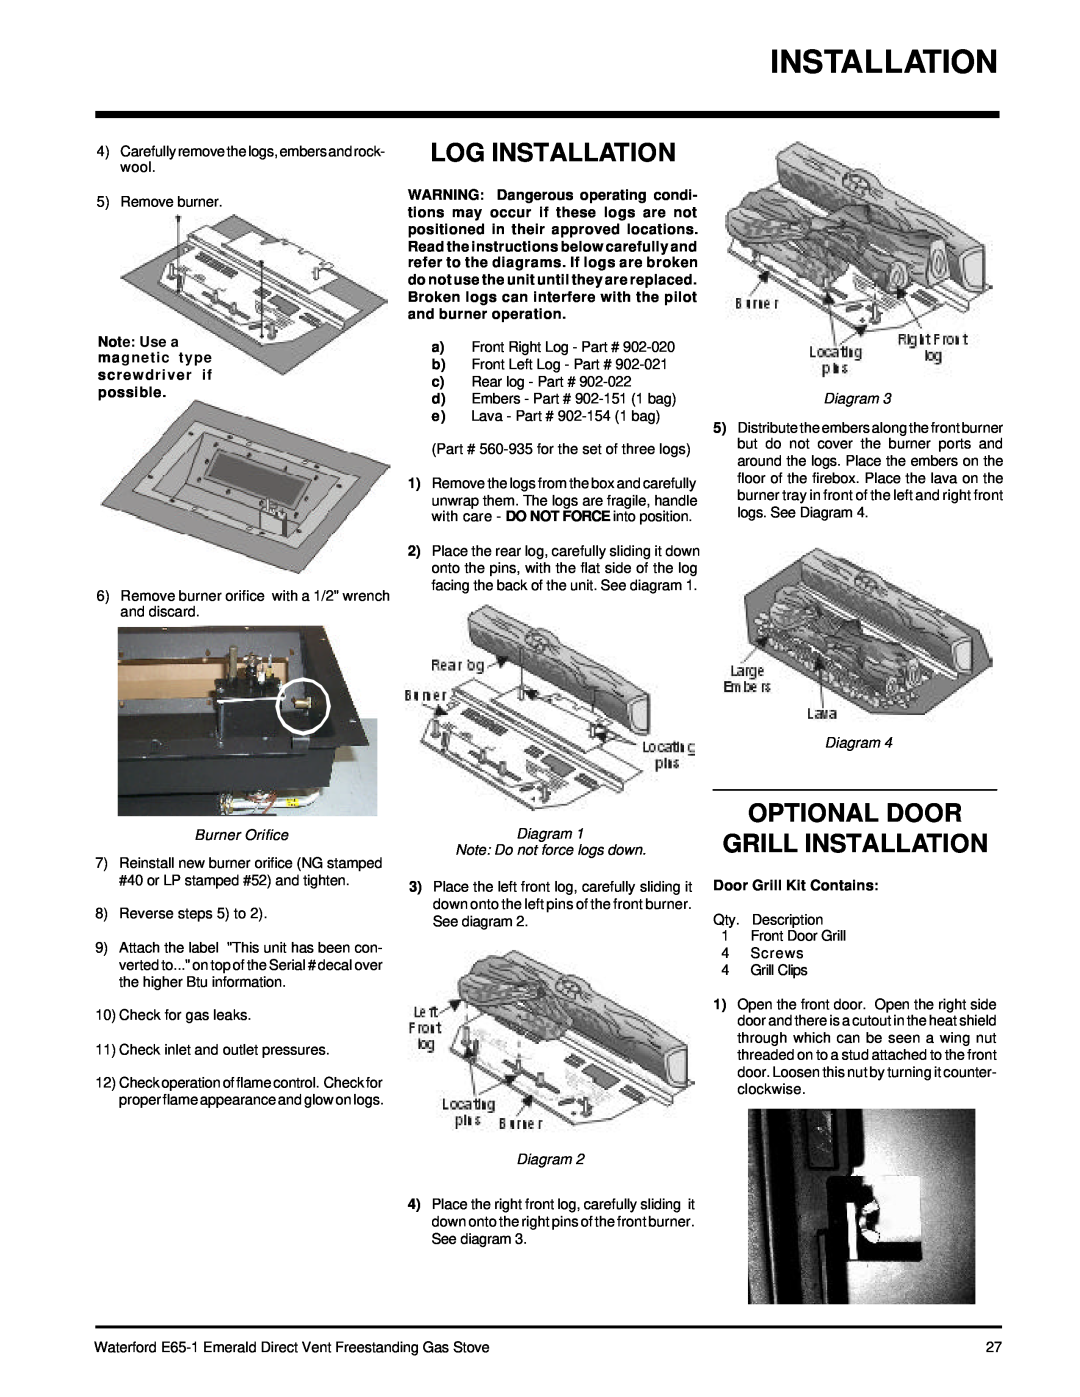
5)Distribute the embers along the front burner but do not cover the burner ports and around the logs. Place the embers on the floor of the firebox. Place the lava on the burner tray in front of the left and right front logs. See Diagram 4.
Burner Orifice
7)Reinstall new burner orifice (NG stamped #40 or LP stamped #52) and tighten.
8)Reverse steps 5) to 2).
9)Attach the label "This unit has been con- verted to..." on top of the Serial # decal over the higher Btu information.
10)Check for gas leaks.
11)Check inlet and outlet pressures.
12)Check operation of flame control. Check for proper flame appearance and glow on logs.
Diagram 1
Note: Do not force logs down.
3)Place the left front log, carefully sliding it down onto the left pins of the front burner. See diagram 2.
Diagram 4
OPTIONAL DOOR
GRILL INSTALLATION
Door Grill Kit Contains:
Qty. Description
1Front Door Grill
4Screws
4Grill Clips
1)Open the front door. Open the right side door and there is a cutout in the heat shield through which can be seen a wing nut threaded on to a stud attached to the front door. Loosen this nut by turning it counter- clockwise.
Diagram 2
4)Place the right front log, carefully sliding it down onto the right pins of the front burner. See diagram 3.
Waterford | 27 |