Pre-Installation
IMPORTANT! Before starting the installation read these instructions thoroughly to familiarize yourself with all aspects of installation and adjustment.
IMPORTANT: IF YOUR GARAGE HAS NO SERVICE ENTRANCE DOOR, INSTALL AN OPTIONAL OUTSIDE QUICK RELEASE LOCK. THIS ACCESSORY ALLOWS MANUAL OPERATION OF GARAGE DOOR FROM OUTSIDE IN CASE OF POWER FAILURE.
IDENTIFY YOUR DOOR
Identify your door by referring to illustrations below and verify that your door type is a sectional door with curved track. Do not install if the door is any type of one piece door.
NOTE: The opener has been designed for sectional doors. Do not attempt to install this opener on any style one piece door. Using this opener on a
TEST YOUR DOOR
Before you begin, complete the following two tests to insure that the door is balanced and working properly. A door that binds, sticks or is out of balance could cause severe injury. Do not attempt to compensate for an improperly adjusted door by the installation of an opener. This will interfere with the proper operation of the opener’s safety features and/or may damage the door or opener. Have a qualifi ed service person make any needed adjustments or repairs before proceeding with installation.
Door Test One
Raise and lower the door and check closely for any sticking or binding that may occur. Lift the door approximately half way open, as illustrated. When releasing the door, it should stay in position. If spring tension pulls the door further open or door weight pulls it down, your door is not properly adjusted.
Door Test Two
When properly installed, a door should remain clear of the opening, when allowed to rest at its natural, full open position. If “door drift” pulls door back into opening or spring tension is not suffi cient to pull door totally clear of opening, the door is not properly adjusted.
PRE-ASSEMBLY CHECK
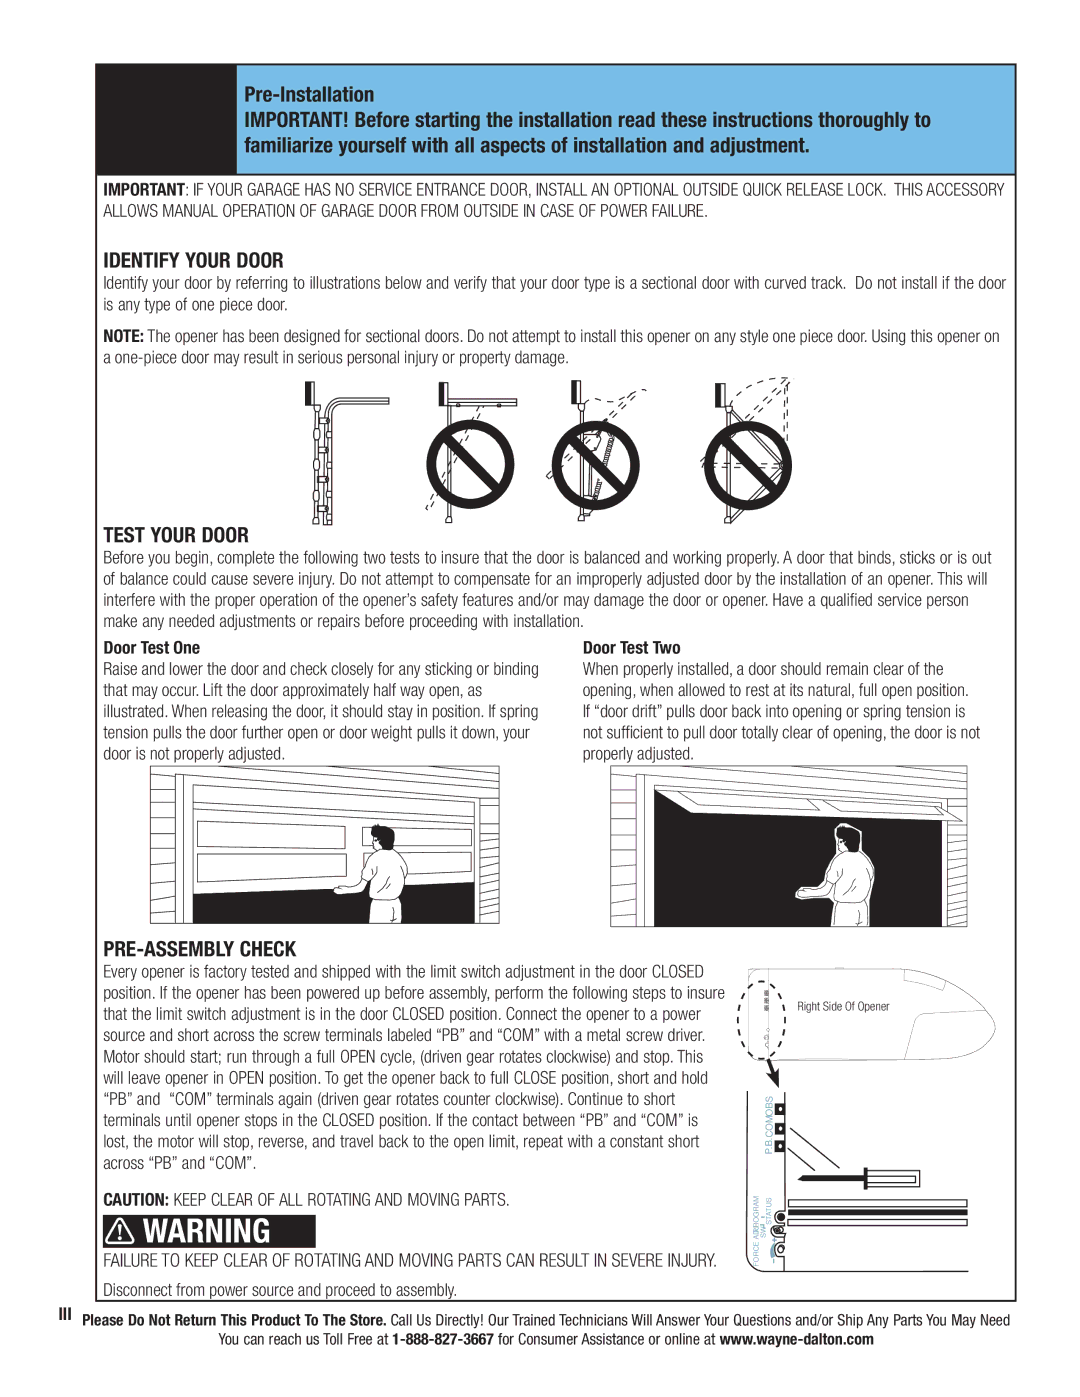
Every opener is factory tested and shipped with the limit switch adjustment in the door CLOSED position. If the opener has been powered up before assembly, perform the following steps to insure that the limit switch adjustment is in the door CLOSED position. Connect the opener to a power source and short across the screw terminals labeled “PB” and “COM” with a metal screw driver. Motor should start; run through a full OPEN cycle, (driven gear rotates clockwise) and stop. This will leave opener in OPEN position. To get the opener back to full CLOSE position, short and hold “PB” and “COM” terminals again (driven gear rotates counter clockwise). Continue to short terminals until opener stops in the CLOSED position. If the contact between “PB” and “COM” is lost, the motor will stop, reverse, and travel back to the open limit, repeat with a constant short across “PB” and “COM”.
Right Side Of Opener
P.B. COM OBS![]()
![]()
CAUTION: KEEP CLEAR OF ALL ROTATING AND MOVING PARTS. | ADJ.PROGRAM | SW STATUS | ||
| WARNING |
| ||
|
|
| ||
FAILURE TO KEEP CLEAR OF ROTATING AND MOVING PARTS CAN RESULT IN SEVERE INJURY. | FORCE |
| ||
Disconnect from power source and proceed to assembly.
IIIPlease Do Not Return This Product To The Store. Call Us Directly! Our Trained Technicians Will Answer Your Questions and/or Ship Any Parts You May Need
You can reach us Toll Free at