1Attaching Opener to Rail
Tools Needed: | IMPORTANT: THE DRIVER GEAR IN THE |
| OPENER MUST BE PROPERLY ALIGNED |
3/8” Socket | WITH THE SPROCKET/ COUPLING COGS IN |
| THE RAIL ASSEMBLY AND THE MOUNTING |
Ratchet Wrench | BOLTS FULLY TIGHTENED, BEFORE |
| POWERING UP THE OPENER. NEGLECTING |
| TO DO THIS WILL RESULT IN GEAR FAILURE. |
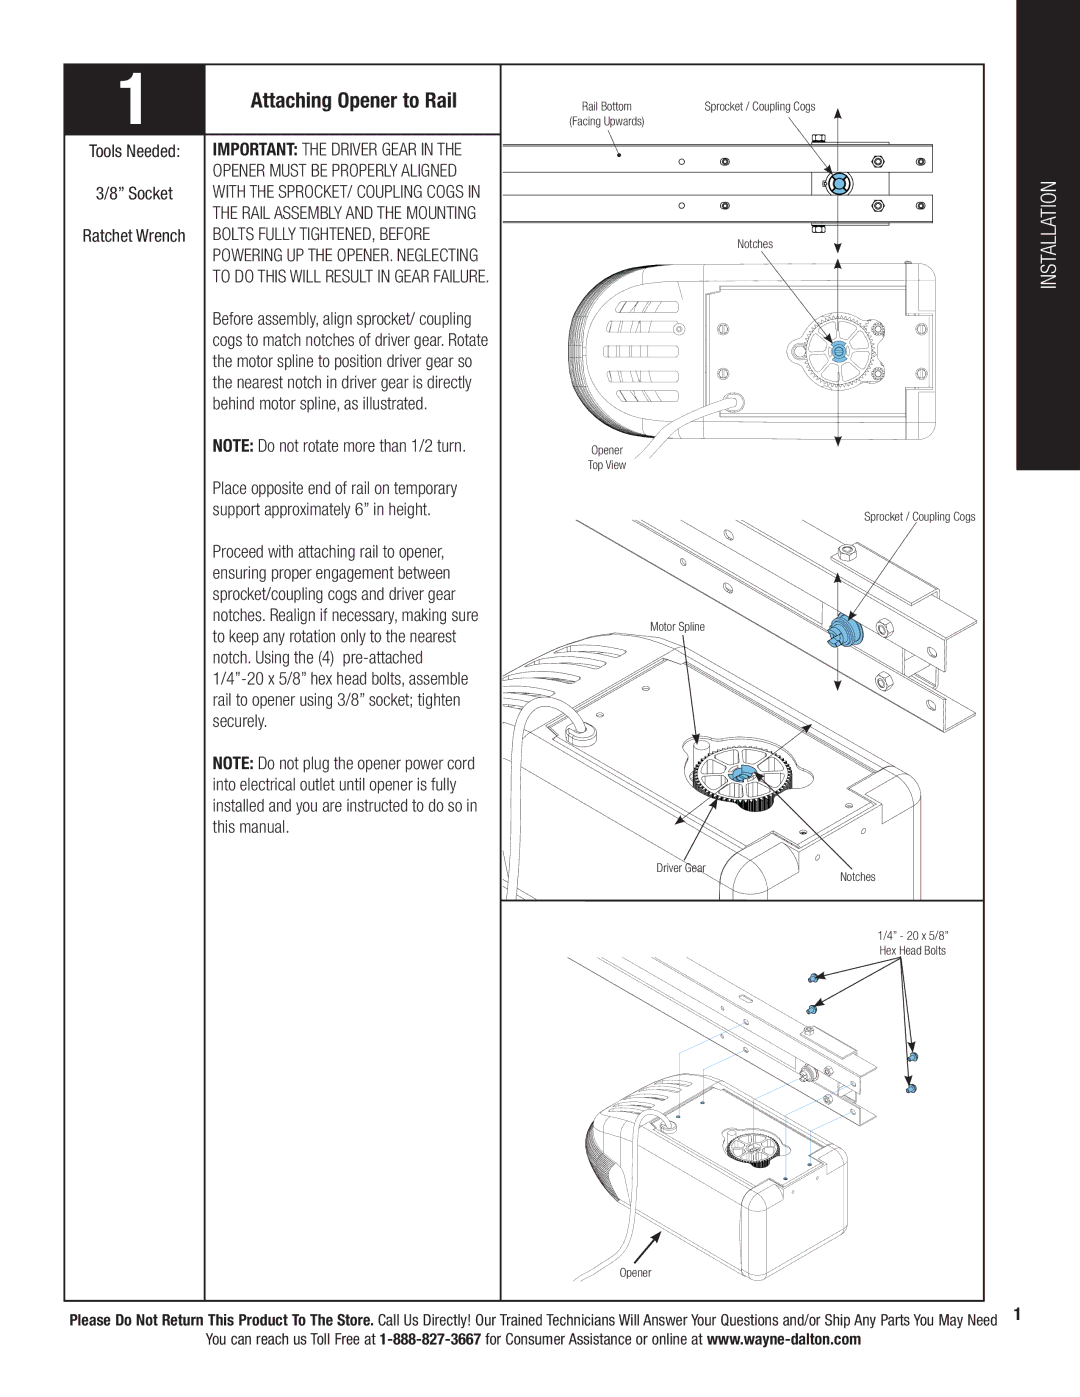
| Before assembly, align sprocket/ coupling |
| cogs to match notches of driver gear. Rotate |
| the motor spline to position driver gear so |
| the nearest notch in driver gear is directly |
| behind motor spline, as illustrated. |
| NOTE: Do not rotate more than 1/2 turn. |
Rail Bottom | Sprocket / Coupling Cogs |
(Facing Upwards) |
|
Notches
INSTALLATION
Place opposite end of rail on temporary |
support approximately 6” in height. |
Proceed with attaching rail to opener, |
ensuring proper engagement between |
sprocket/coupling cogs and driver gear |
notches. Realign if necessary, making sure |
to keep any rotation only to the nearest |
notch. Using the (4) |
rail to opener using 3/8” socket; tighten |
securely. |
NOTE: Do not plug the opener power cord |
into electrical outlet until opener is fully |
installed and you are instructed to do so in |
this manual. |
Opener
Top View
Motor Spline
Driver Gear
Opener
Sprocket / Coupling Cogs
Notches
1/4” - 20 x 5/8” Hex Head Bolts
Please Do Not Return This Product To The Store. Call Us Directly! Our Trained Technicians Will Answer Your Questions and/or Ship Any Parts You May Need 1 You can reach us Toll Free at
