5Removing a paper jam
Precaution: Be very careful for the manual cutter mounted on the printer cover when removing and replacing the cover, so as not to hurt yourself. Never touch the print head immediately after printing, because the head may still be hot.
1.Remove the printer cover.
2.Pull the print head release lever toward you (to the
3.Remove the paper jam. Check for and remove any shreds of paper that may remain in the printer.
4.Return the print head release lever to its original position.
5.Reset the paper roll correctly by following the steps in “Installing the paper roll”.
6Cleaning the print head
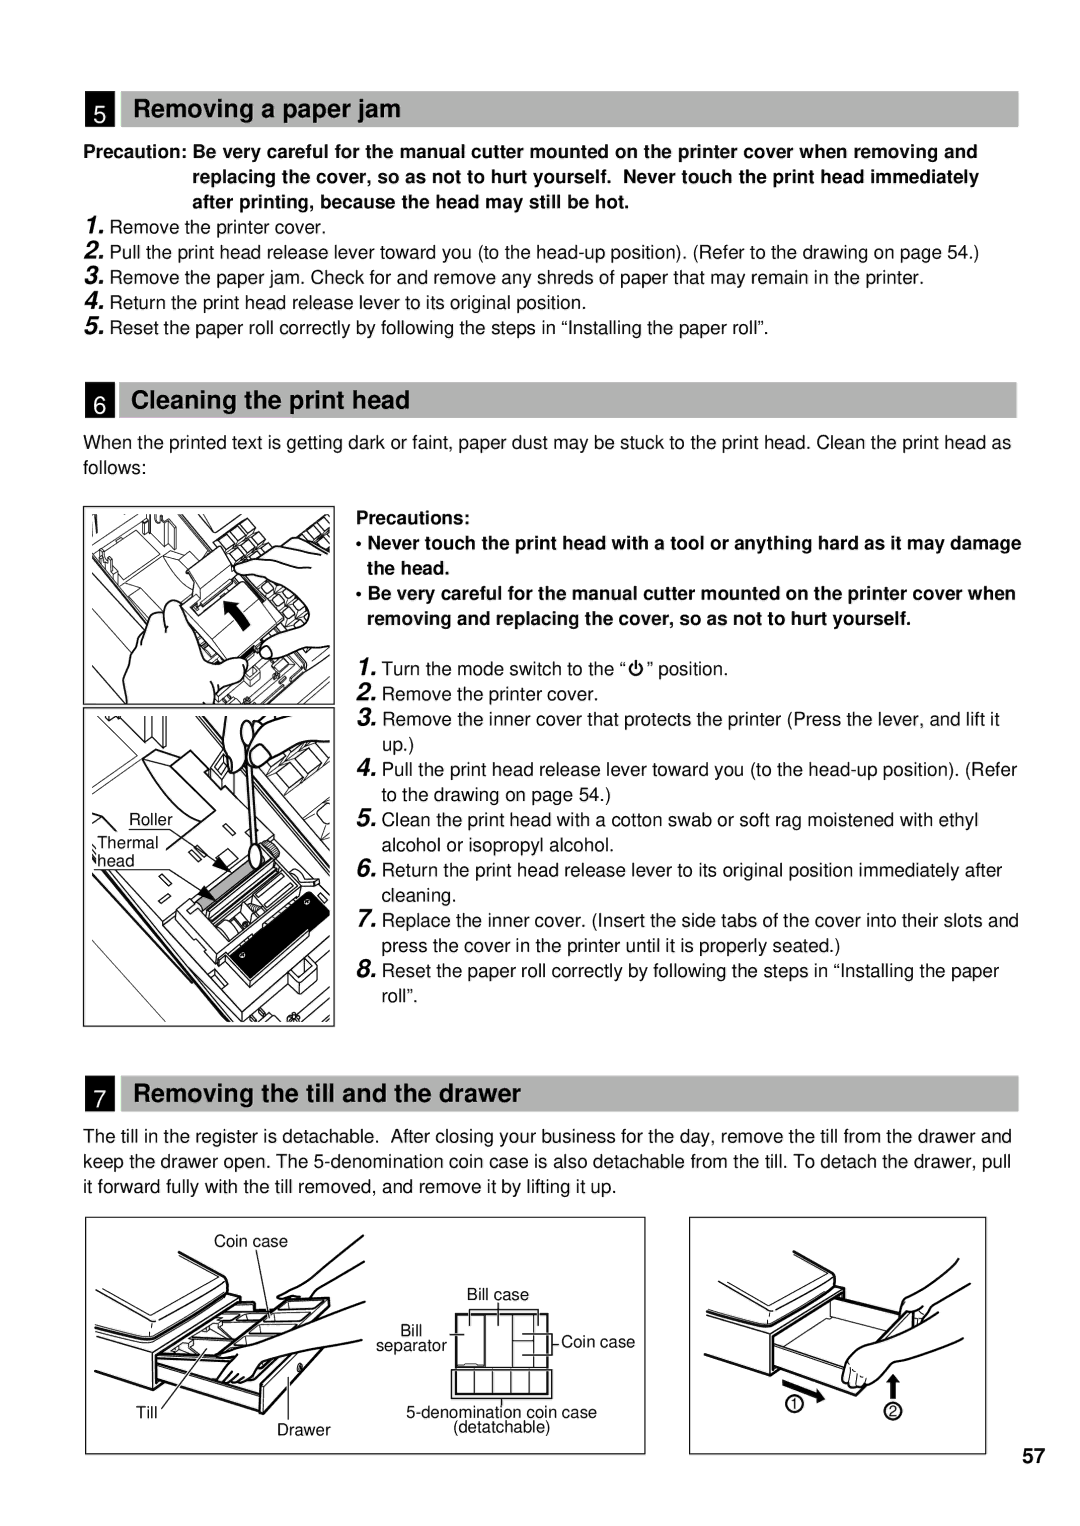
When the printed text is getting dark or faint, paper dust may be stuck to the print head. Clean the print head as follows:
Roller |
Thermal |
head |
Precautions:
•Never touch the print head with a tool or anything hard as it may damage the head.
•Be very careful for the manual cutter mounted on the printer cover when removing and replacing the cover, so as not to hurt yourself.
1.Turn the mode switch to the “ ” position.
2.Remove the printer cover.
3.Remove the inner cover that protects the printer (Press the lever, and lift it up.)
4.Pull the print head release lever toward you (to the
5.Clean the print head with a cotton swab or soft rag moistened with ethyl alcohol or isopropyl alcohol.
6.Return the print head release lever to its original position immediately after cleaning.
7.Replace the inner cover. (Insert the side tabs of the cover into their slots and press the cover in the printer until it is properly seated.)
8.Reset the paper roll correctly by following the steps in “Installing the paper roll”.
7Removing the till and the drawer
The till in the register is detachable. After closing your business for the day, remove the till from the drawer and keep the drawer open. The
Coin case |
|
|
|
| Bill case |
| Bill | Coin case |
| separator | |
Till | ||
Drawer |
| (detatchable) |
12
57
