4Installing and removing the paper roll
Be sure to use paper rolls specified by SHARP.
The use of any other paper rolls than specified could cause paper jamming, resulting in register malfunction.
Paper specification |
|
|
Paper width: 57.5 ± 0.5 mm | Max. outside diameter: 70 mm | Quality: Thermal paper |
• Be sure to set paper roll(s) prior to using your machine, otherwise it may cause a malfunction.
Install the paper roll in the printer. Be careful then to set the roll and cut the paper end correctly.
If the top end of the paper roll is fixed with paste or tape, the paper may lose its color development ability in the pasted or taped area due to the deterioration of the
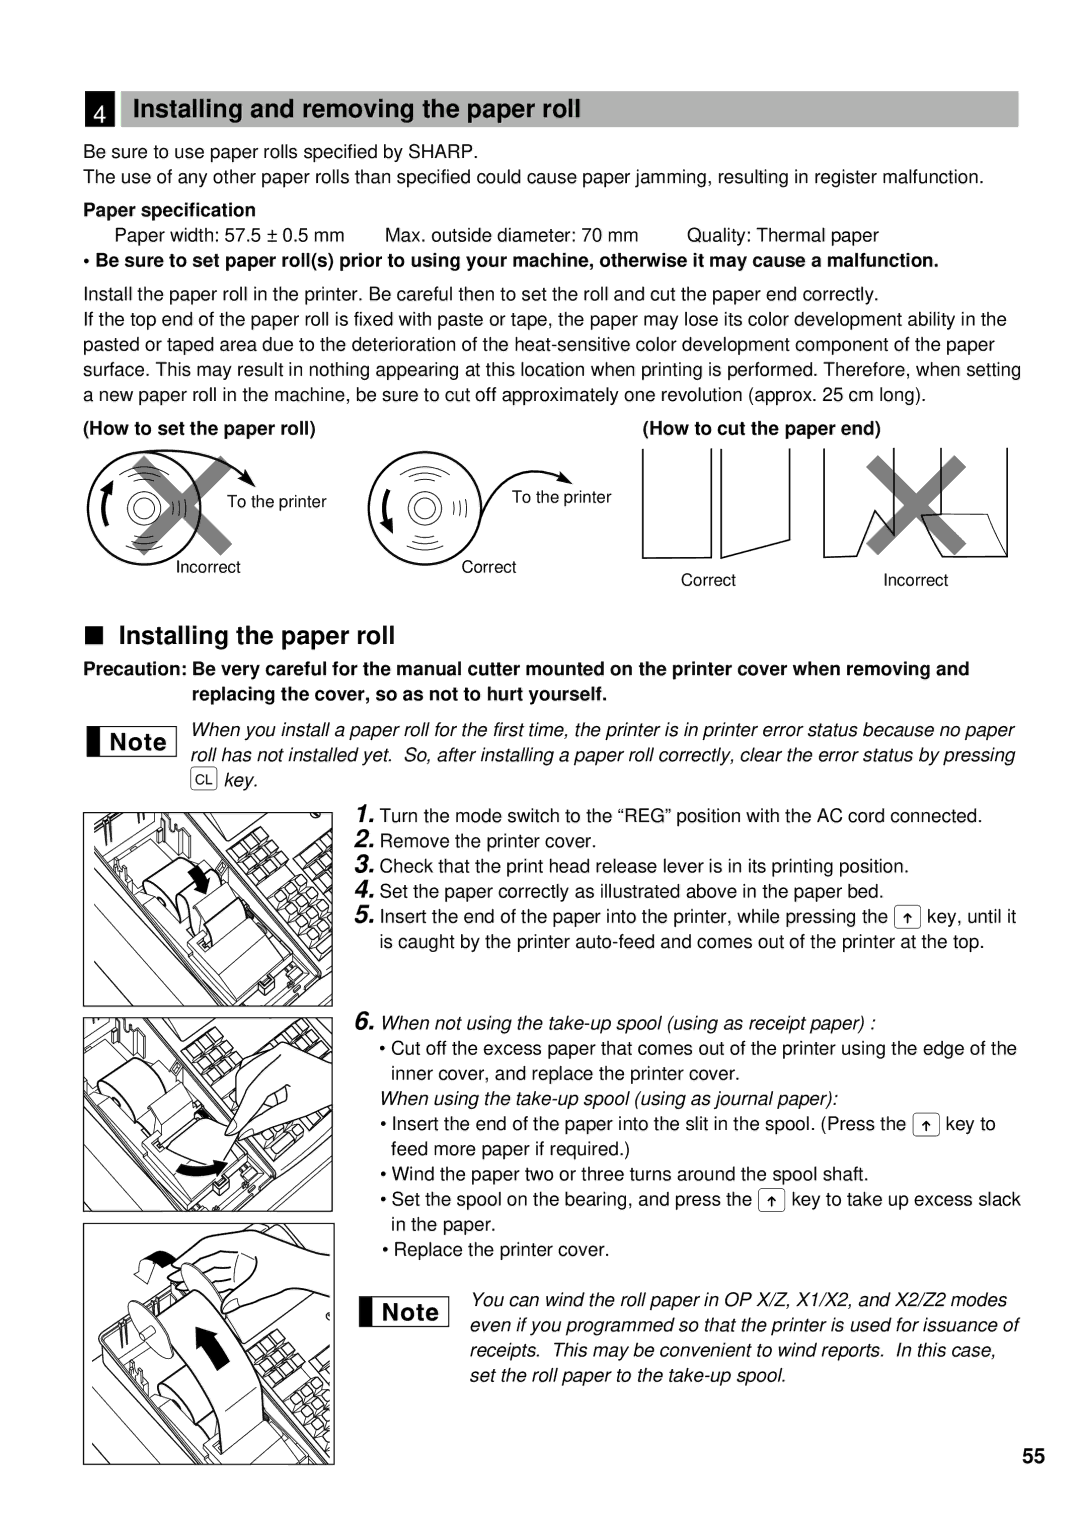
(How to set the paper roll) | (How to cut the paper end) |
|
To the printer | To the printer |
|
Incorrect | Correct | Incorrect |
| Correct |
Installing the paper roll
Precaution: Be very careful for the manual cutter mounted on the printer cover when removing and replacing the cover, so as not to hurt yourself.
When you install a paper roll for the first time, the printer is in printer error status because no paper roll has not installed yet. So, after installing a paper roll correctly, clear the error status by pressing
ckey.
1. Turn the mode switch to the “REG” position with the AC cord connected.
2. Remove the printer cover.
3. Check that the print head release lever is in its printing position.
4. Set the paper correctly as illustrated above in the paper bed.
5. Insert the end of the paper into the printer, while pressing the ákey, until it is caught by the printer
6. When not using the take-up spool (using as receipt paper) :
• Cut off the excess paper that comes out of the printer using the edge of the inner cover, and replace the printer cover.
When using the take-up spool (using as journal paper):
• Insert the end of the paper into the slit in the spool. (Press the feed more paper if required.)
• Wind the paper two or three turns around the spool shaft.
• Set the spool on the bearing, and press the ákey to take up excess slack in the paper.
• Replace the printer cover.
You can wind the roll paper in OP X/Z, X1/X2, and X2/Z2 modes even if you programmed so that the printer is used for issuance of receipts. This may be convenient to wind reports. In this case, set the roll paper to the
55