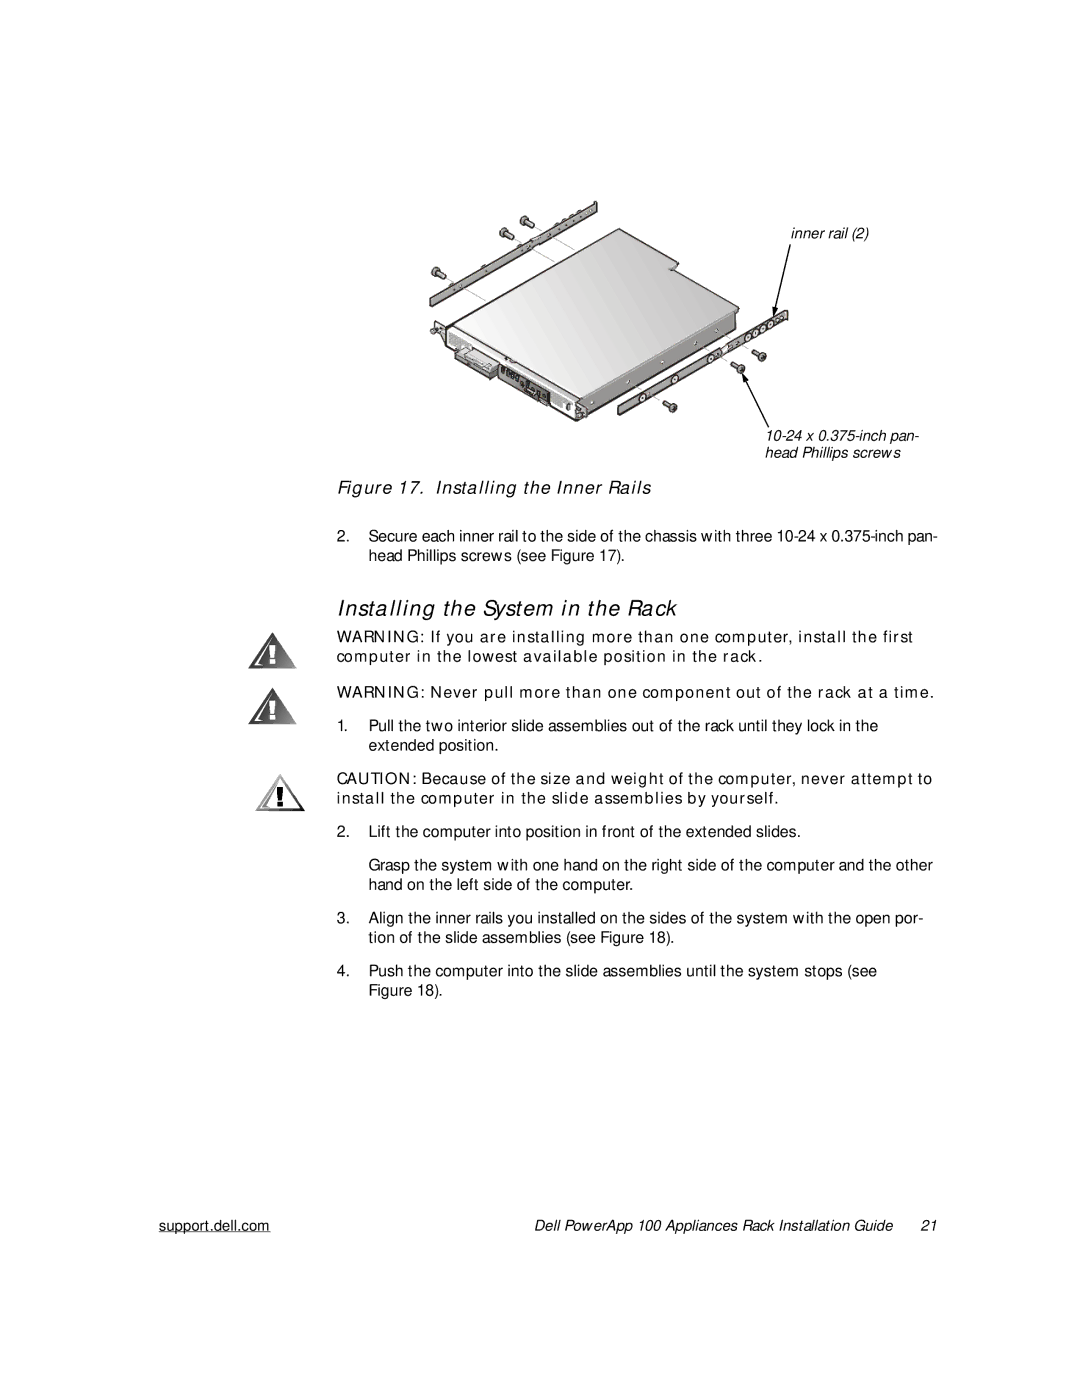
inner rail (2)
Figure 17. Installing the Inner Rails
2.Secure each inner rail to the side of the chassis with three
Installing the System in the Rack
WARNING: If you are installing more than one computer, install the first computer in the lowest available position in the rack.
WARNING: Never pull more than one component out of the rack at a time.
1.Pull the two interior slide assemblies out of the rack until they lock in the extended position.
CAUTION: Because of the size and weight of the computer, never attempt to install the computer in the slide assemblies by yourself.
2.Lift the computer into position in front of the extended slides.
Grasp the system with one hand on the right side of the computer and the other hand on the left side of the computer.
3.Align the inner rails you installed on the sides of the system with the open por- tion of the slide assemblies (see Figure 18).
4.Push the computer into the slide assemblies until the system stops (see Figure 18).
support.dell.com | Dell PowerApp 100 Appliances Rack Installation Guide | 21 |
