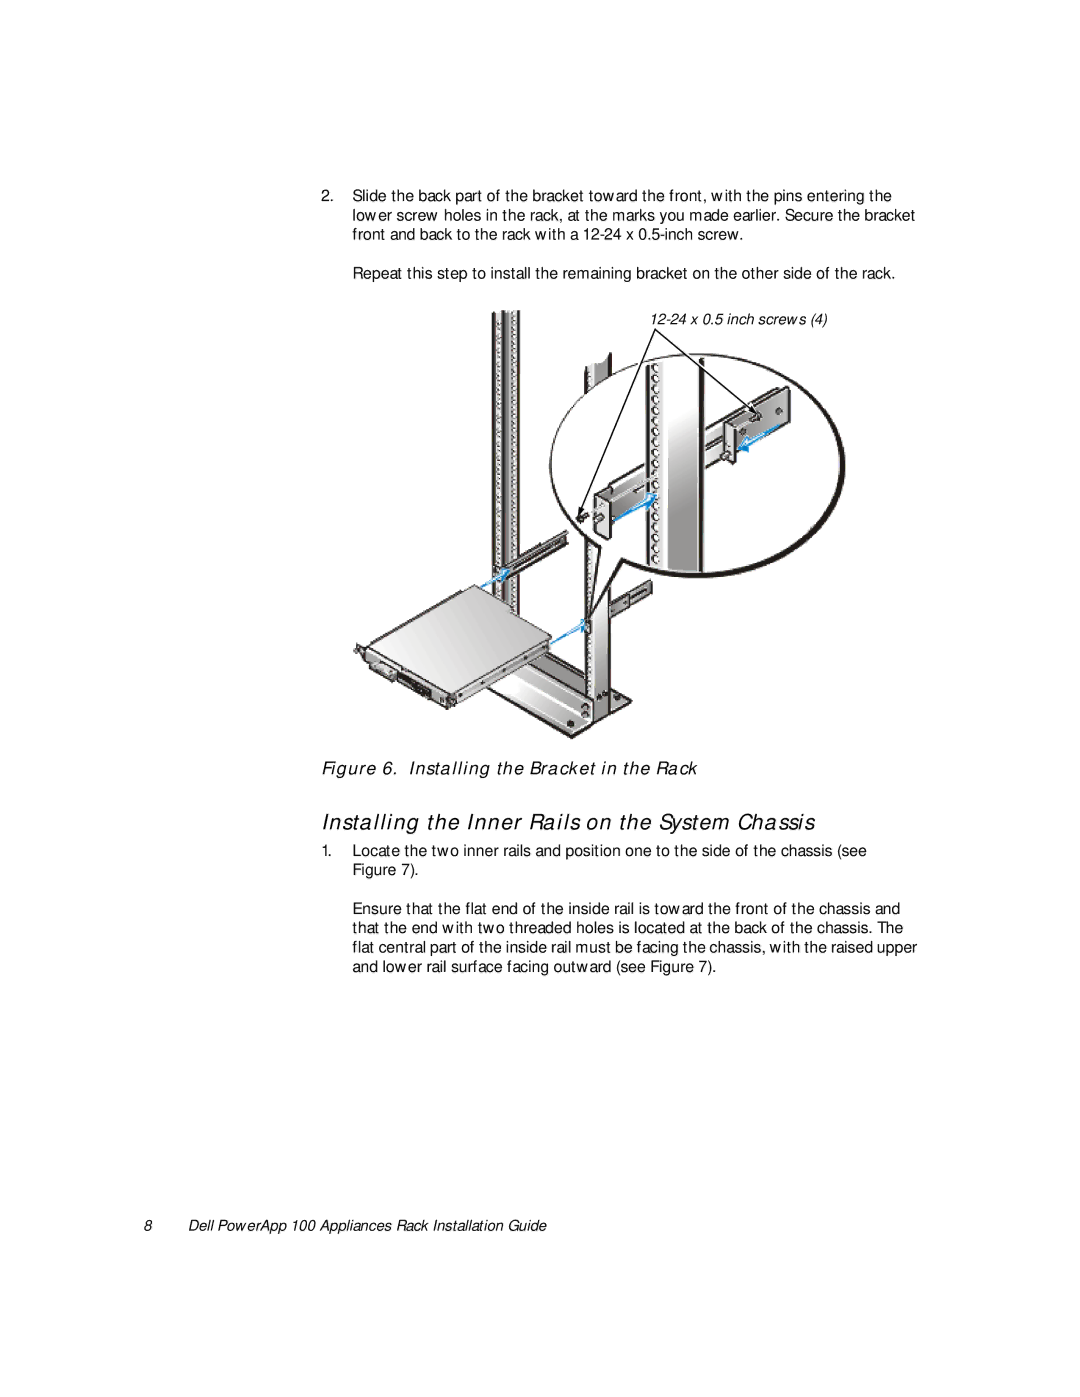
2.Slide the back part of the bracket toward the front, with the pins entering the lower screw holes in the rack, at the marks you made earlier. Secure the bracket front and back to the rack with a
Repeat this step to install the remaining bracket on the other side of the rack.
Figure 6. Installing the Bracket in the Rack
Installing the Inner Rails on the System Chassis
1.Locate the two inner rails and position one to the side of the chassis (see Figure 7).
Ensure that the flat end of the inside rail is toward the front of the chassis and that the end with two threaded holes is located at the back of the chassis. The flat central part of the inside rail must be facing the chassis, with the raised upper and lower rail surface facing outward (see Figure 7).
8 Dell PowerApp 100 Appliances Rack Installation Guide