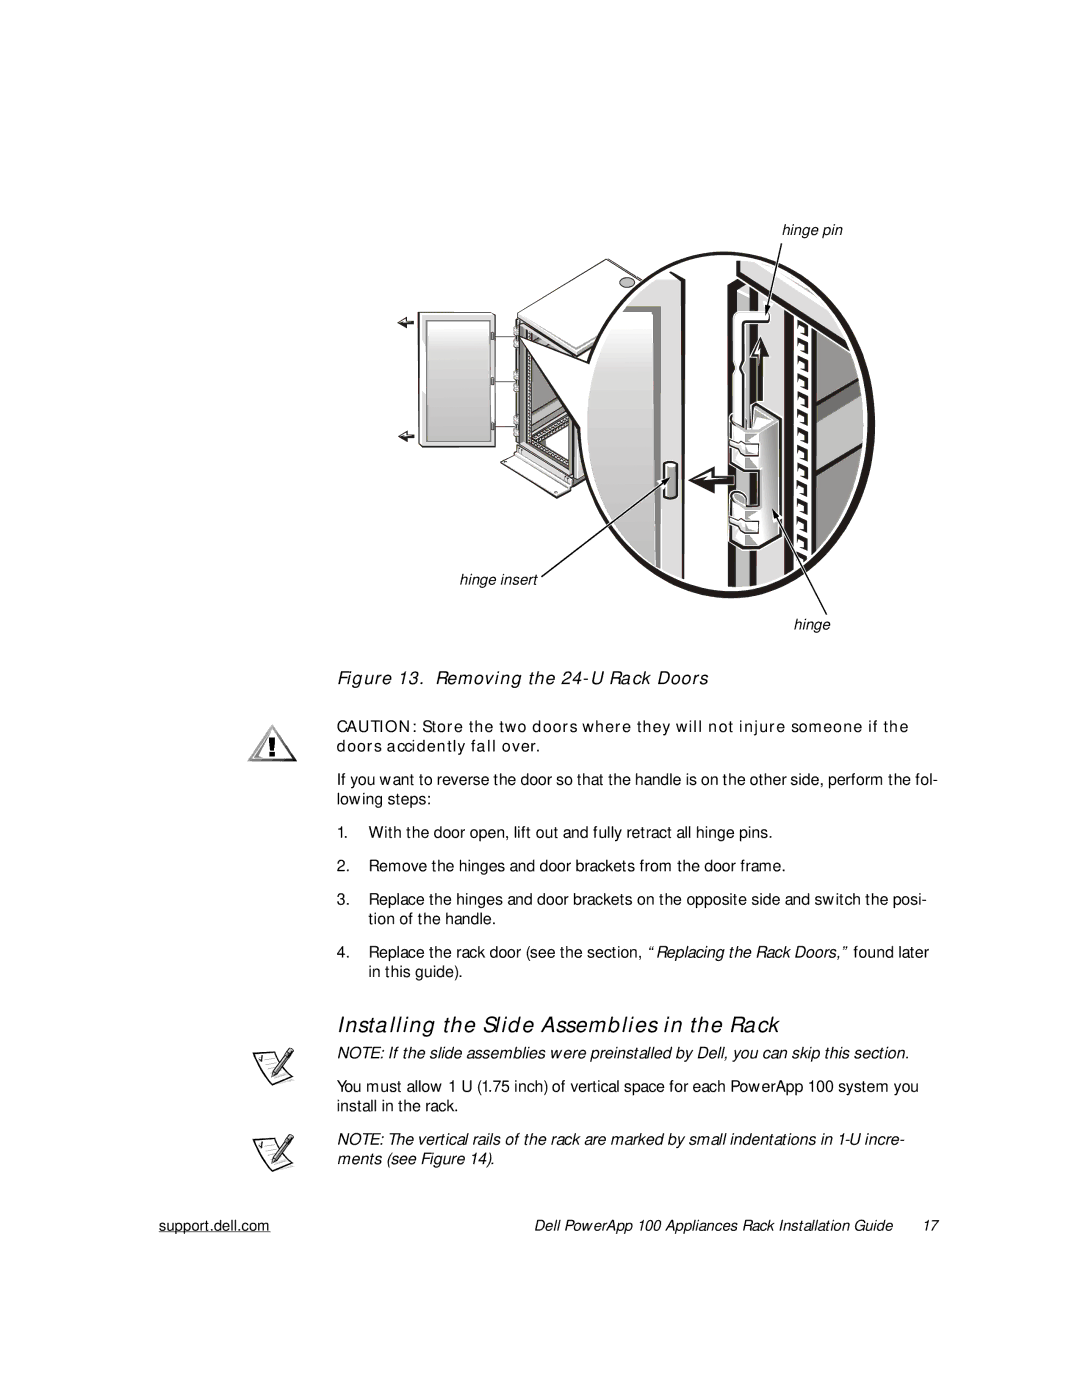
hinge pin
hinge insert
hinge
Figure 13. Removing the 24-U Rack Doors
CAUTION: Store the two doors where they will not injure someone if the doors accidently fall over.
If you want to reverse the door so that the handle is on the other side, perform the fol- lowing steps:
1.With the door open, lift out and fully retract all hinge pins.
2.Remove the hinges and door brackets from the door frame.
3.Replace the hinges and door brackets on the opposite side and switch the posi- tion of the handle.
4.Replace the rack door (see the section, “Replacing the Rack Doors,” found later in this guide).
Installing the Slide Assemblies in the Rack
NOTE: If the slide assemblies were preinstalled by Dell, you can skip this section.
You must allow 1 U (1.75 inch) of vertical space for each PowerApp 100 system you install in the rack.
NOTE: The vertical rails of the rack are marked by small indentations in
support.dell.com | Dell PowerApp 100 Appliances Rack Installation Guide | 17 |
