W1677/W1711 10" Table Saw
Mobile Base
SETUP
If your model includes a mobile base kit, or you plan to use an aftermarket mobile base kit for your saw, we rec- ommend assembling the saw on the mobile base to avoid heavy/awkward lifting later.
Assemble your mobile base equipment as detailed in the instructions included with the mobile base, then put the saw base unit on the mobile base before continuing assembly.
Assembly
You can mount the extension wings yourself, but it is easier with help.
Note: If you have a model with long rails and an exten- sion table, leave the right wing off to make room for the extension table.
To assemble your table saw, do these steps:
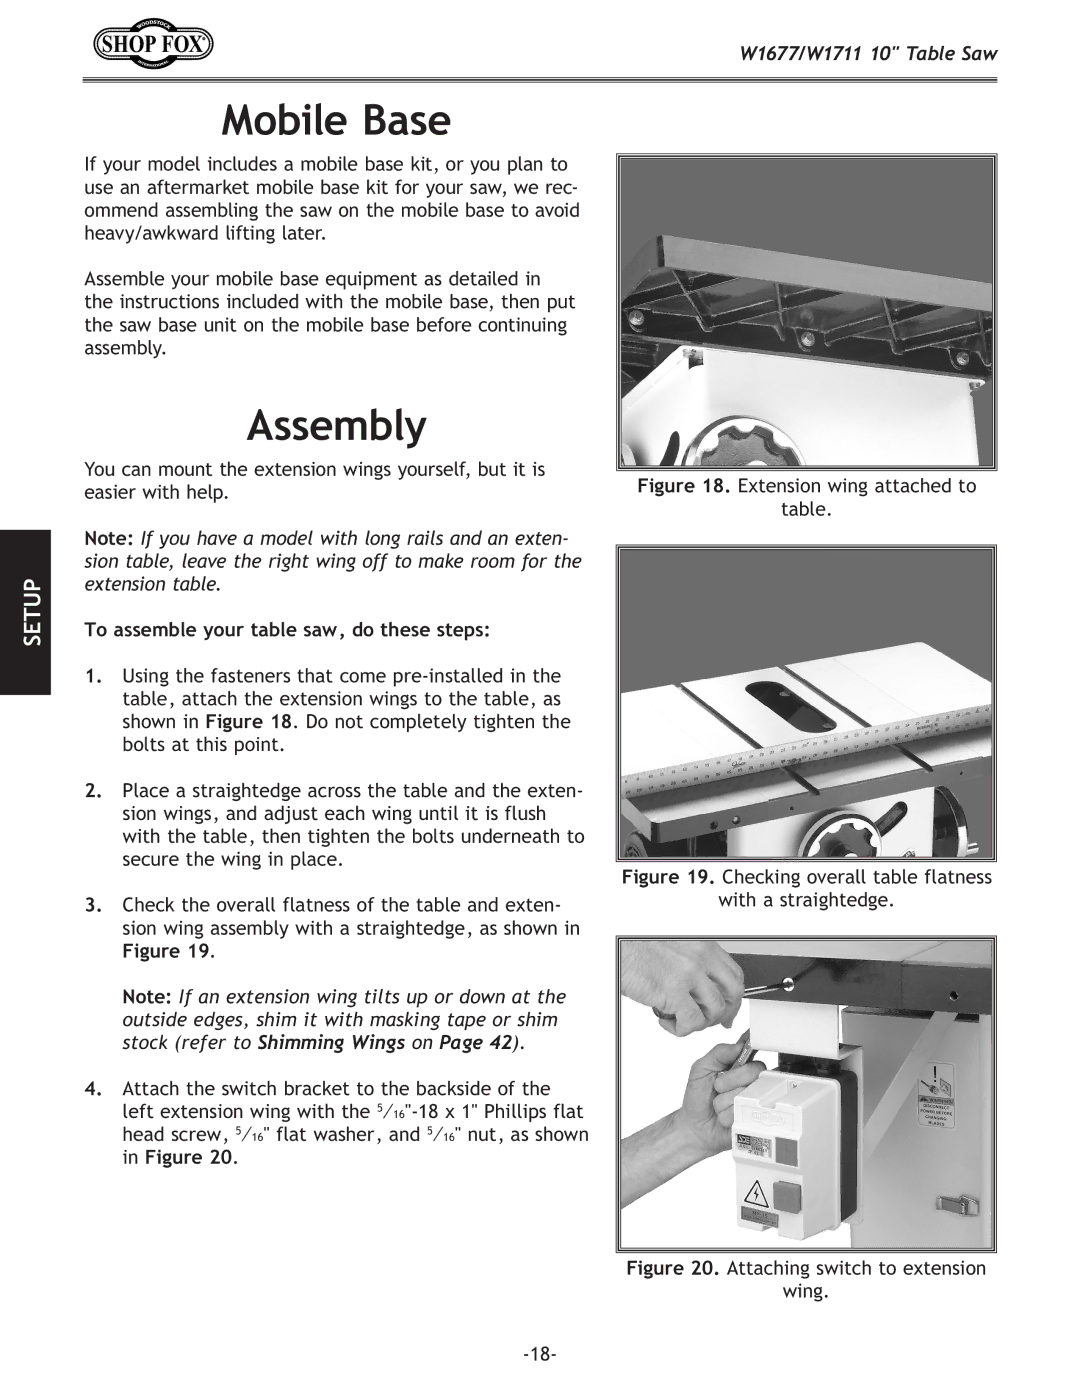
1.Using the fasteners that come
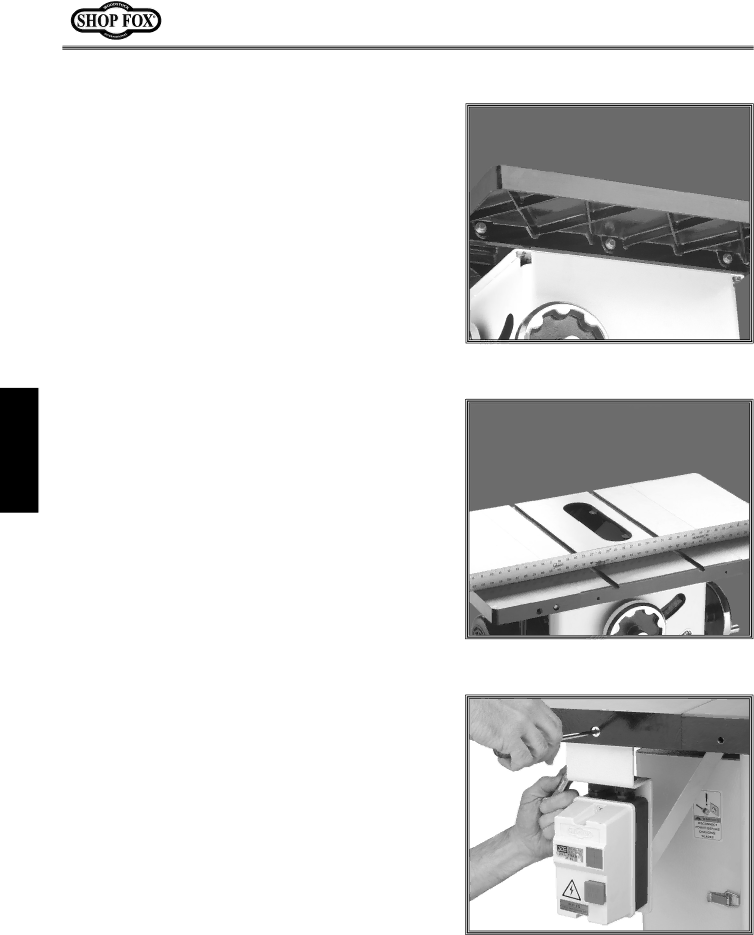
2.Place a straightedge across the table and the exten- sion wings, and adjust each wing until it is flush with the table, then tighten the bolts underneath to secure the wing in place.
3.Check the overall flatness of the table and exten- sion wing assembly with a straightedge, as shown in
Figure 19.
Note: If an extension wing tilts up or down at the outside edges, shim it with masking tape or shim stock (refer to Shimming Wings on Page 42).
4.Attach the switch bracket to the backside of the left extension wing with the
Figure 18. Extension wing attached to
table.