W1677/W1711 10" Table Saw
6.Raise the blade and check its position in the table insert opening. If the blade position is not satisfac- tory, make sure you have correctly shifted the com- ponents discussed in this section. If you repeat these steps and still cannot get favorable results, call our Technical Support.
Miter Slot Parallel to
Blade
To cut accurately when using the miter gauge, the miter slot MUST be parallel to the blade.
To check and adjust the miter slot parallel to the blade, do these steps:
1.DISCONNECT SAW FROM POWER SOURCE!
2.Raise the blade to its full height and set the blade 90˚ to the table.
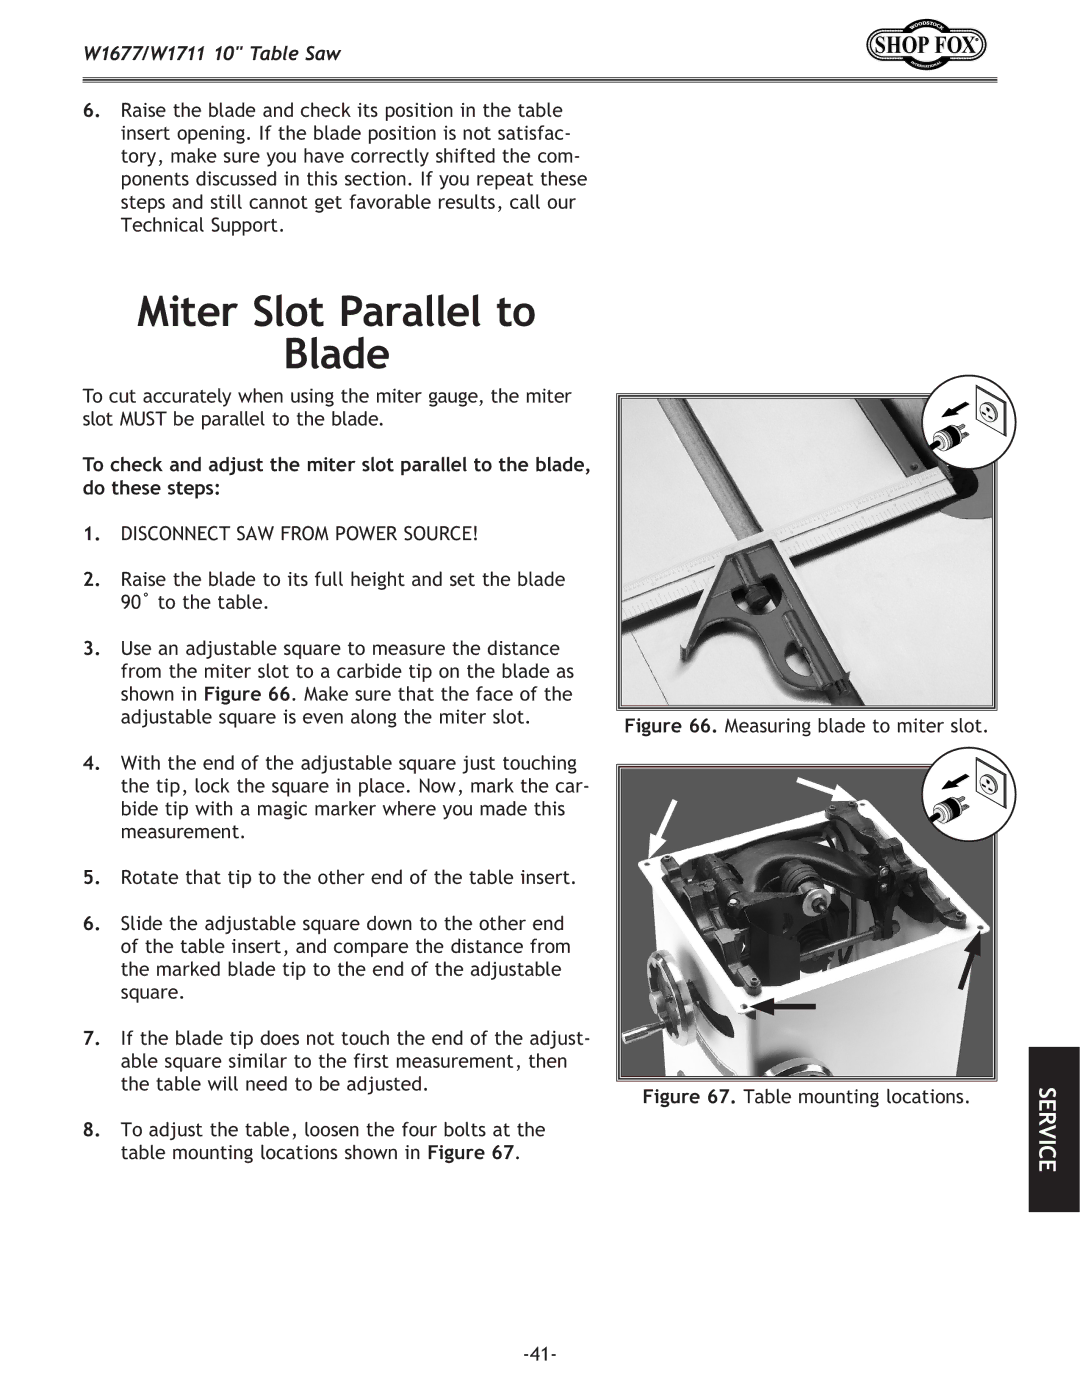
3.Use an adjustable square to measure the distance from the miter slot to a carbide tip on the blade as shown in Figure 66. Make sure that the face of the adjustable square is even along the miter slot.
4.With the end of the adjustable square just touching the tip, lock the square in place. Now, mark the car- bide tip with a magic marker where you made this measurement.
5.Rotate that tip to the other end of the table insert.
6.Slide the adjustable square down to the other end of the table insert, and compare the distance from the marked blade tip to the end of the adjustable square.
7.If the blade tip does not touch the end of the adjust- able square similar to the first measurement, then the table will need to be adjusted.
8.To adjust the table, loosen the four bolts at the table mounting locations shown in Figure 67.
Figure 66. Measuring blade to miter slot.
Figure 67. Table mounting locations.
SERVICE
