LEFT-TILT Table SAW
Page
Table of Contents
Introduction
Woodstock Technical Support
W1677 Series Specifications
W1711 Series Specifications
Controls and Features
Fence controls Blade Guard/Splitter Miter Gauge
Safety
Standard Safety Instructions
Always Lock Mobile Bases if Used Before Operating Machinery
Specific Safety Instructions for Table Saws
Avoiding Potential Injuries
Unplug saw before changing blades
Use featherboards when possible To protect against kickback
Kickback
Use a zero-clearance table insert whenever possible
Common Terms
Extension Cords
Electrical
220V Operation
Grounding
Inventory
Setup
Unpacking
Box Inventory Figures 12 Qty
Standard Rails Figure Qty
Shop Fox Classic Fence Inventory
Inventory Needed for Your Saw
Long Rails Figure Qty
Shop Fox Original Fence Inventory
Flat Washers 3⁄ 8 Rail/Ext Table
Machine Placement
Cleaning Machine
Mobile Base
Assembly
To assemble your table saw, do these steps
Motor shipping brace
Installing blade
Adjusting table insert flush
Before you test run the machine, do these steps
Test Run
To test run the table saw, do these steps
Blade Height
Operations
General
Feed Rate
Blade Material
Blade Selection
Blade Types
Changing Blades
To change blades, do these steps
Through Cuts
Through vs. Non-Through Cuts
Non-Through Cuts
Blade Tilt/Bevel Cuts
When using the tilting mechanism
Rip Cuts
To make a rip cut, do these steps
Miter Cuts
To crosscut using the miter gauge, do these steps
Cross Cuts
To cut a miter, do these steps
Dado Cuts
To use a stacked or wobble dado blade, do these steps
First cut when making a dado With a standard ripping blade
To cut dadoes with a standard blade, do these steps
Rabbet Cuts
To cut rabbets with the dado blade, do these steps
To cut rabbets with the standard blade, do these steps
Clearly mark the width of the rabbet cut on Workpiece
Components Needed for the Resaw Barrier
Resawing
Resaw Barrier
To build the resaw barrier, do these steps
Components Needed for the Auxiliary Fence
Auxiliary Fence
To build the auxiliary fence, do these steps
Components Needed for Resawing
Resawing Operations
To perform resawing operations, do these steps
Aftermarket Safety Accessories
Outfeed roller table
Shop-Made Safety Accessories
Here are some of the basic items you may want to consider
Belts
Maintenance
Cleaning
Table & Base
Blade Tilt Stop Bolts
Service
To set the stop bolts on the trunnion, do these steps
To adjust the geared bearing housing, do these steps
To adjust the trunnion assembly, do these steps
Blade Alignment
Miter Slot Parallel to Blade
Measuring blade to miter slot
Shimming Wings
To shim an extension wing, do these steps
Splitter Adjustment
To check and align the splitter to the blade, do these steps
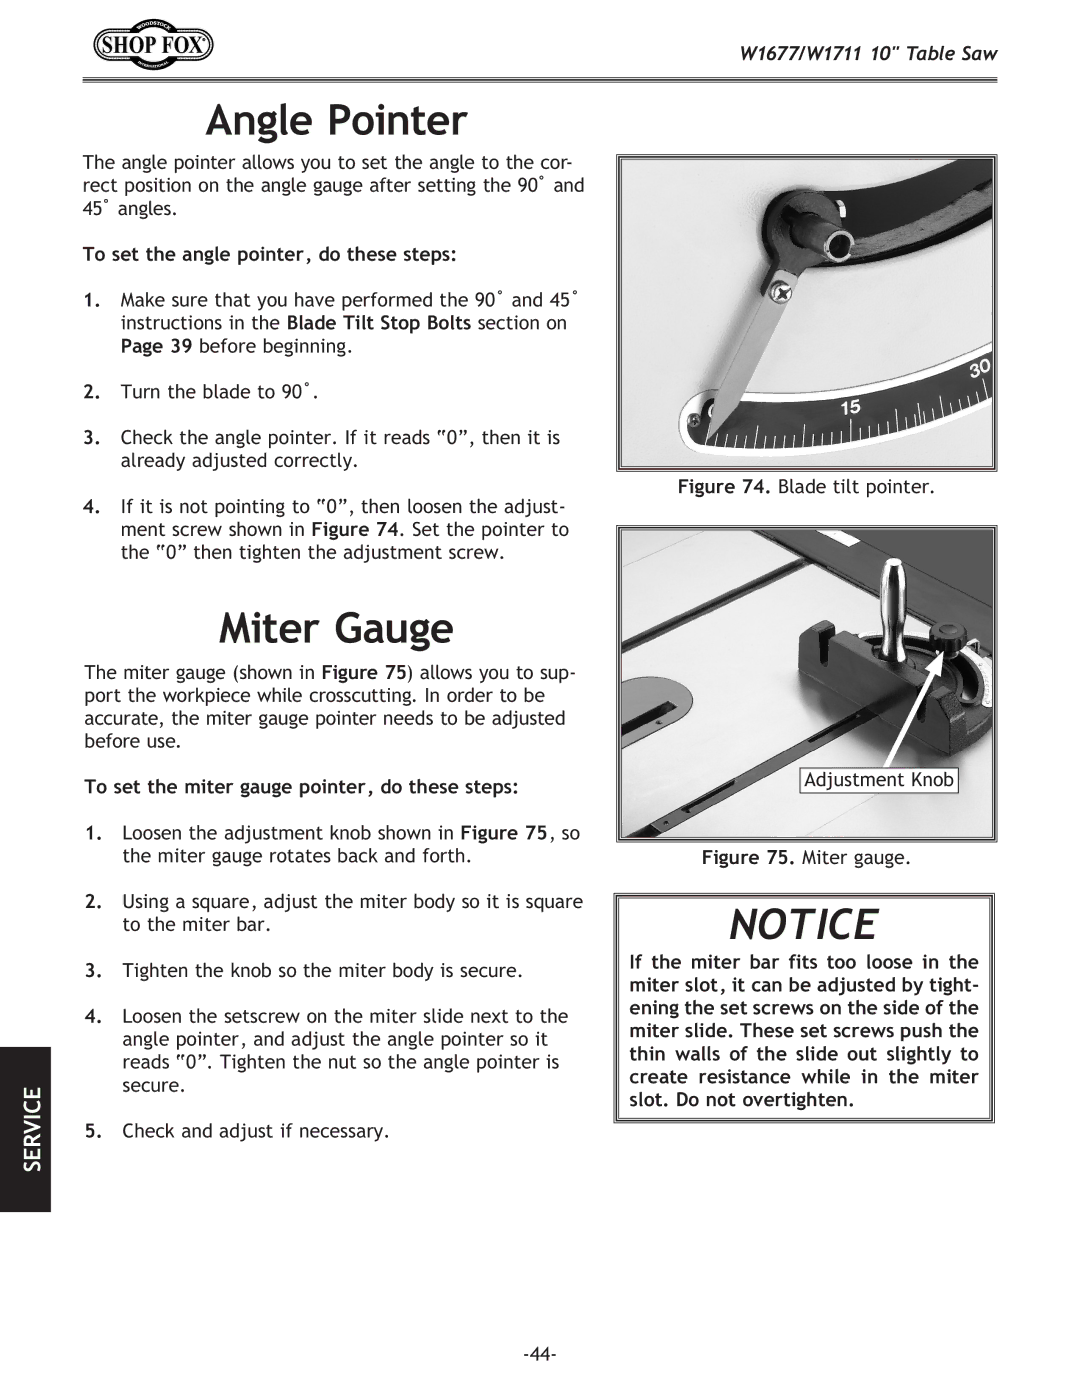
To set the angle pointer, do these steps
Angle Pointer
Miter Gauge
To set the miter gauge pointer, do these steps
Replacing V-Belts
Adjusting Fence
To replace the V-belts, do these steps
W1677 Wiring Diagram
W1711 Wiring Diagram
Troubleshooting
Motor & Electrical
Table Saw Operations
Possible Cause Corrective Action
Parts
Table/Body Breakdown
PART# Description
Motor/Trunnion Breakdown
Handwheellock
Guard/Miter Gauge Breakdown
XPB15
Warranty
Page
Page
Warranty Registration
Comments
BOX BELLINGHAM, WA