W1677/W1711 10" Table Saw
SERVICE
General
This section covers the most common service adjustments or procedures that may need to be made during the life of your machine.
If you require additional machine service not included in this section, please contact Woodstock International Technical Support at (360)
Blade Tilt Stop Bolts
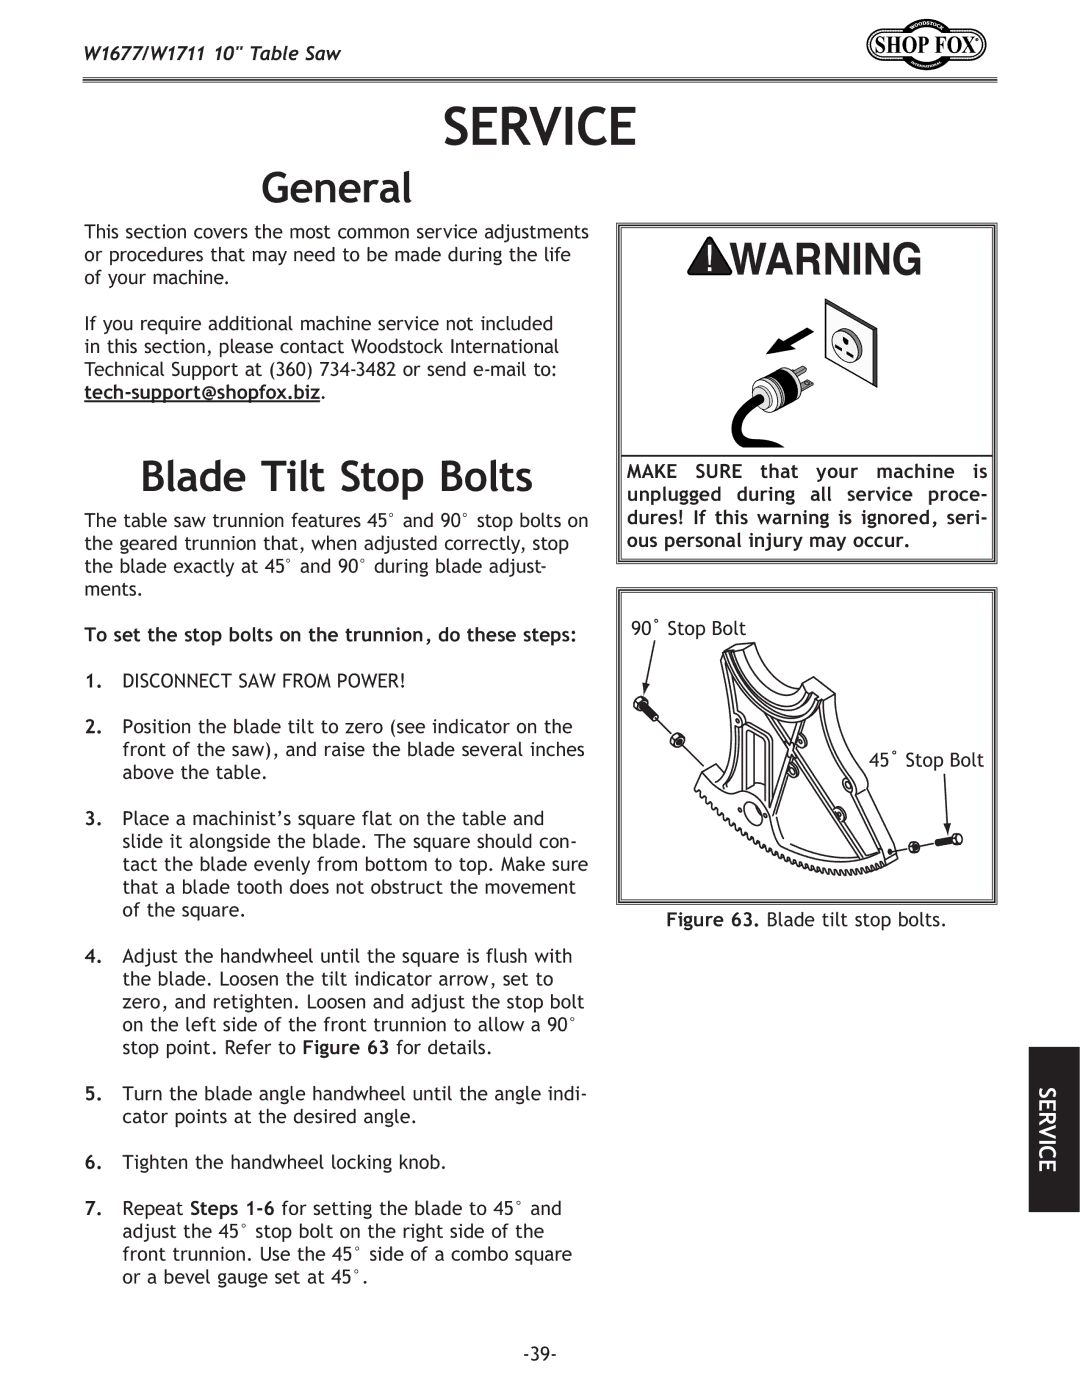
The table saw trunnion features 45° and 90° stop bolts on the geared trunnion that, when adjusted correctly, stop the blade exactly at 45° and 90° during blade adjust- ments.
To set the stop bolts on the trunnion, do these steps:
1.DISCONNECT SAW FROM POWER!
2.Position the blade tilt to zero (see indicator on the front of the saw), and raise the blade several inches above the table.
3.Place a machinist’s square flat on the table and slide it alongside the blade. The square should con- tact the blade evenly from bottom to top. Make sure that a blade tooth does not obstruct the movement of the square.
4.Adjust the handwheel until the square is flush with the blade. Loosen the tilt indicator arrow, set to zero, and retighten. Loosen and adjust the stop bolt on the left side of the front trunnion to allow a 90° stop point. Refer to Figure 63 for details.
5.Turn the blade angle handwheel until the angle indi- cator points at the desired angle.
6.Tighten the handwheel locking knob.
7.Repeat Steps
MAKE SURE that your machine is unplugged during all service proce- dures! If this warning is ignored, seri- ous personal injury may occur.
�������������
�������������
Figure 63. Blade tilt stop bolts.
SERVICE