EMC directive
Trademarks
Related manuals
Preface
Prerequisite manuals
Changes with this revision
Table of Contents
End of Configuration Downloading Settings to the PrintServer
11. AS/400 SCS Printing Using SNA 115
Unix Printing Using TCP/IP LPR/LPD 101
PSF/400 AFP Printing Using TCP/IP 110
12. AS/400 SCS-DCA Printing Using TCP/IP 118
Appendices
157
Redirect
Items Supplied with Xerox 4500 PS TR
∙ Product documentation
Fslref
Direct host print via TCP/IP
Introduction to Xerox 4500 PS TR
Direct host print
LAN print
Redirected host print
1 IPX/SPX protocol
Supported protocols
2 TCP/IP protocols
NetBEUI/NetBios protocol
Ida 802.2 protocol
Illustration
5 PU/LU protocol
PrintServer Printer
LAN
Xerox 4500 PS TR features
Xerox 4500 PS TR non-IPDS
Icds
Direct AFP print mainframe / midrange
System requirements
All environments
LAN based AFP print
Supported printers
Pre-Installation tasks
Installation of Xerox 4500 PS TR
Ring speed configuration
National language selection Cpgid IPC
EU US language settings
Example
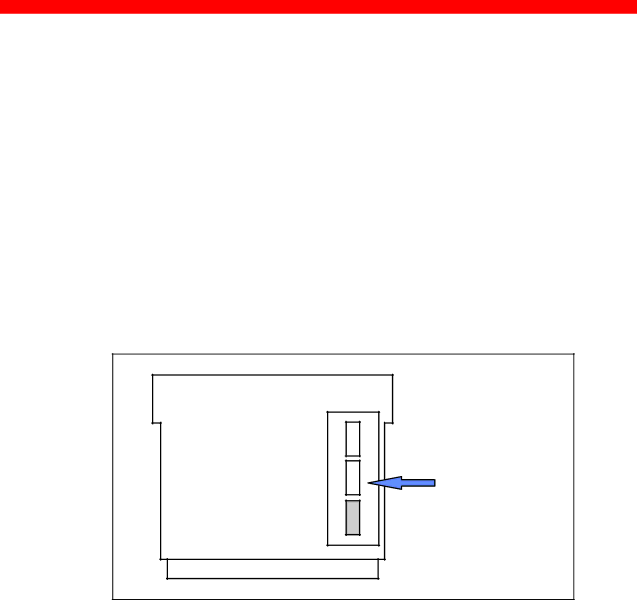
Rear panel
UTP Test LAN SES PRT
PRT
LED indicators
UTP
SES Sion
Installing into Xerox 4505 / 4510 printer
Installation procedure
Before you start the installation you must power OFF
Installation Xerox 4500 PS TR
Installing into Xerox 4517 printer
Installing into Xerox 4520 printer
∙ Native Share Strings
Share timeout
Network installation
Ipds Share Strings
Installing upgrade modules
When IP address has been defined
Configuration
Introduction to configuration
Bootp Server
General on Configuration
Psinst32
TCP/IP
Minimum configuration
Mandatory settings
Mandatory parameters
Class values Subnet mask
Enable NetWare parameter
Enable Pulu
Set Blocknumber
NetBEUI / NetBios
Ida
Windows ‘95 DLC Installation Procedure
Configuration using PSinst32
Program Installation Procedure
Program Execution
Windows NT 4.0 DLC Installation Procedure
Executing PSinst32
Help
Main menu Where do I start with PSinst32?
Main Window
Here’s how you configure the various protocols
Program setup Configuring Your Preferred Protocol
Configure TCP/IP
Configure Snmp
Configure SPX/IPX NetWare ENP
Configuration Xerox 4500 PS TR
Configure SNA PU/LU
Further Options The File Menu
Select Adaptor
Discover
Refresh
Download
Select Download Port
End of Configuration Downloading Settings to the PrintServer
Configuration Xerox 4500 PS TR
Boot PrintServer after download
Firmware download
Example of downloading firmware for PrintServer drivers
Broadcasting
Name
Requirements
Configuration using Web Browser
Access to ida Html configuration
IP address
Password
Configuration chart
Overview
Configure PrintServer
Main Menu
PrintServer Status Menu
Example
Configuration using Telnet
Telnet
Navigation keys
Selecting menu fields
Menu Structure
Configuring PrintServer
Configure PrintServer Submenu
Main Menu
PrintServer ConfigurePrintServer
Configure Snmp Return to previous menu EnterSelection
PrintServer Configuration
General Parameters Menu
Default Gateway Address
TCP/IP Configuration
ConfigureTCP/IP 0xx.xxx HostName
Save and Return Return without saving EnterSelection
Ida 802.2 Configuration
IPX/SPX Configuration
EPS Password
NCP preferred DStree
NetBios Configuration
PU/LU Configuration
ConfigurePU/LU 0xx.xxx
05D
Snmp Configuration
Snmp Manager Access Authorization
Selecting Authorize will present the following screen
Printer
Configure Sessions
Change Password
YES
Restore Configuration
Save Configuration
Restore Factory Default
By default all sessions have trace enabled
Reboot PrintServer
Trace destination
Status PrintServer
??##N1,0#
Configuration using Setup File
Setup File Identifier
??space
Sample minimum configuration file
Idaps
Netbios
Advanced configuration
Enabling Idaps
Define SNA
Printing LPD
Define TCP/IP
Define PPD
Printing Ipds
Printing Icds
See the Define PPD
Define NetWare
Define ENP session
Define NetBEUI/NetBios
Define ida
Define Printer session
IP Address Subnet Mask Gateway Address Bootfile
Setting Up via Bootp server
Bootptab Device Entry
Notations used in Bootptab file
Bootfile Entry
Setting up Bootptab Device Entry
Microcode File
Bootptab
Bootp process
Setting up the Tftp Daemon
Tftp in AIX Environment
Tftp in OS/2 Environment
Starting the Bootp Server
Bootpd -b -d -d -d -d -d
Testing PrintServer
About the Ping function
Novell Setup for IPX/SPX
Enable NetWare Enable IPX/SPX Set Frametype
Using the embedded Pserver
Embedded Pserver setup
Before you begin
Using the embedded Nprinter
Embedded Nprinter setup
Printing command example
NetWare setup Bindery mode
Now make other Nprinter configuration if so required
Select Queues Serviced by Printer and press Enter
Enter
NetWare setup DS mode
Select Other / Unknown
Now make other Nprinter configurations if so required
Illustration
Client
NetBEUI/NetBIOS Printing Using Windows ‘95, NT or OS/2
Windows ‘95 and NT Setup
OS/2 Setup
Net use lptx \\idaxxxxxx\PxPrinterx
Changing the default PrintServer Name and Workgroup
OS/2 Printing Using TCP/IP LPR/LPD
OS/2 printing via a print queue
LPR -b -pLPDPrt1 -s192.0.110.1 myprint.pcl
OS/2 printing using LPR command
Lprmon -b -pLPDPrt1 -s192.0.110.1 LPT1
Host Configuration
Unix Printing Using TCP/IP LPR/LPD
AIX printing using TCP/IP LPR/LPD
Define the remote printer using smit
Entry Fields
SUN OS printing using TCP/IP LPR/LPD
Printer Name
Defining the remote printer/plotter using’admintool’’‘
Enable the printer using the admintool
Print Server
Defining the remote printer/plotter using SAM
HP-UX printing with SAM using TCP/IP LPR/LPD
Remote Print Name
Windows NT Printing Using TCP/IP LPR/LPD
Create a remote output queue
AS/400 Printing Using Host Print Transform and TCP/IP
Requirements
108
AS/400 printing
10.1 AS/400 version 3.1
PSF/400 AFP Printing Using TCP/IP
Value must be unique within the network
FORMFEED*AUTOCUT Rmtlocnametcpip
Setting the Chgtcpa
Configuring WRKAFP2 for direct TCP/IP connection
AS400PTF
10.2 AS/400 version 3.2
LEXLINK, *IP, *USRDFN
Crtpsfcfg version 3.2 only
Immed
11. AS/400 SCS Printing Using SNA
11.1 AS/400 controller definition
ALL
11.2 AS/400 printer definition
11.3 AS/400 printing
12. AS/400 SCS-DCA Printing Using TCP/IP
PS23OUTQ
12.2 AS/400 Printing
Text
MTU size
PSF/MVS AFP Printing Using TCP/IP
13.1 PSF/MVS direct attachment
Sample PSF/MVS JES2 initialisation statements
13.2 PSF/MVS startup procedure
PBJ
Logmode
SNA Ipds and SCS Printing from MVS or VM
Ipds printer SCS printer
Vtam definition
PS PU definition for
Definition
124
14.3 3174 OS/2 Gateway PS PU definition
OS/2 Vtam definition
OS/2 Protocol.ini definitions
OS/2 CM/2 gateway definitions
127
PU/LU Definitions
PSF JCL
Host SNA SAA
Choose Configure Data Link Adapters
Entries look like this
Choose Configure Downstream PUs
Choose Configure LUs for Downstream PUs
Unload nwsaa load nwsaa
NET,INACT,ID=puname,F V NET,ACT,ID=puname
FSL Configuration
FSL Configuration
PSS/MVS AFP Printing Using TCP/IP
Sample PSS/MVS JES2 initialisation statements
PSS printer profile using TCP/IP attachment
PSS/VM AFP Printing Using TCP/IP
Sample PSS VM printer profile definition using TCP/IP
PSF/2 AFP Printing Using TCP/IP
Creating a new printer profile
Enter the Device Name
Enter IP Address
Keepalive support for OS/2
Select Port Number
17.3 OS/2 Keepalive configuration
Enter Printer name
PSF/AIX Printing Using TCP/IP
Adding TCP/IP attached printer
Enter Internet address
Keepalive support for AIX
AIX Keepalive support
No -a
Monitoring tools
Problem Determination
What is Snmp
Snmp support
PS name
Using the NetGuardian browser
Preparing for use of Snmp
Contact name
LED Status error messages
LAN SES PRT
LAN, and PRT LEDs all flash
Troubleshooting
When installing
LAN LED continues to flash
Message AIN1048E or
PSF indicated communication errors
LAN LED is lit but PRT LED is not lit
LAN, LEDs is lit, PRT flashes, but no print is produced
Does the printer indicate an error message?
When configuring
Bootptab file errors
PRT LED flashes slowly
Are you unable / able to generate a test printout?
Does the LED status of theXerox 4500 PS TR appear normal?
Can you Ping theXerox 4500 PS TR ?
Unable
Unsuccessfully
When printing
Successfully
NetWare
Excerpt from test page with NetWare settings
NetWare settings
Printer State Waiting for job
Ready?
Intervention required IRQ
Ipds
LPD
ENP
SCS
Problem reporting
Printer errors in front panel
Printer indicates an error code
Appendices
Appendix a Configuration Using Setup File
Appendix a 1 Configuring via parallel port
Appendix a 2 Configuration file parameters
Sharetimeout
Enablepulu
Boot
Holdtimeout
END
Beginconfiguration Session
Location
Inputdef
Defaultip
Beginconfiguration Tcpip Hostname
Bootp
Defaultsm
Ncpmode
Beginconfiguration Netware LSLFRAME8022
LSLFRAME802SNAP
Ncppreferredserver
Beginconfiguration PU Blockid
Epspassword
Beginconfiguration IDA Aliasname
Epsfileserver
Localsap
Beginconfiguration Ppdx Portport
Beginconfiguration Lpdx Lpdqueue
Response
Fileserver
Beginconfiguration Enpx Printernumber
Beginconfiguration PAR2IN INSTREAMPAR2IN
Printserver
Beginconfiguration Snaprint Instreamsnaprint
Beginconfiguration Testpgx Instreamtestpg
Beginconfiguration IPDS1 Ipdsvp
Beginconfiguration Icds Languagesel
Nographics
Dldtimeout
Colorafp
Querypages
Envelope
Beginconfiguration Printerx Duplexinstalled
Offsetinstalled
Traydef
Printareax
Pageheight
Pagesize
Printareay
Logicalpageheight
Logicalpagey
Logicalpagewidth
Languagedef PCL Offsetreg
Manualfeed
Ctables
Languagedef Postscript Traydefx Inputprio
Define Snmp Authentraps
Trapcommname
Accessauth
Access
Authcommname
Appendix B Microcode upgrading
Appendix B.1 Upgrading microcode via Parallel port
Appendix B.2 Upgrading Microcode via TCP/IP Boot Server
OS/2
Preparing for Microcode Upgrade via TCP/IP
Update process
AIX
095XXYZZ.B80
B80 Microcode level 2, xerox product
Appendix B.3 Problem determination
Appendix C idaSetup Ipds configuration
Appendix D Ipds resident codepages
Decimal
Appendix E Test printout
Test key
PU LU Settings Ida802.2 Settings
Xerox 4500 PS TR General Information Device Settings
TCP/IP Settings NetWare Settings
Snmp Settings NetBeui Settings
Xerox 4500 PS TR
Description Session Status
Appendix F Error messages
Error code = %x
0x5110
Appendix G List of abbreviations
Appendix H Selected products for Xerox printers
Coax Supported Printers