| SET MENU |
■ Input mode B)INPUT MODE |
|
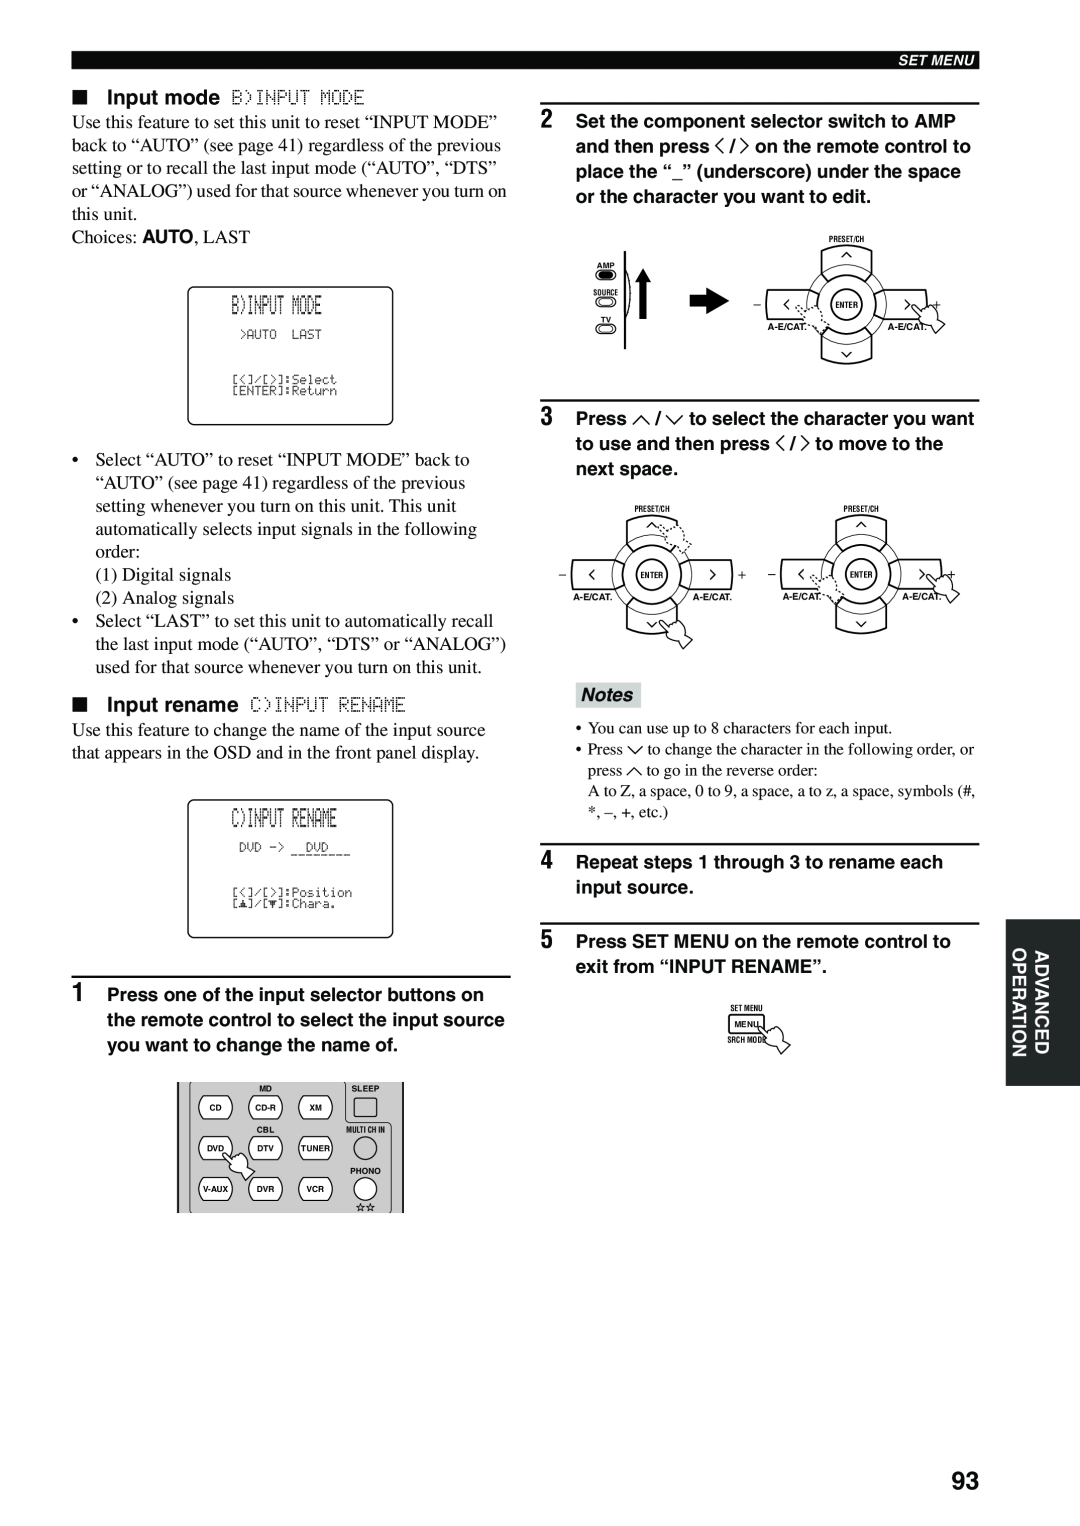
Use this feature to set this unit to reset “INPUT MODE” | 2 Set the component selector switch to AMP |
back to “AUTO” (see page 41) regardless of the previous | and then press j / i on the remote control to |
setting or to recall the last input mode (“AUTO”, “DTS” | place the “_” (underscore) under the space |
or “ANALOG”) used for that source whenever you turn on | or the character you want to edit. |
this unit. |
|
Choices: AUTO, LAST | PRESET/CH |
| AMP |
B)INPUT MODE
SOURCE
TV
ENTER
•Select “AUTO” to reset “INPUT MODE” back to “AUTO” (see page 41) regardless of the previous setting whenever you turn on this unit. This unit automatically selects input signals in the following order:
(1)Digital signals
(2)Analog signals
•Select “LAST” to set this unit to automatically recall the last input mode (“AUTO”, “DTS” or “ANALOG”) used for that source whenever you turn on this unit.
■Input rename C)INPUT RENAME
Use this feature to change the name of the input source that appears in the OSD and in the front panel display.
C)INPUT RENAME
________
p | p |
1Press one of the input selector buttons on the remote control to select the input source you want to change the name of.
| MD | SLEEP |
CD | XM | |
| CBL | MULTI CH IN |
DVD | DTV | TUNER |
|
| PHONO |
DVR | VCR |
3Press u / d to select the character you want to use and then press j / i to move to the next space.
PRESET/CH |
|
| PRESET/CH |
ENTER |
|
| ENTER |
Notes
•You can use up to 8 characters for each input.
•Press d to change the character in the following order, or press u to go in the reverse order:
A to Z, a space, 0 to 9, a space, a to z, a space, symbols (#, *,
4Repeat steps 1 through 3 to rename each input source.
5Press SET MENU on the remote control to exit from “INPUT RENAME”.
SET MENU
MENU
SRCH MODE
OPERATION | ADVANCED |
|
|
93
