Icom IC-R3 instruction manual Setting a frequency, Setting a tuning step

Page 12

3 FREQUENCY AND CHANNEL SETTING

Setting a frequency

qSelect the desired band with [].

wRotate [DIAL] to change the frequency.

The frequency changes according to the preset tuning steps. See the right section for selecting the tuning step.

Some TV channels may be set as skip channels by default and can be selected by rotating [DIAL] while pushing [FUNC]. (p. 34).

Push [] while pushing [FUNC] to change the frequency in 100 kHz, 1 MHz or 10 MHz steps.

Setting a tuning step

Tuning steps can be selected for each band, however, the tuning step of the broadcast band is fixed to 9 kHz steps ex- cept for U.S.A. and Canada versions. The following are avail-

able.


• 5 kHz

• 6.25 kHz* • 10 kHz

• 12.5 kHz

• 15 kHz

• 20 kHz

• 25 kHz • 30 kHz

• 50 kHz

• 100 kHz

* Not available for 1200 MHz band.

FM

75 50 25

FM

75 50 25

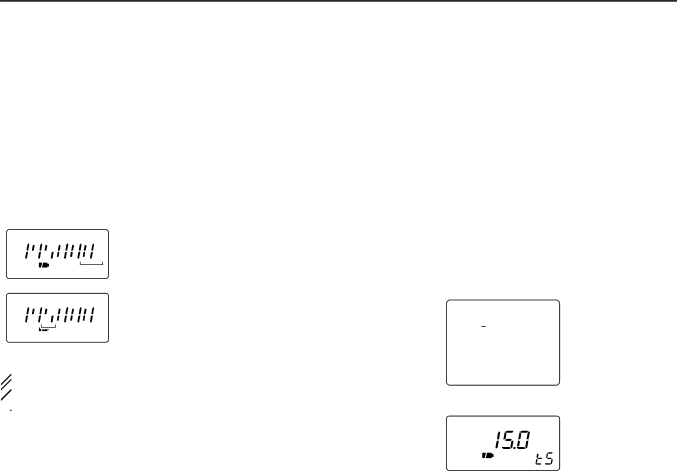
[DIAL] changes the frequency according to the selected tuning step.

While pushing [FUNC], [DIAL] changes the frequency in 1 MHz steps (default).

qSelect the desired band, except for TV band, with []. w Rotate [DIAL] while pushing [MODE] to select the desired

tuning step.

•15 kHz tuning step (Simple screen)

FM

146.100.000

TS 15.0

The 1 MHz tuning step (dial select step) can be set to 100

kHz, 1 MHz or 10 MHz tuning steps in set mode. See p. 39 for details.

•15 kHz tuning step (Sub LCD)

8

Image 12
Contents IR3 You experience a ringing in your ears, reduce the volume Areas with temperatures below -10C +14F or aboveEven when the receiver power is OFF, a slight current still +60C +140FSupplied Accessories Accessories included with the receiver QtyTable of Contents Accessory Attachment Battery installationAntenna Belt clipPanel Description Panel descriptionVFO/MEMORY Switch V/M Skip Mode Switch Mode SETMonitor Switch SQL ATT External DC Power Jack DCFunction display Skip Scan Indicator pgs Battery Indicators2ATTENUATOR Indicator p Audio and video output jack informationDual LCD Frequency and Channel Setting What is VFO?VFO and memory channels Operating band selectionSetting a frequency Setting a tuning stepPush SQL ATT to exit the attenuator setting condition Selecting a memory channelAttenuator function Lock functionWhen a signal is received Basic OperationReceiving U.S.A. version automatically turns itself OFF whenSetting volume level Setting squelch levelWhile pushing SQL, rotate Dial to select the squelch levelReceive mode selection Monitor functionSetting the backlighting condition Push Func + Mode SET momentarily to enter set modeDisplay backlighting Rotate Dial until Light appearsMemory channel contents Memory ChannelsGeneral Programming during selectionTransferring memory contents to another memory Programming after selectionMemory bank selection Memory clear Push Func + V/M for 2 sec. to clearExample Clearing memory channel 3 memory bank a Rotate the tuning dial to select the desired character Memory namesScan Operation Scan typesFull Scan p Function pFull/band/programmed scan Release ↔ to start the scanMemory bank scan To stop the scan, push ↔ againSelecting scan edges Band rangesSkip channel setting Setting the scan pause timeScan resume condition Rotate Dial until Pause Scan or Pause appearsSetting the scan resume time Rotate Dial until Scan Resume or RESUmE appearsFrequency skip function Programming a skip frequencyFrequency skip function ON/OFF Priority Watch Priority watch typesMemory Scan Watch p VFO Scan Watch pPush Mode SET to exit set mode and start the watch Priority watch operationMemory channel watch and memory scan Watch Rotate Dial to select Priority or PRIoVFO scan watch Setting subaudible tones for tone squelch Operation Subaudible Tone OperationTone squelch operation OperationPocket beep operation Rotate Dial until Tone Freq. or tonE appearsAvailable subaudible tone frequencies Unit Hz Tone scan Push SQL to stop the beeps and flashingPush ↔ to stop the scan Duplex Operation Duplex shift directionRotate Dial until Duplex or dUP appears Offset frequency Rotate Dial until Offset Freq. or oFFSEt appearsBand Scope Range, if desiredSkip channel setting TV OperationTV operation TV channel receivingTV frequency AM TV receiving TV frequency AM TV memory channelPush ↔ one or more times to select the band above 30 MHz Push Func + one or more times to select the TV screenSub carrier adjustment ATV operationATV memory channel Signal source Signal levelsDirection Finding Direction finding function exampleSet mode Set mode itemsOther Functions Setting dial select step Dial select stepRelease Func to exit the condition Auto power-off function Rotate Dial until A.Power OFF or AP oFF appearsBeep tones Rotate Dial until Beep Audio or bEEP appearsPower saver Monitor switch actionRotate Dial until Power Save or P Save appears Rotate Dial until Monitor or monI appearsDial speed acceleration Lock function effectRotate Dial until Dial Speedup or SPEEd appears Rotate Dial until Key Lock or LoCk appearsDisplay mode selection Color LCD can be automatically turned on when usingDisplay contrast Rotate Dial until Display or dISP appearsDisplay brightness Display background colorRotate Dial until Bright appears Partial reset Total resetPush Power for 2 sec. to turn power OFF Cloning functionBattery Charging Battery cautionsBattery charging Battery pack installationCP-18A/E fuse ReplacementCP-18A/E Turn power OFF CheckRegular charging Rapid charging with the BC-135Operation Flow Chart Memory mode VFO modeConfirmation beep p Backlighting p Power save p Auto power OFF pScan resume time p TV Frequency Table A. channelsCcir channels Australian channels Taiwan channelsNew Zealand channels China channels Indonesian channelsItalian channels FOT channels Specifications and Options GeneralReceiver Operating periods Approx OptionsTroubleshooting Problem Possible Cause SolutionQuick Reference Quick Reference Declaration of Conformity Kamihigashi, Hirano-ku, Osaka 547-0002 Japan