1 | Telephone wall jack |
|
|
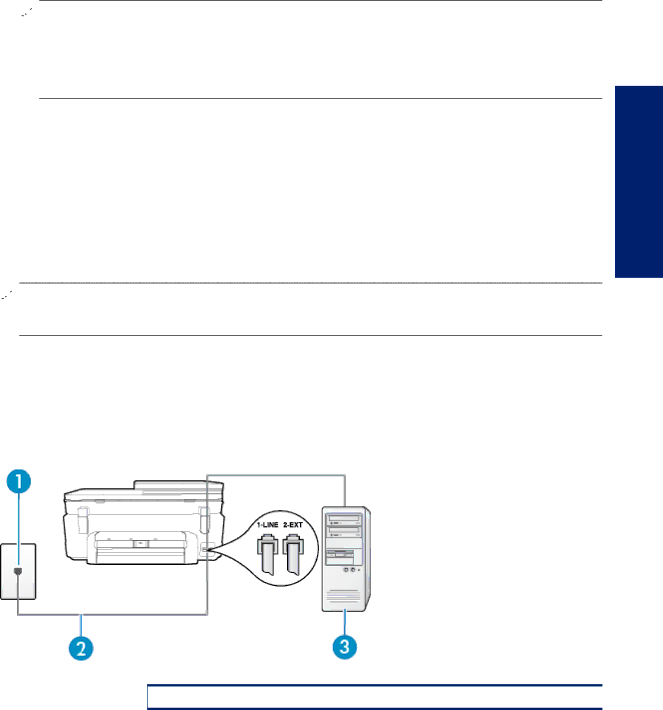
2 | Use the phone cord supplied in the box with the printer to connect to the |
| You might need to connect the supplied phone cord to the adapter provided for your country/ |
| region. |
|
|
To set up the printer with voice mail
1.Using the phone cord supplied in the box with the printer, connect one end to your telephone wall jack, then connect the other end to the port labeled
You might need to connect the supplied phone cord to the adapter provided for your country/region.
![]() NOTE: You might need to connect the supplied phone cord to the adapter provided for your country/ region.
NOTE: You might need to connect the supplied phone cord to the adapter provided for your country/ region.
If you do not use the supplied cord to connect from the telephone wall jack to the printer, you might not be able to fax successfully. This special phone cord is different from the phone cords you might already have in your home or office.
2.Turn off the Auto Answer setting.
3.Run a fax test.
You must be available to respond in person to incoming fax calls, or the printer cannot receive faxes. You must initiate the manual fax before voicemail picks up the line.
If you encounter problems setting up the printer with optional equipment, contact your local service provider or vendor for further assistance.
Case G: Fax line shared with computer modem (no voice calls received)
If you have a fax line on which you receive no voice calls, and you also have a computer modem connected on this line, set up the printer as described in this section.
![]() NOTE: If you have a computer
NOTE: If you have a computer
•Set up the printer with a computer
•Set up the printer with a computer DSL/ADSL modem
Set up the printer with a computer dial-up modem
If you are using the same phone line for sending faxes and for a computer
Back view of the printer
Additional fax setup
1
Telephone wall jack
Set up faxing (parallel phone systems) | 85 |