AUTOMATIC
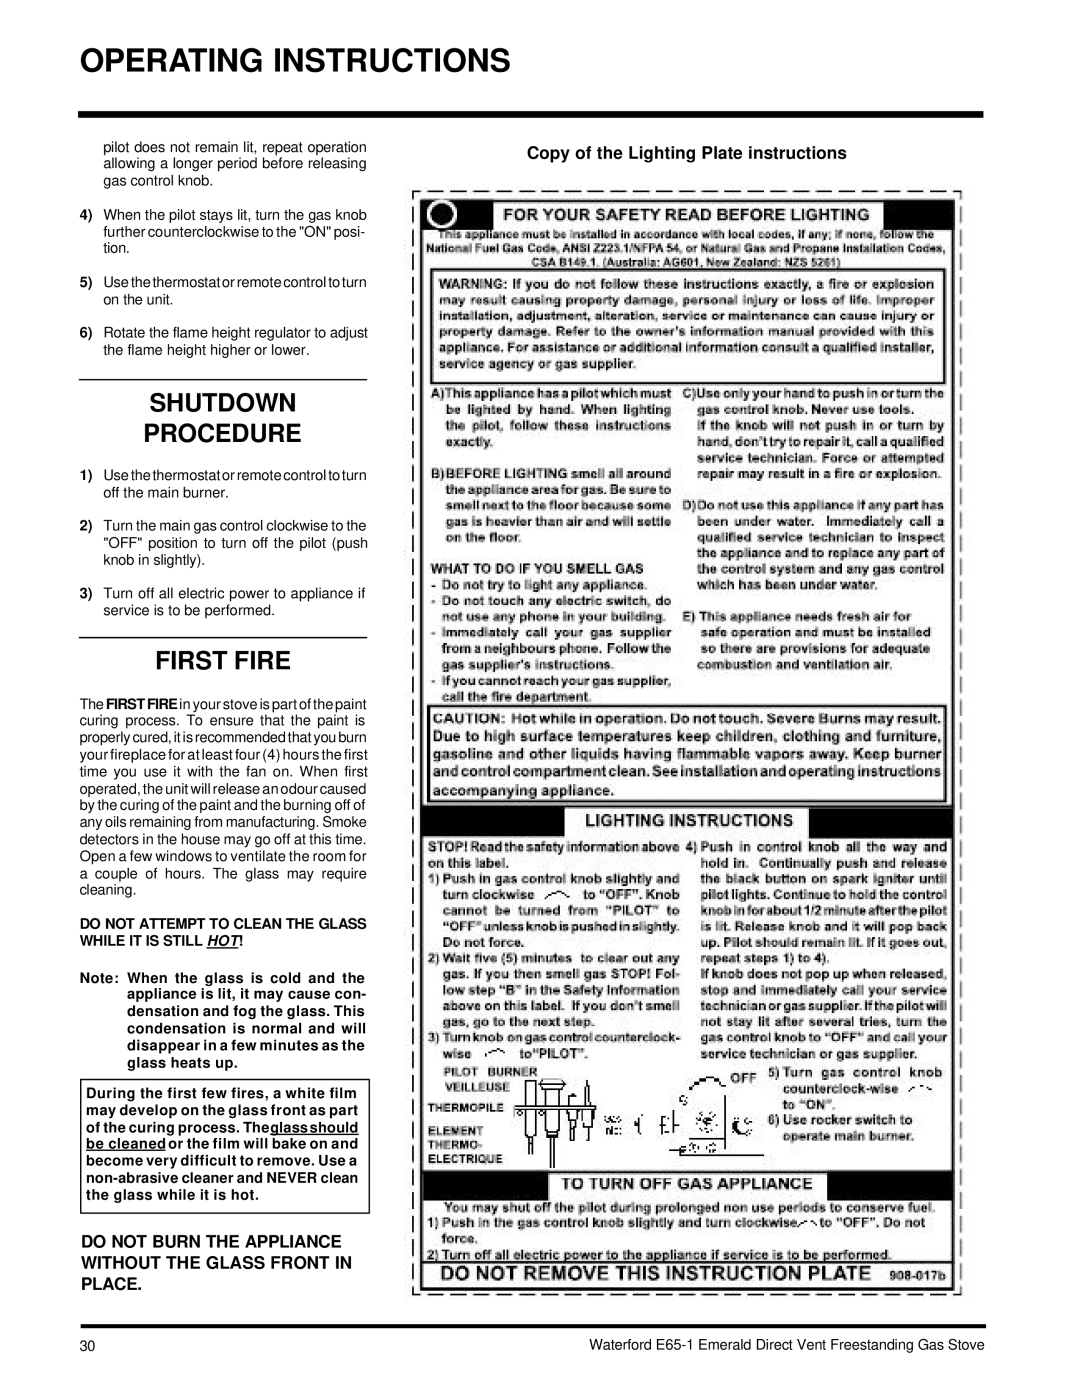
CONVECTION FAN
OPERATION
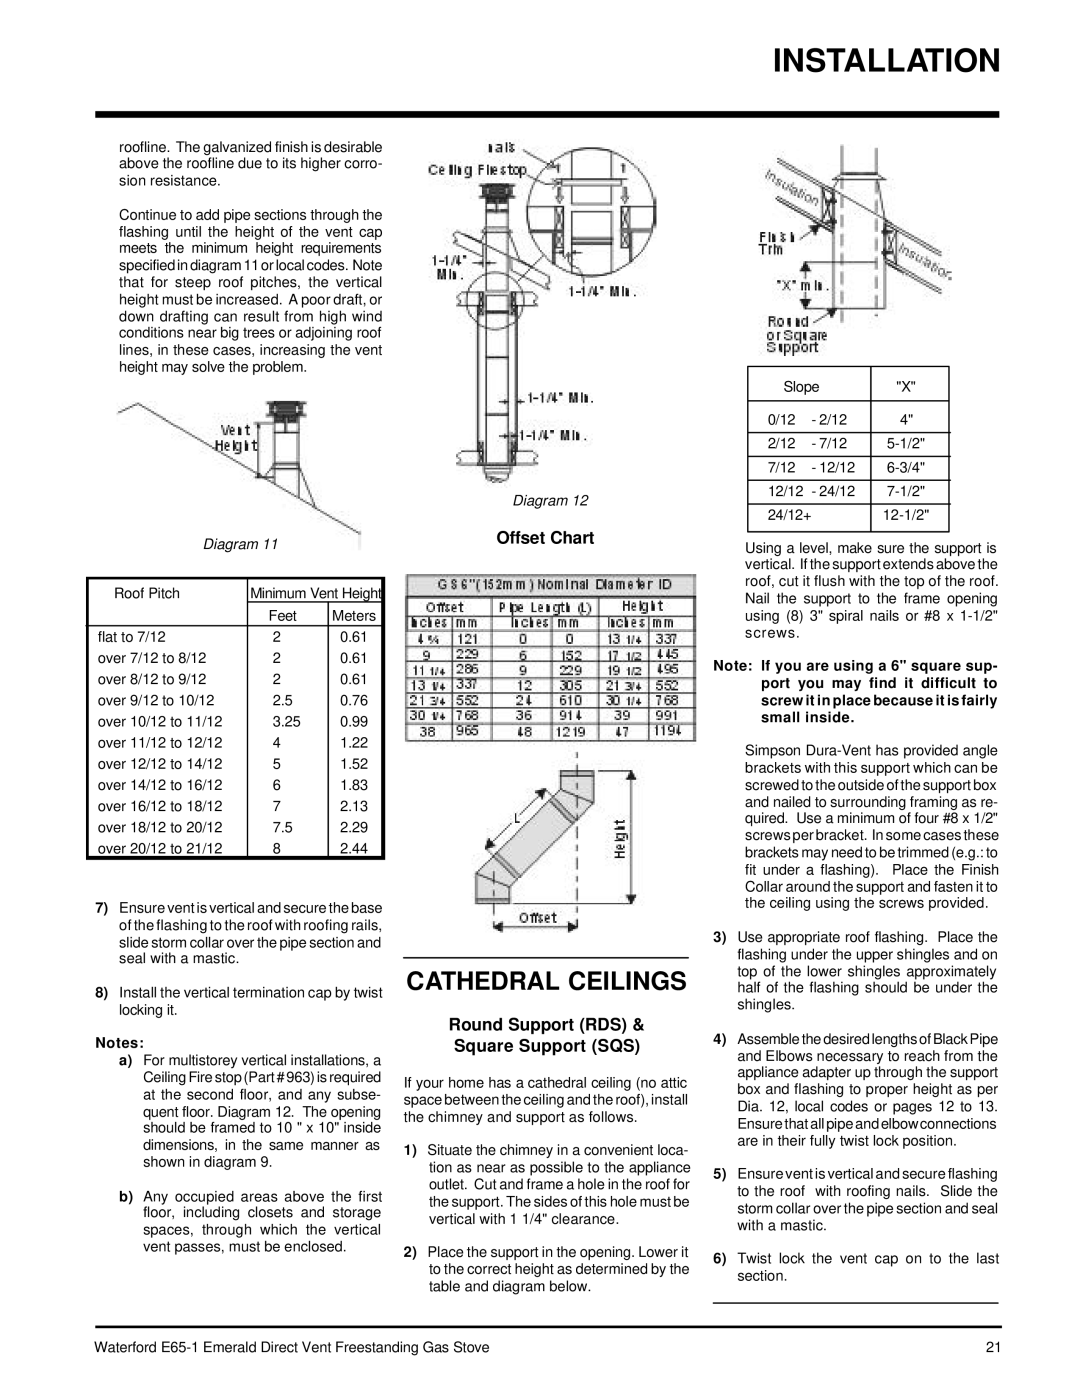
The fan operates automatically - turn the knob at the top right rear corner to adjust to the desired speed. The fan will turn on as the stove comes up to operating temperature. After the unit has been turned off and the unit cooled to below a useful heat output range the fan will shut off automatically.
ADJUSTING FLAME
HEIGHT
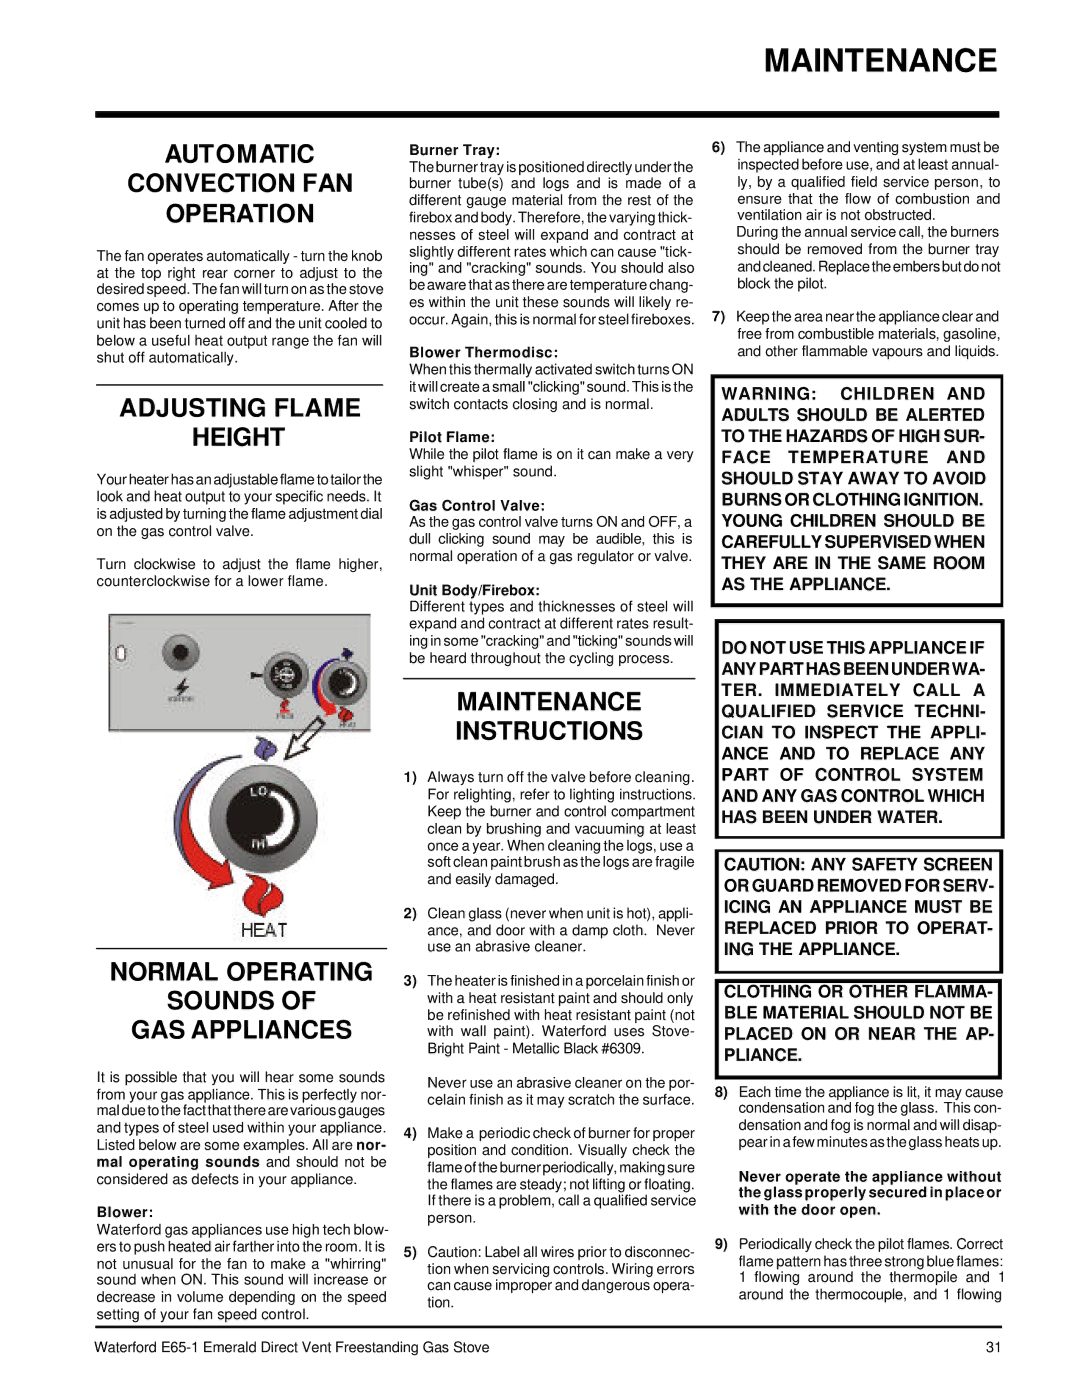
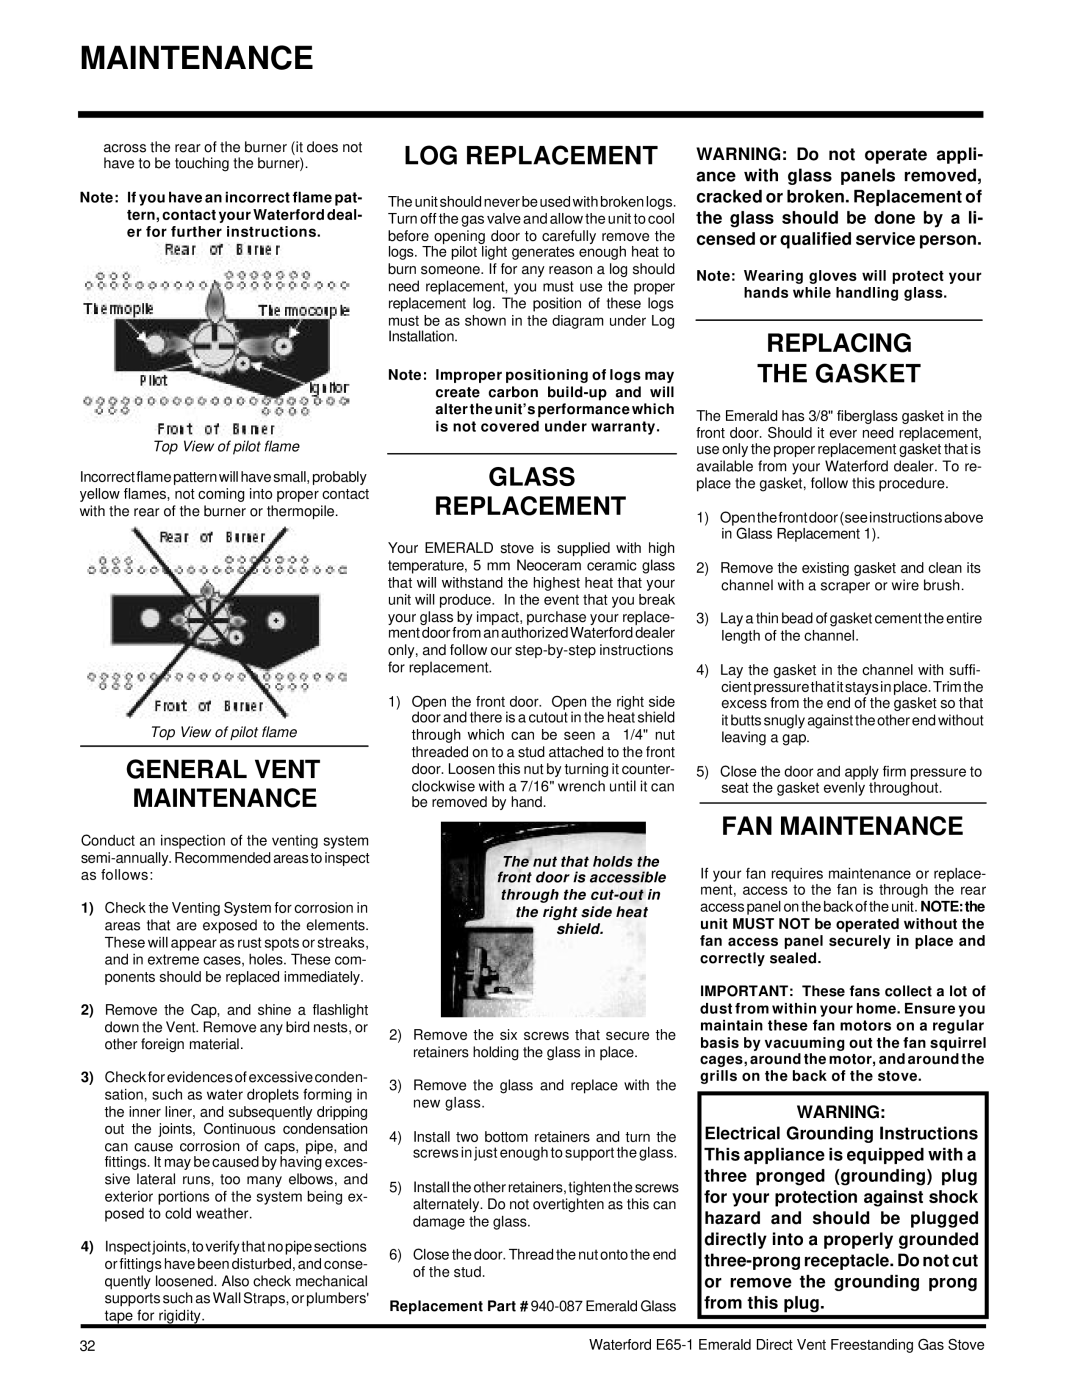
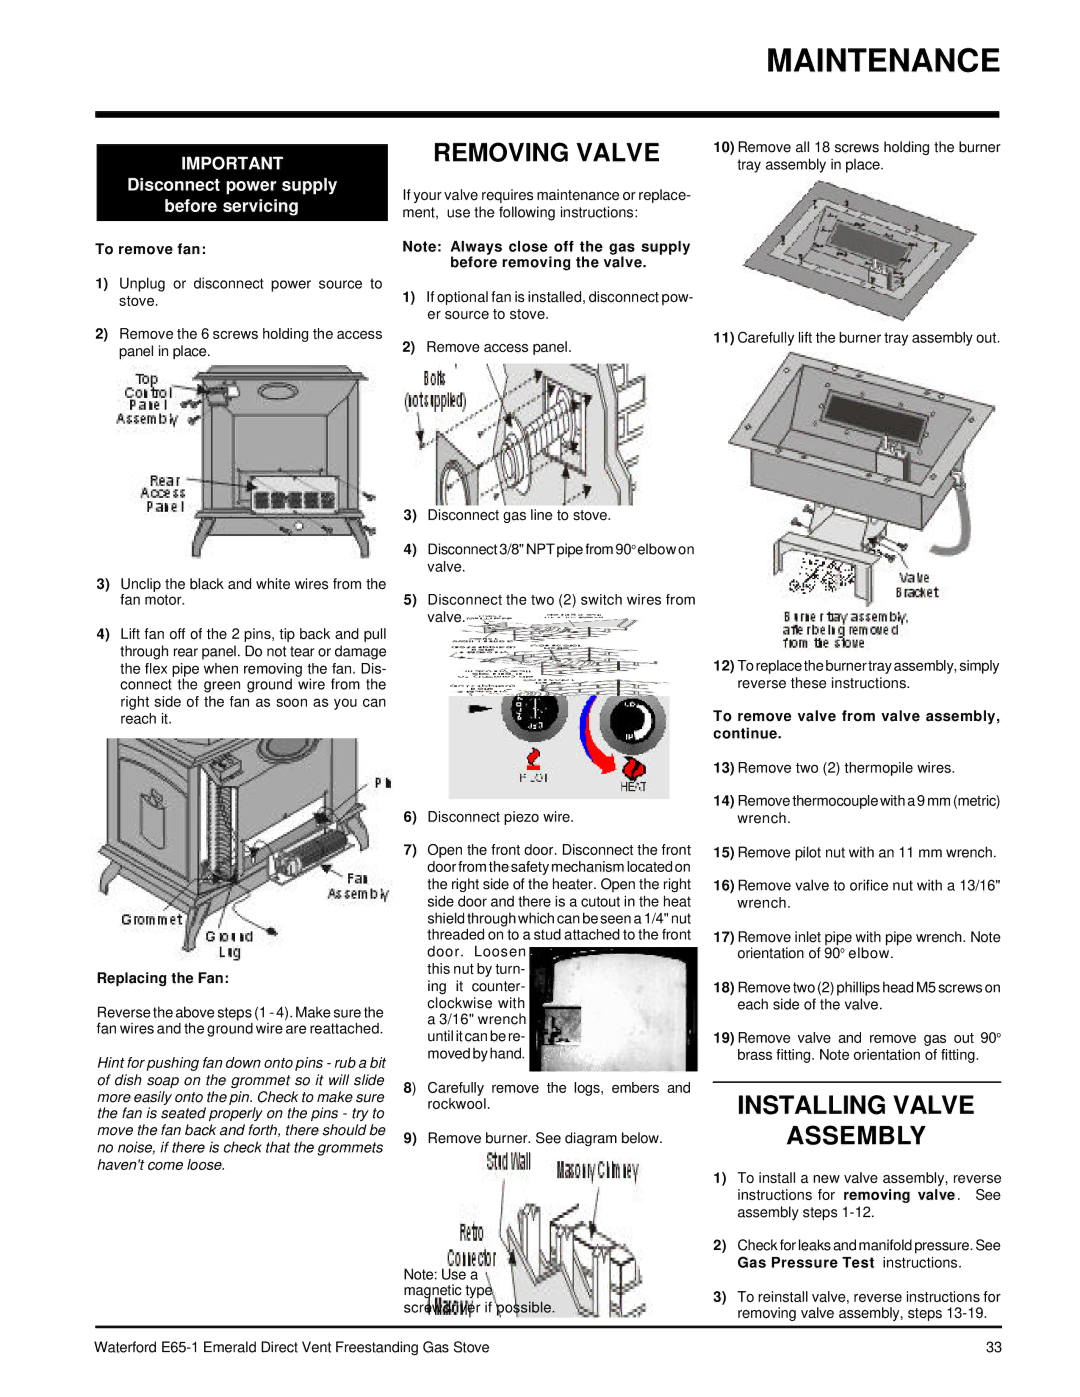
Your heater has an adjustable flame to tailor the look and heat output to your specific needs. It is adjusted by turning the flame adjustment dial on the gas control valve.
Turn clockwise to adjust the flame higher, counterclockwise for a lower flame.
Burner Tray:
The burner tray is positioned directly under the burner tube(s) and logs and is made of a different gauge material from the rest of the firebox and body. Therefore, the varying thick- nesses of steel will expand and contract at slightly different rates which can cause "tick- ing" and "cracking" sounds. You should also be aware that as there are temperature chang- es within the unit these sounds will likely re- occur. Again, this is normal for steel fireboxes.
Blower Thermodisc:
When this thermally activated switch turns ON it will create a small "clicking" sound. This is the switch contacts closing and is normal.
Pilot Flame:
While the pilot flame is on it can make a very slight "whisper" sound.
Gas Control Valve:
As the gas control valve turns ON and OFF, a dull clicking sound may be audible, this is normal operation of a gas regulator or valve.
Unit Body/Firebox:
Different types and thicknesses of steel will expand and contract at different rates result- ing in some "cracking" and "ticking" sounds will be heard throughout the cycling process.
MAINTENANCE
INSTRUCTIONS
1)Always turn off the valve before cleaning. For relighting, refer to lighting instructions. Keep the burner and control compartment clean by brushing and vacuuming at least once a year. When cleaning the logs, use a soft clean paint brush as the logs are fragile and easily damaged.
2)Clean glass (never when unit is hot), appli- ance, and door with a damp cloth. Never use an abrasive cleaner.
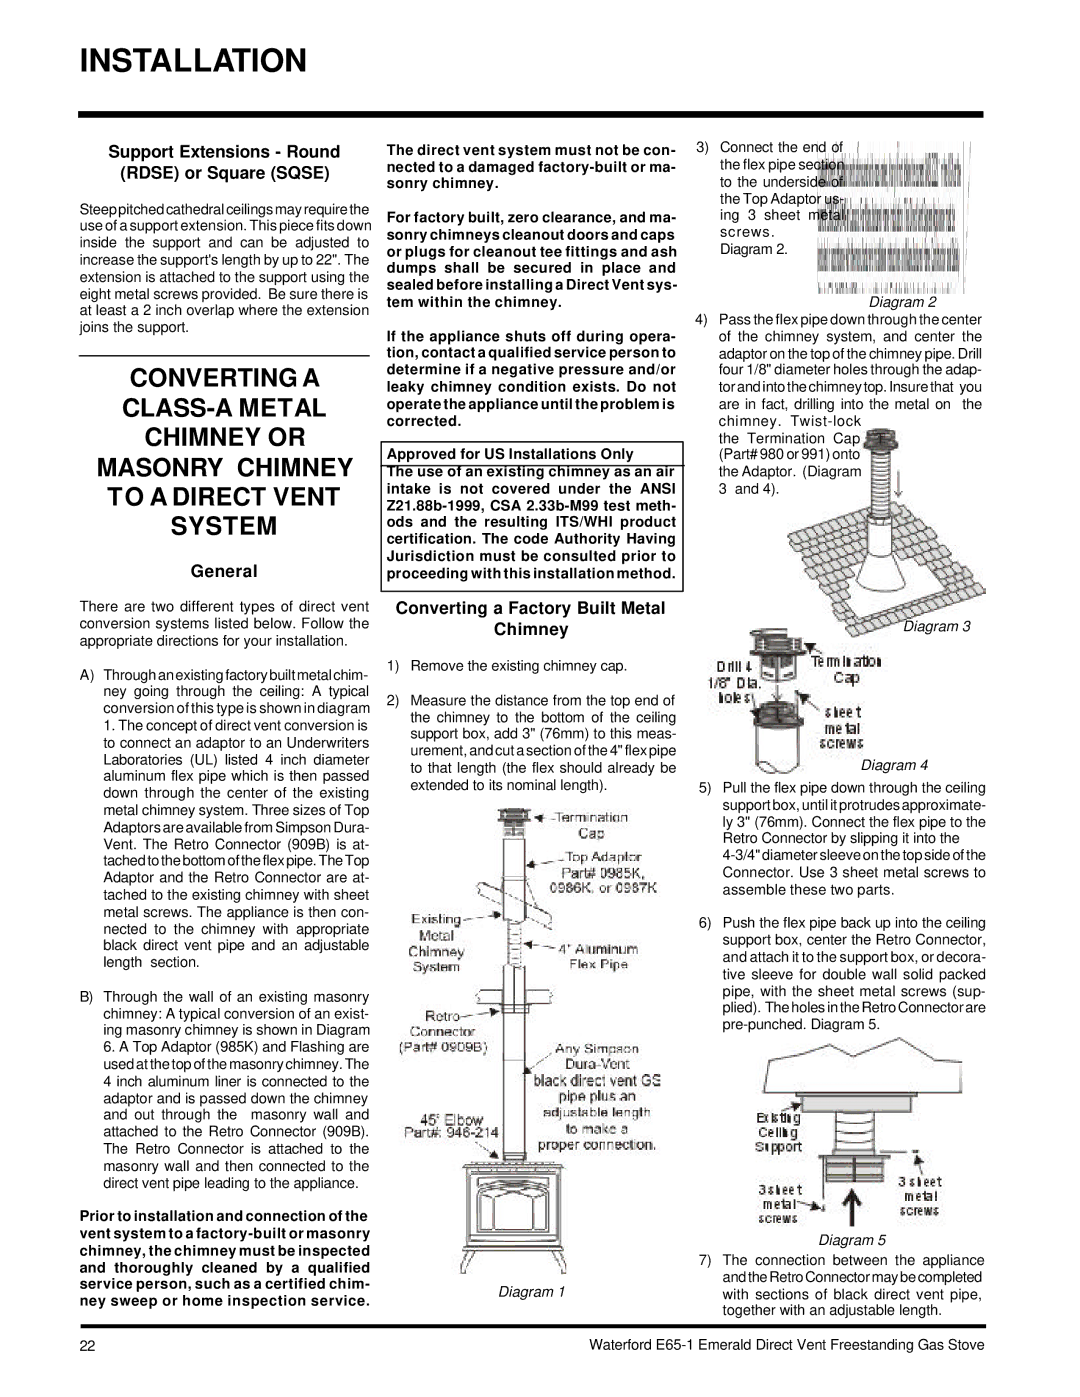
MAINTENANCE
6)The appliance and venting system must be inspected before use, and at least annual- ly, by a qualified field service person, to ensure that the flow of combustion and ventilation air is not obstructed.
During the annual service call, the burners should be removed from the burner tray and cleaned. Replace the embers but do not block the pilot.
7)Keep the area near the appliance clear and free from combustible materials, gasoline, and other flammable vapours and liquids.
WARNING: CHILDREN AND ADULTS SHOULD BE ALERTED TO THE HAZARDS OF HIGH SUR- FACE TEMPERATURE AND SHOULD STAY AWAY TO AVOID BURNS OR CLOTHING IGNITION. YOUNG CHILDREN SHOULD BE CAREFULLY SUPERVISED WHEN THEY ARE IN THE SAME ROOM AS THE APPLIANCE.
DO NOT USE THIS APPLIANCE IF ANY PART HAS BEEN UNDER WA- TER. IMMEDIATELY CALL A QUALIFIED SERVICE TECHNI- CIAN TO INSPECT THE APPLI- ANCE AND TO REPLACE ANY PART OF CONTROL SYSTEM AND ANY GAS CONTROL WHICH HAS BEEN UNDER WATER.
CAUTION: ANY SAFETY SCREEN OR GUARD REMOVED FOR SERV- ICING AN APPLIANCE MUST BE REPLACED PRIOR TO OPERAT- ING THE APPLIANCE.
NORMAL OPERATING
SOUNDS OF
GAS APPLIANCES
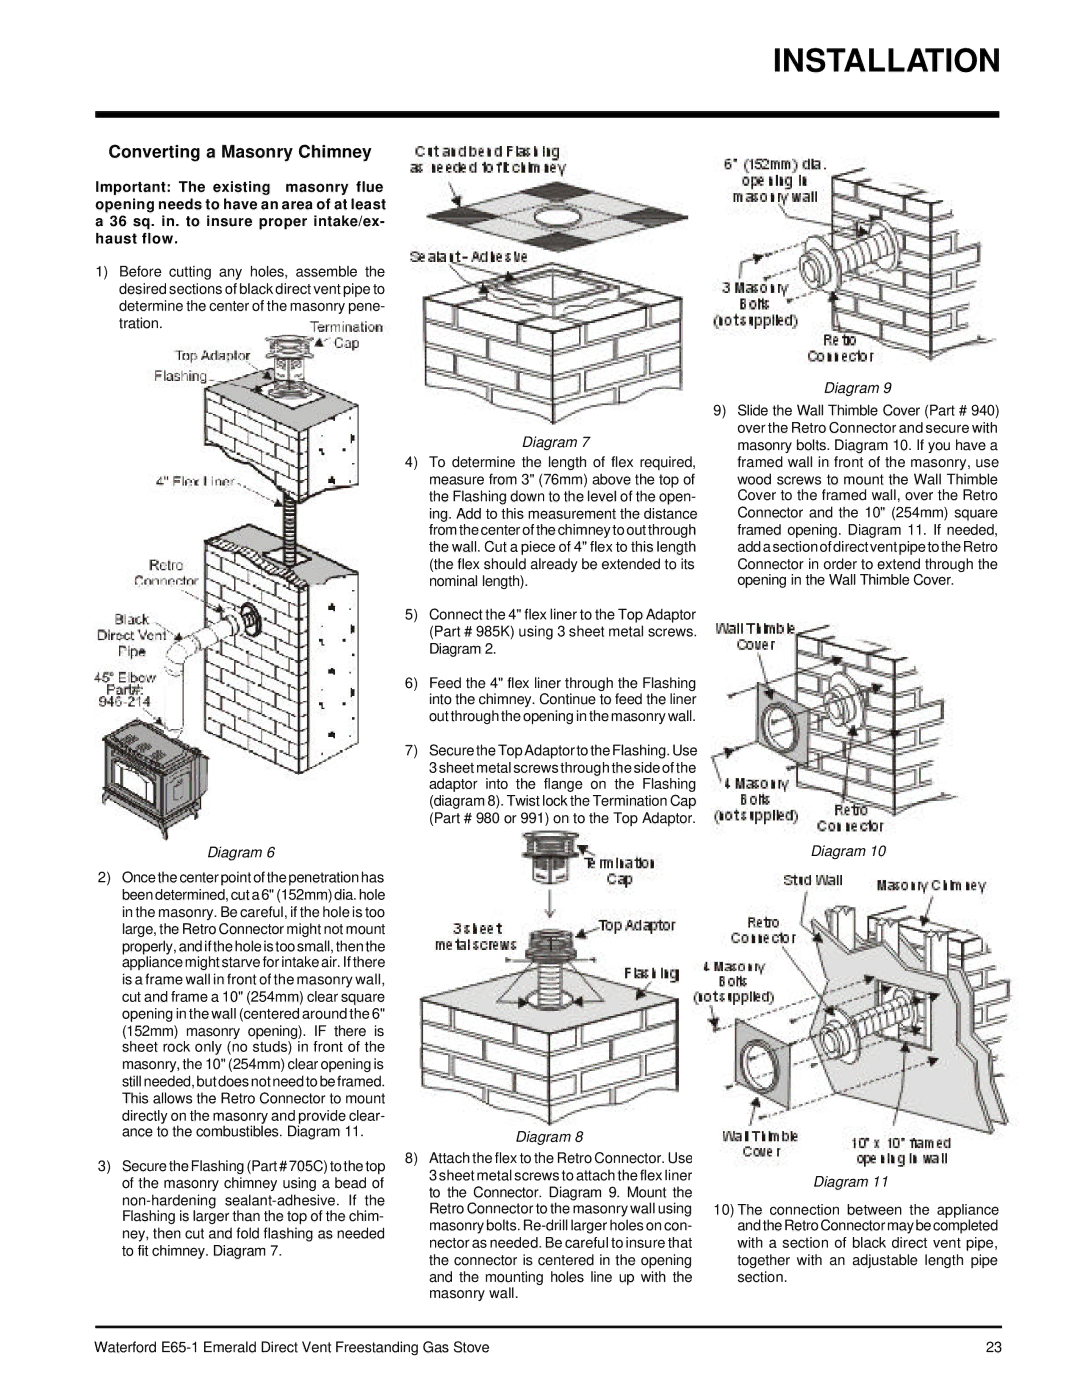
It is possible that you will hear some sounds from your gas appliance. This is perfectly nor- mal due to the fact that there are various gauges and types of steel used within your appliance. Listed below are some examples. All are nor- mal operating sounds and should not be considered as defects in your appliance.
Blower:
Waterford gas appliances use high tech blow- ers to push heated air farther into the room. It is not unusual for the fan to make a "whirring" sound when ON. This sound will increase or decrease in volume depending on the speed setting of your fan speed control.
3)The heater is finished in a porcelain finish or with a heat resistant paint and should only be refinished with heat resistant paint (not with wall paint). Waterford uses Stove- Bright Paint - Metallic Black #6309.
Never use an abrasive cleaner on the por- celain finish as it may scratch the surface.
4)Make a periodic check of burner for proper position and condition. Visually check the flame of the burner periodically, making sure the flames are steady; not lifting or floating. If there is a problem, call a qualified service person.
5)Caution: Label all wires prior to disconnec- tion when servicing controls. Wiring errors can cause improper and dangerous opera- tion.
CLOTHING OR OTHER FLAMMA- BLE MATERIAL SHOULD NOT BE PLACED ON OR NEAR THE AP- PLIANCE.
8)Each time the appliance is lit, it may cause condensation and fog the glass. This con- densation and fog is normal and will disap- pear in a few minutes as the glass heats up.
Never operate the appliance without the glass properly secured in place or with the door open.
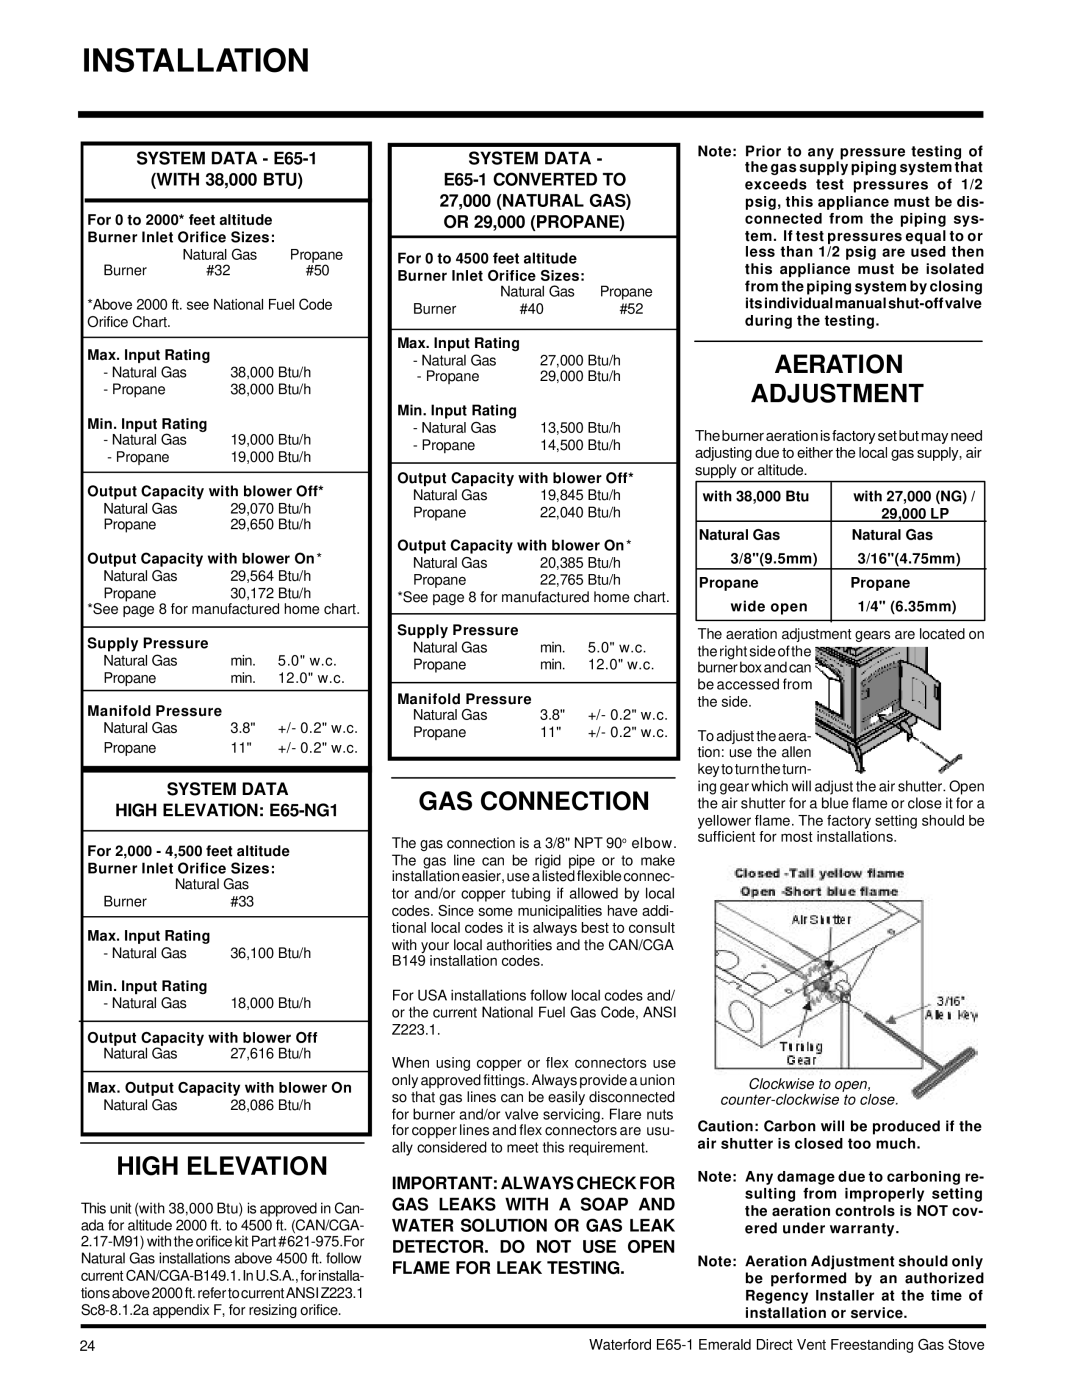
9)Periodically check the pilot flames. Correct flame pattern has three strong blue flames: 1 flowing around the thermopile and 1 around the thermocouple, and 1 flowing
Waterford
31
