summary to display the new IP settings. Figure 7 shows what you should expect to see.
Note that when a manual IP address has been assigned it will not revert back to the DHCP mode on subsequent
You will now know either the DHCP or manual IP address and you can now move on to using the Web interface.
Figure 7 CLI Summary with Assigned IP Address
Logging On to the Web Interface
Using the IP address you have obtained in the previous section, enter this into the URL field of your preferred Web browser. There is no need to add http:// before the
Logging On to the Web Interface | 27 |
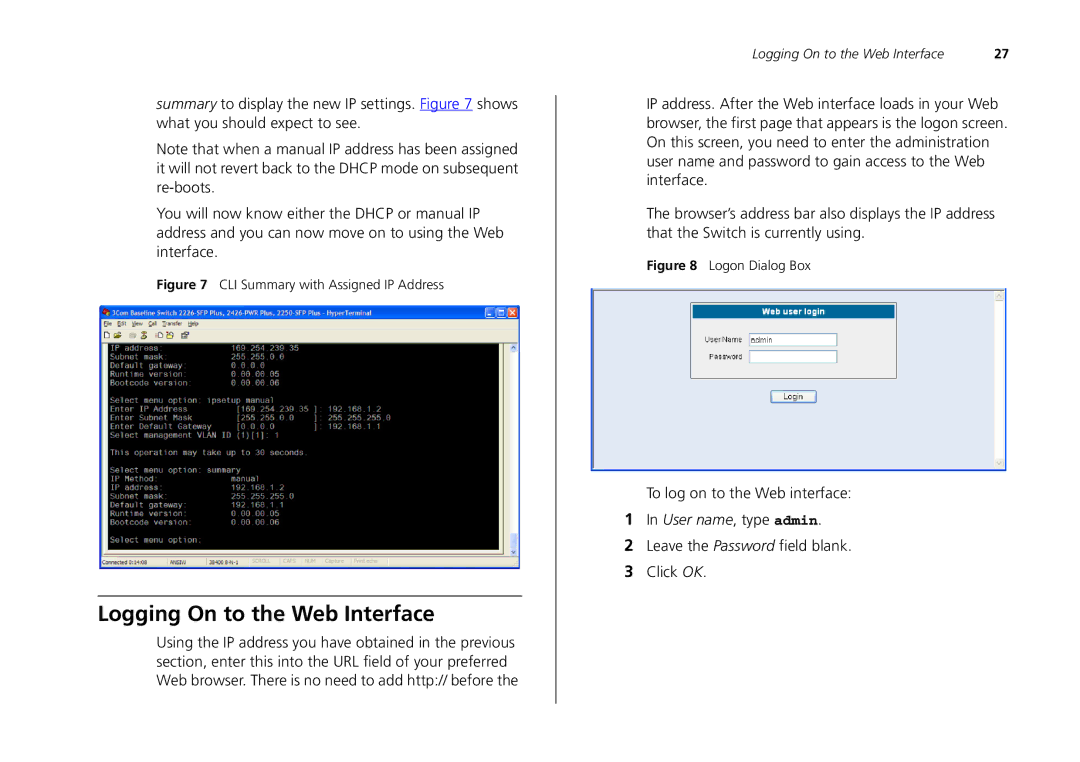
IP address. After the Web interface loads in your Web browser, the first page that appears is the logon screen. On this screen, you need to enter the administration user name and password to gain access to the Web interface.
The browser’s address bar also displays the IP address that the Switch is currently using.
Figure 8 Logon Dialog Box
To log on to the Web interface:
1In User name, type admin.
2Leave the Password field blank.
3Click OK.