Installing the IntelliJack | 11 |
•If the end of the cable is terminated with a male connector, connect the network cable directly into the Ethernet uplink port.
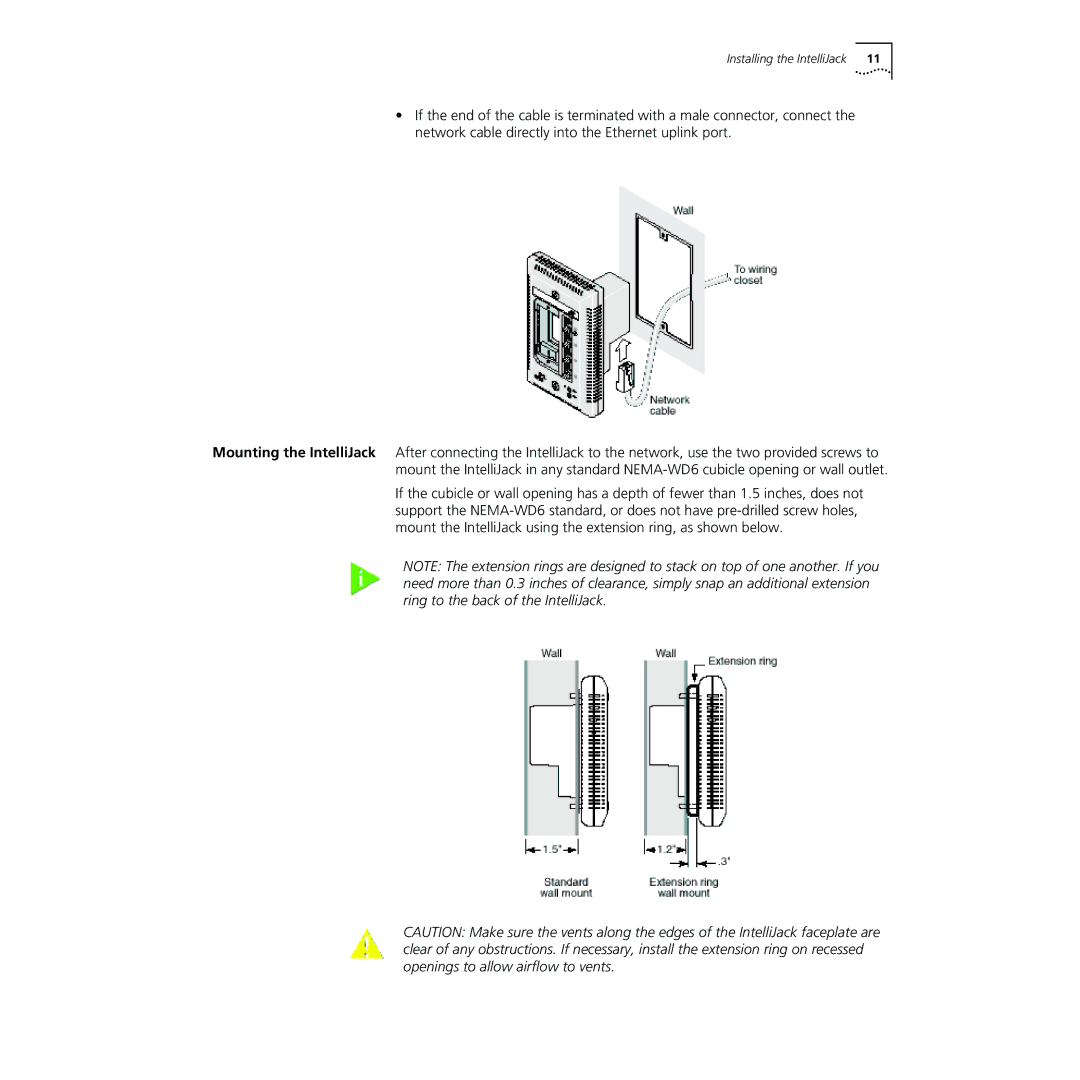
Mounting the IntelliJack After connecting the IntelliJack to the network, use the two provided screws to mount the IntelliJack in any standard
If the cubicle or wall opening has a depth of fewer than 1.5 inches, does not support the
NOTE: The extension rings are designed to stack on top of one another. If you need more than 0.3 inches of clearance, simply snap an additional extension ring to the back of the IntelliJack.
CAUTION: Make sure the vents along the edges of the IntelliJack faceplate are clear of any obstructions. If necessary, install the extension ring on recessed openings to allow airflow to vents.