|
| Installing the IntelliJack | 5 | |
|
|
|
|
|
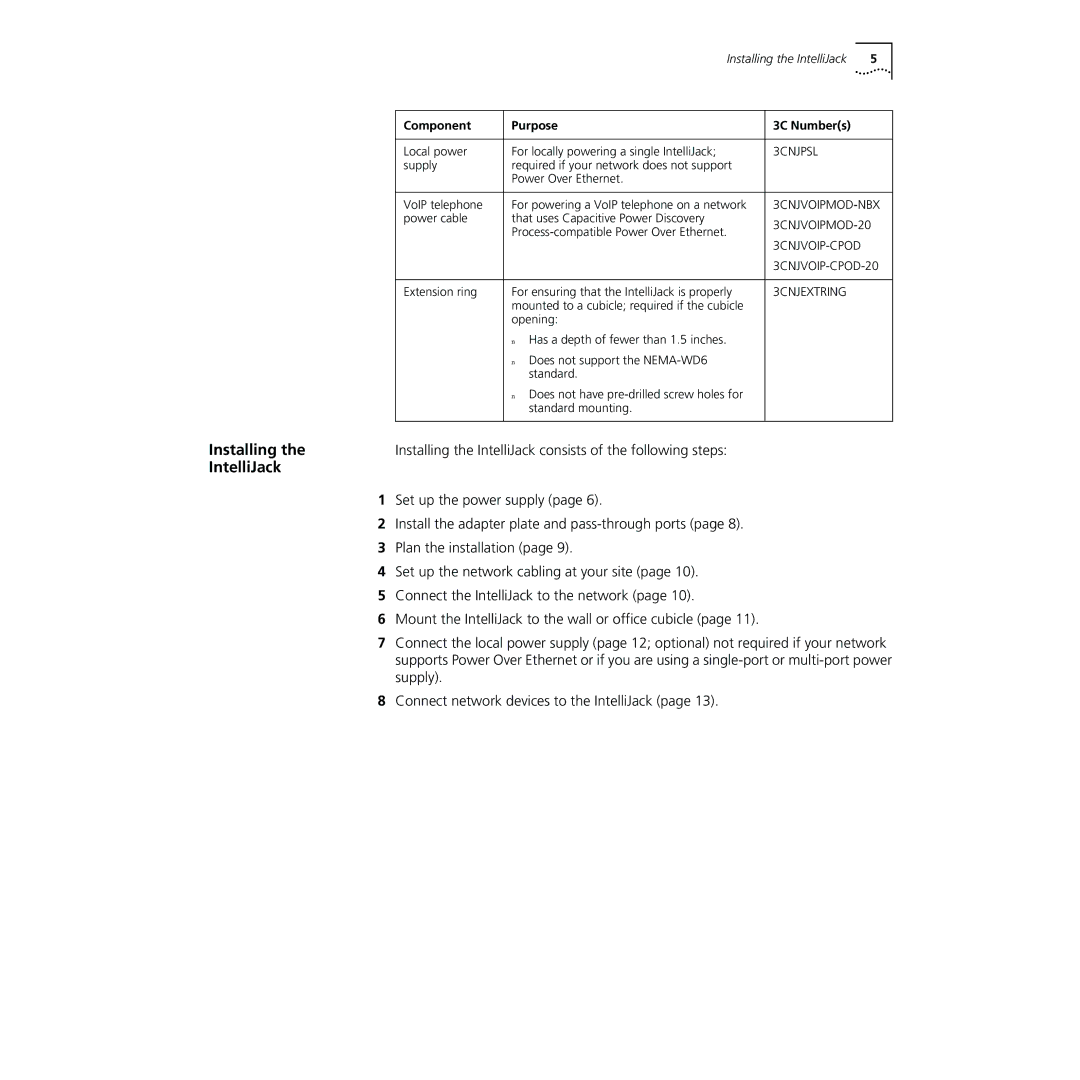
| Component | Purpose | 3C Number(s) |
|
|
|
|
|
|
| Local power | For locally powering a single IntelliJack; | 3CNJPSL |
|
| supply | required if your network does not support |
|
|
|
| Power Over Ethernet. |
|
|
|
|
|
| |
| VoIP telephone | For powering a VoIP telephone on a network | ||
| power cable | that uses Capacitive Power Discovery | ||
|
| |||
|
|
| ||
|
|
|
| |
|
|
| ||
|
|
|
|
|
| Extension ring | For ensuring that the IntelliJack is properly | 3CNJEXTRING |
|
|
| mounted to a cubicle; required if the cubicle |
|
|
|
| opening: |
|
|
|
| n Has a depth of fewer than 1.5 inches. |
|
|
|
| n Does not support the |
|
|
|
| standard. |
|
|
|
| n Does not have |
|
|
|
| standard mounting. |
|
|
Installing the |
|
|
|
|
Installing the IntelliJack consists of the following steps: |
|
| ||
IntelliJack |
|
|
|
|
1Set up the power supply (page 6).
2Install the adapter plate and
3Plan the installation (page 9).
4Set up the network cabling at your site (page 10).
5Connect the IntelliJack to the network (page 10).
6Mount the IntelliJack to the wall or office cubicle (page 11).
7Connect the local power supply (page 12; optional) not required if your network supports Power Over Ethernet or if you are using a
8Connect network devices to the IntelliJack (page 13).