42 |
|
|
| 3 System upgrade | ||
|
|
|
|
| ||
Interleave | Channel A | Channel B | Total | |||
|
|
|
| |||
mode | DIMM1A | DIMM2A | DIMM1B | DIMM2B | memory | |
|
|
| ||||
|
|
|
|
|
|
|
| 512 MB |
| 512 MB |
| 1 GB | |
|
|
|
|
|
|
|
| 1 GB |
| 1 GB |
| 2 GB | |
Dual |
|
|
|
|
|
|
2 GB |
| 2 GB |
| 4 GB | ||
channel |
|
| ||||
|
|
|
|
|
| |
| 512 MB | 512 MB | 512 MB | 512 MB | 2 GB | |
|
|
|
|
|
|
|
| 1 GB | 1 GB | 1 GB | 1 GB | 4 GB | |
|
|
|
|
|
|
|
| 2 GB | 2 GB | 2 GB | 2 GB | 8 GB | |
|
|
|
|
|
|
|
To remove a memory module:
1Perform the
2Lay the server on its side (components showing).
3If necessary, remove any cables that prevent access to the DIMM slots.
4Locate the memory module you intend to remove.
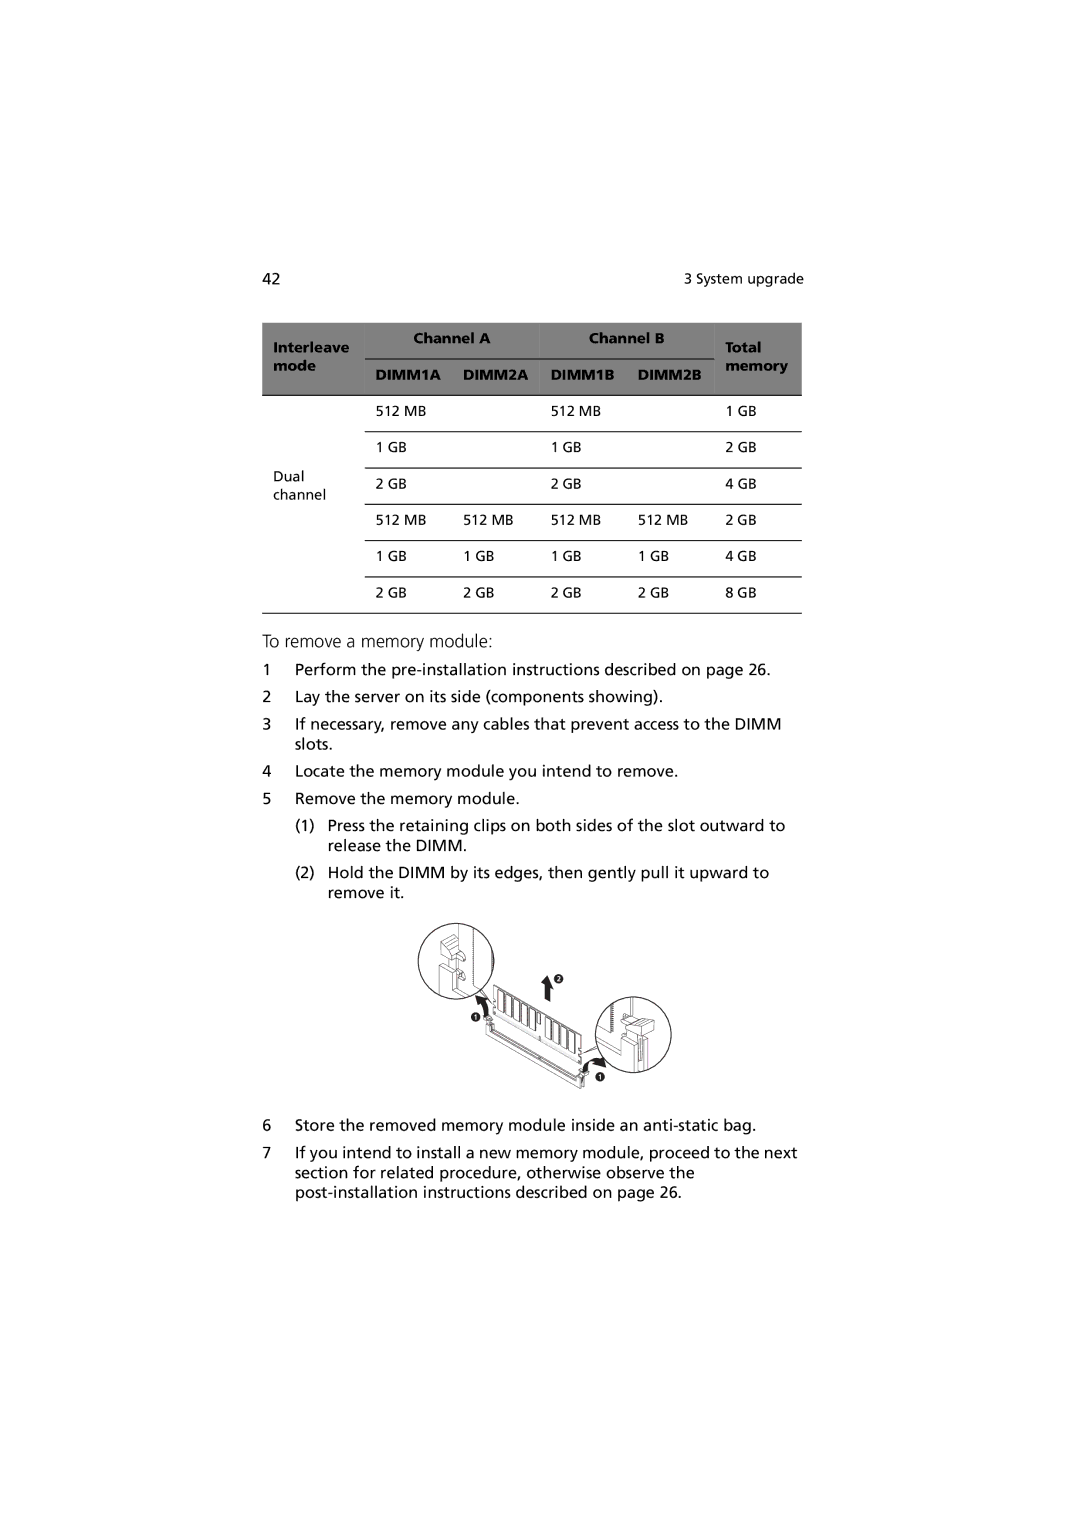
5Remove the memory module.
(1)Press the retaining clips on both sides of the slot outward to release the DIMM.
(2)Hold the DIMM by its edges, then gently pull it upward to remove it.
6Store the removed memory module inside an
7If you intend to install a new memory module, proceed to the next section for related procedure, otherwise observe the