Control Connections
Sensors, triggers, and PCs, oh my. If you’ve gotten this far, you’re really
•Remote IR sensors - These allow you to control your
•Triggers - These allow you to automatically power on connected devices, such as motorized movie screens and connected amplifiers, when the
•RS232 Port - This allows you to control the GFR- 700HD with a home automation system or to up- grade the receiver’s firmware through the RS232 port on your PC.
Remote IR Sensor Connections
1Obtain a remote IR sensor.
•Choose a remote IR sensor from an electron- ics distributor that suits your particular in- stallation needs.
•Install the remote IR sensor according to the manufacturer’s instructions.
3Connect the remote IR sensor’s mono
4Confirm the remote IR sensor is working.
•Conceal the
Screen/Power Trigger Connections
1Using a cable with dual mono
•Common compatible devices include ampli- fiers, motorized screens, and
2Make sure the Main Trigger is enabled in the menu system; see page 33.
• The default setting is on for all inputs.
3Confirm the trigger is working.
•Power on the
•The connected device should power on.
PC Connections
1Contact Adcom for information on the avail-
ability of firmware updates and instructions for implementing them.
2When instructed, use an RS232 cable to connect the RS232 port on the
Media Center & Home Automation Control Systems
1The RS232 port can also be used to control the
•See Discrete Remote Control Commands on pages
Chatper 2 - Connections
|
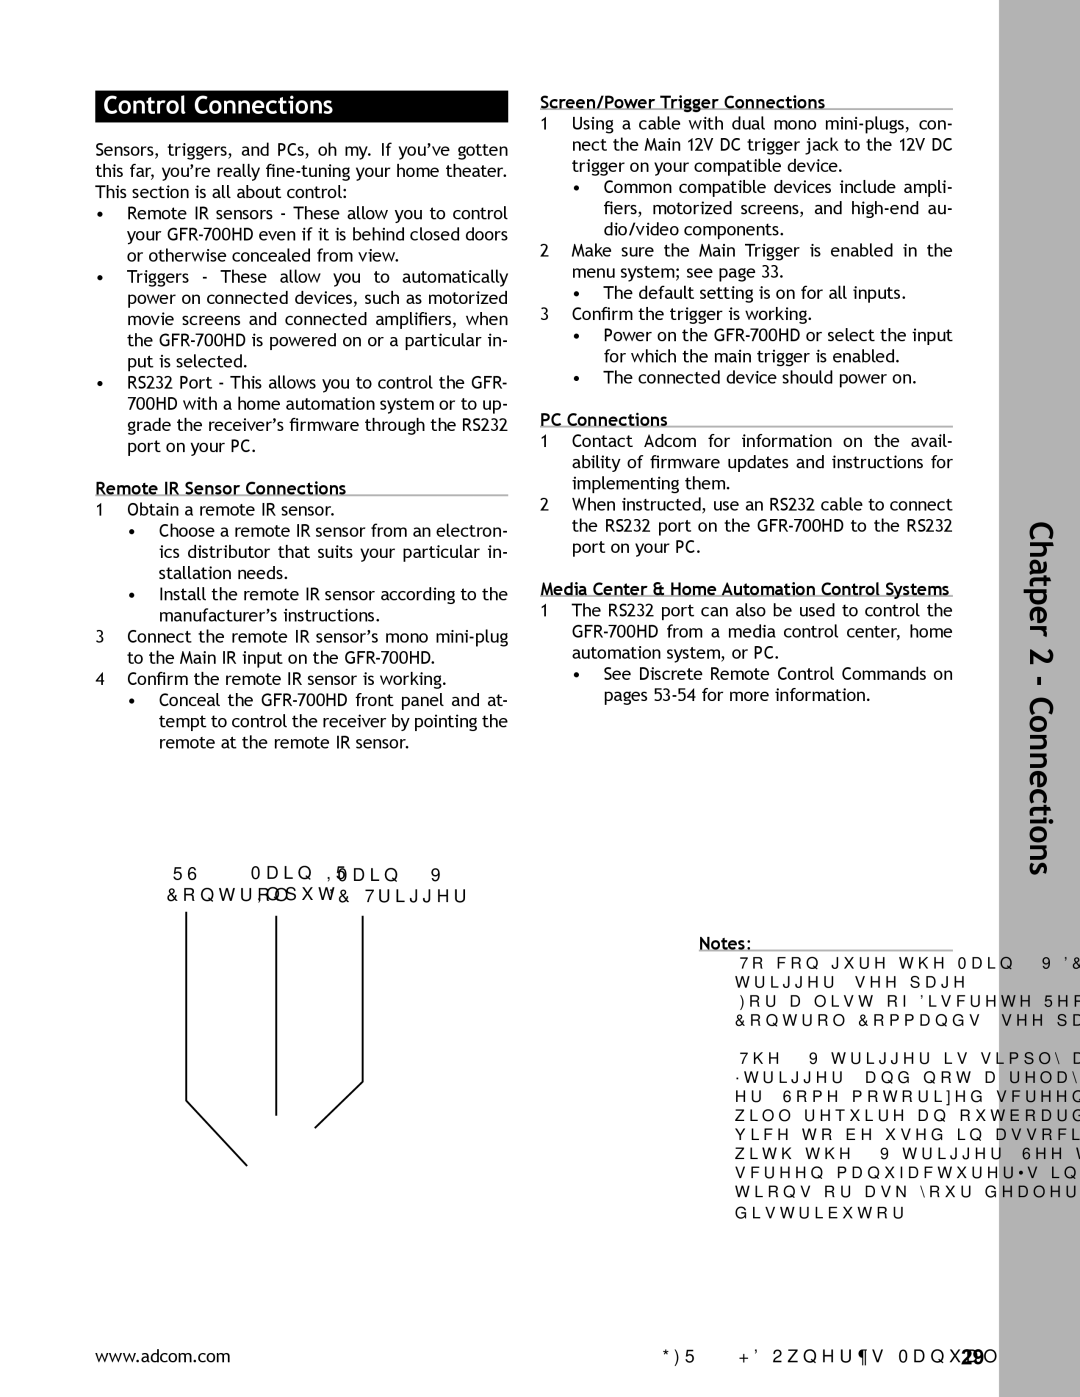
| RS232 | Main IR | Main 12V |
|
| ||
|
| Control | Input | DC Trigger |
|
| ||
| �� |
|
|
|
|
|
|
|
�� | �� |
|
|
|
|
|
|
|
| �� |
|
|
|
|
|
|
|
| �� | �� | �� | � | �� |
| �� | |
|
|
|
|
|
|
|
| |
| �� |
|
|
|
|
|
|
|
�� | �� |
|
|
|
|
|
|
|
| ��� |
|
|
|
|
|
|
|
|
| ������� | �� |
|
|
|
|
|
|
|
|
| �������������������������� |
|
|
|
|
| ��� |
|
|
|
|
|
|
|
|
|
|
| ������ ���� |
| �������������������� |
|
|
| ��� |
|
| ������ | ������ | ������ | ������ |
|
|
| �������������� |
|
|
|
|
|
|
| �� |
|
| �������� �������� ������� | ��������� ��������� | ��������� ��������� | ��������� | ��������� |
|
|
|
| |||||
| �� |
|
| ������������� |
|
|
|
|
|
|
|
|
|
|
|
| |
| �� | ������� | �� |
|
|
| ����� | ����� |
|
|
|
|
|
| |||
|
|
|
|
| �������������� |
|
|
|
| �� |
|
|
|
|
| ������������������������� | |
����� |
|
|
|
|
|
| ����������� | |
|
|
|
|
|
|
| ||
���� | ������� | ������������� |
|
|
| ��������������������������� | ||
Notes:
•To configure the Main 12V DC trigger, see page 33.
•For a list of Discrete Remote Control Commands, see pages
•The 12V trigger is simply a “trigger” and not a relay driv- er. Some motorized screens will require an outboard de- vice to be used in association with the 12V trigger. See the screen manufacturer’s instruc- tions or ask your dealer or distributor.
www.adcom.com | 29 |