Instrument Changes | Model 8904A |
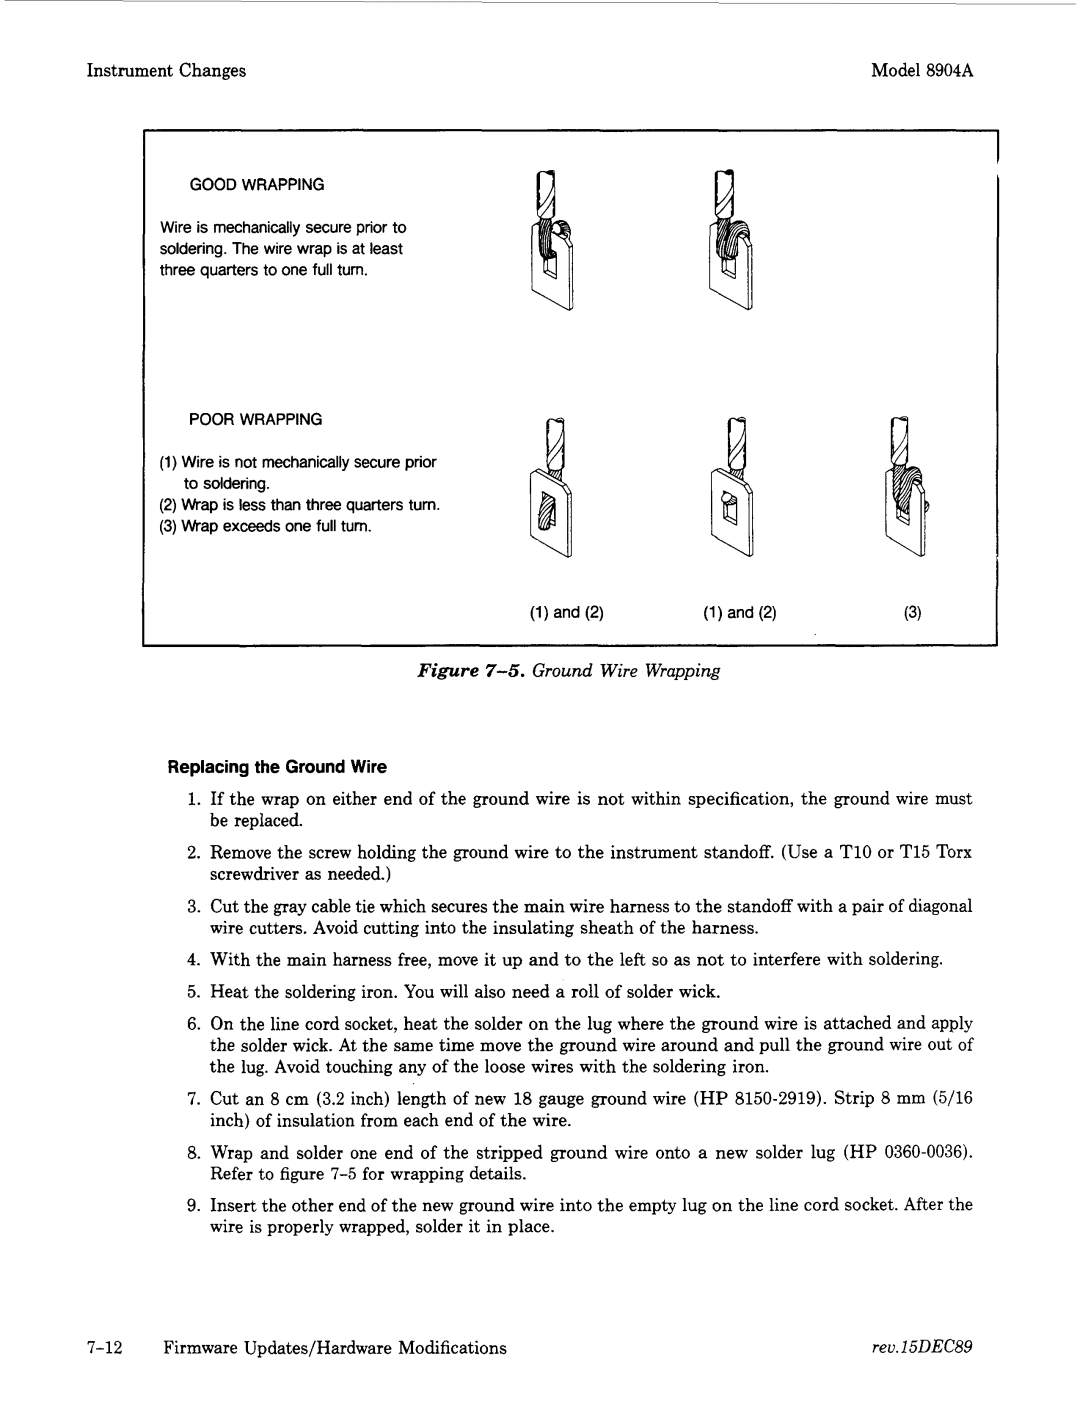
GOOD WRAPPING
Wire is mechanically secure prior to soldering. The wire wrap is at least three quarters to one full turn.
POOR WRAPPING
(1)Wire is not mechanically secure prior to soldering.
(2)Wrap is less than three quarters turn.
(3)Wrap exceeds one full turn.
~~ | ~ | ~~ | _ _ _ _ _ _ _ _ ~ |
Figure 7-5. Ground Wire Wrapping
Replacing the Ground Wire
1.If the wrap on either end of the ground wire is not within specification, the ground wire must be replaced.
2.Remove the screw holding the ground wire to the instrument standoff. (Use a T10 or T15 Torx screwdriver as needed.)
3.Cut the gray cable tie which secures the main wire harness to the standoff with a pair of diagonal wire cutters. Avoid cutting into the insulating sheath of the harness.
4.With the main harness free, move it up and to the left so as not to interfere with soldering.
5.Heat the soldering iron. You will also need a roll of solder wick.
6.On the line cord socket, heat the solder on the lug where the ground wire is attached and apply the solder wick. At the same time move the ground wire around and pull the ground wire out of the lug. Avoid touching any of the loose wires with the soldering iron.
7.Cut an 8 cm (3.2 inch) length of new 18 gauge ground wire (HP
8.Wrap and solder one end of the stripped ground wire onto a new solder lug (HP
9.Insert the other end of the new ground wire into the empty lug on the line cord socket. After the wire is properly wrapped, solder it in place.
Firmware Updates/Hardware Modifications | rev.15DEC89 |