Installing The Module In The Mainframe
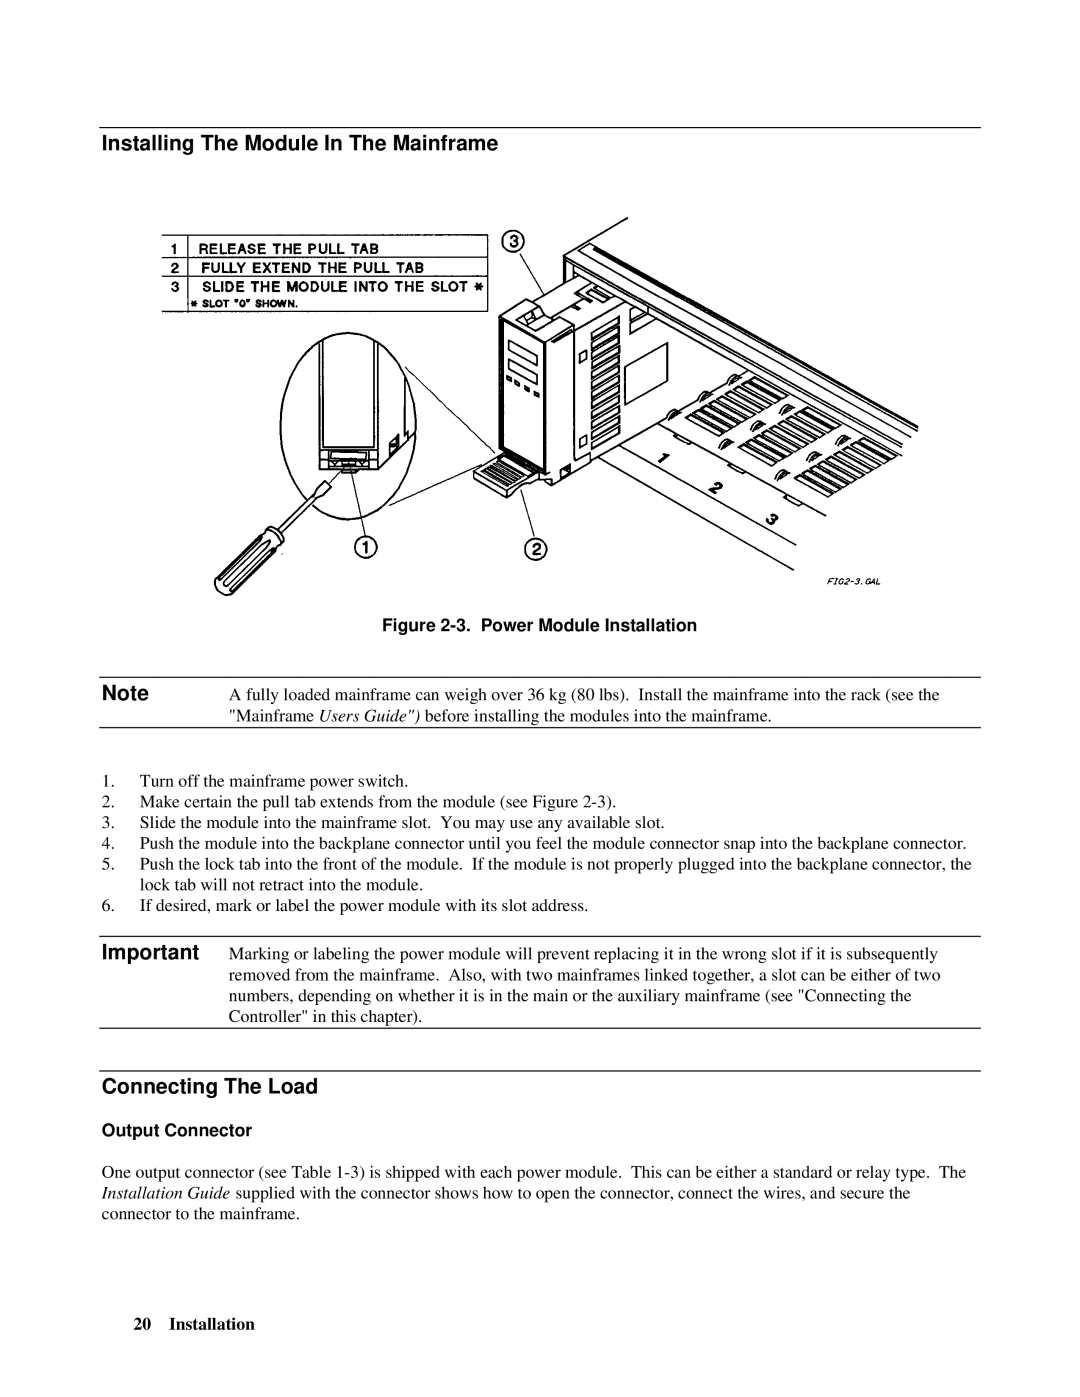
| Figure |
|
|
Note | A fully loaded mainframe can weigh over 36 kg (80 lbs). Install the mainframe into the rack (see the |
| "Mainframe Users Guide") before installing the modules into the mainframe. |
|
|
1.Turn off the mainframe power switch.
2.Make certain the pull tab extends from the module (see Figure
3.Slide the module into the mainframe slot. You may use any available slot.
4.Push the module into the backplane connector until you feel the module connector snap into the backplane connector.
5.Push the lock tab into the front of the module. If the module is not properly plugged into the backplane connector, the lock tab will not retract into the module.
6.If desired, mark or label the power module with its slot address.
Important Marking or labeling the power module will prevent replacing it in the wrong slot if it is subsequently removed from the mainframe. Also, with two mainframes linked together, a slot can be either of two numbers, depending on whether it is in the main or the auxiliary mainframe (see "Connecting the Controller" in this chapter).
Connecting The Load
Output Connector
One output connector (see Table
