Quick Start: Learning How to Make Measurements
Analyzer Front Panel
Analyzer Front Panel
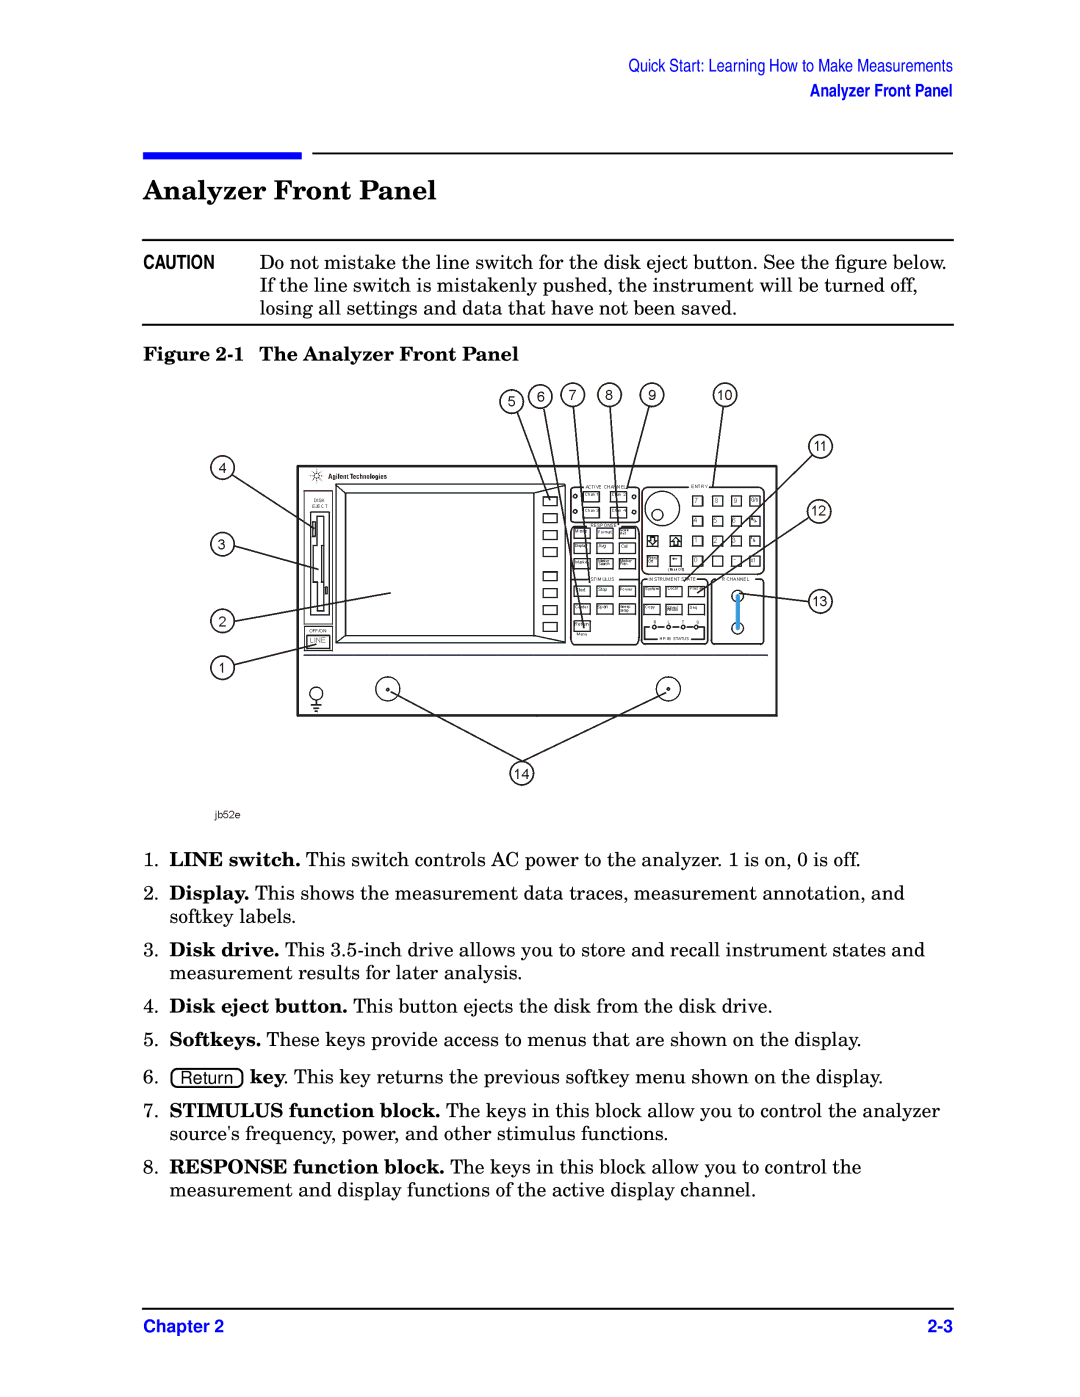
CAUTION Do not mistake the line switch for the disk eject button. See the figure below. If the line switch is mistakenly pushed, the instrument will be turned off, losing all settings and data that have not been saved.
Figure 2-1 The Analyzer Front Panel
1.LINE switch. This switch controls AC power to the analyzer. 1 is on, 0 is off.
2.Display. This shows the measurement data traces, measurement annotation, and softkey labels.
3.Disk drive. This
4.Disk eject button. This button ejects the disk from the disk drive.
5.Softkeys. These keys provide access to menus that are shown on the display.
6.![]() Return
Return![]() key. This key returns the previous softkey menu shown on the display.
key. This key returns the previous softkey menu shown on the display.
7.STIMULUS function block. The keys in this block allow you to control the analyzer source's frequency, power, and other stimulus functions.
8.RESPONSE function block. The keys in this block allow you to control the measurement and display functions of the active display channel.
Chapter 2 |
