SPECIFICATIONS. . . . . . . . . . . . . . . . . . . . . . . . . . . . . . . . . . . . . . . . . . . . . . . . . . . . 34
TROUBLESHOOTING GUIDE. . . . . . . . . . . . . . . . . . . . . . . . . . . . . . . . . . . . . . . . . .35
MD GUIDE MESSAGES. . . . . . . . . . . . . . . . . . . . . . . . . . . . . . . . . . . . . . . . . . . . . . . 36
PARTS INDEX. . . . . . . . . . . . . . . . . . . . . . . . . . . . . . . . . . . . . . . . . . . . . . . . . .Back cover
|
|
|
|
| PREPARATIONS | pg. 3 |
|
|
|
|
|
CONNECTIONS
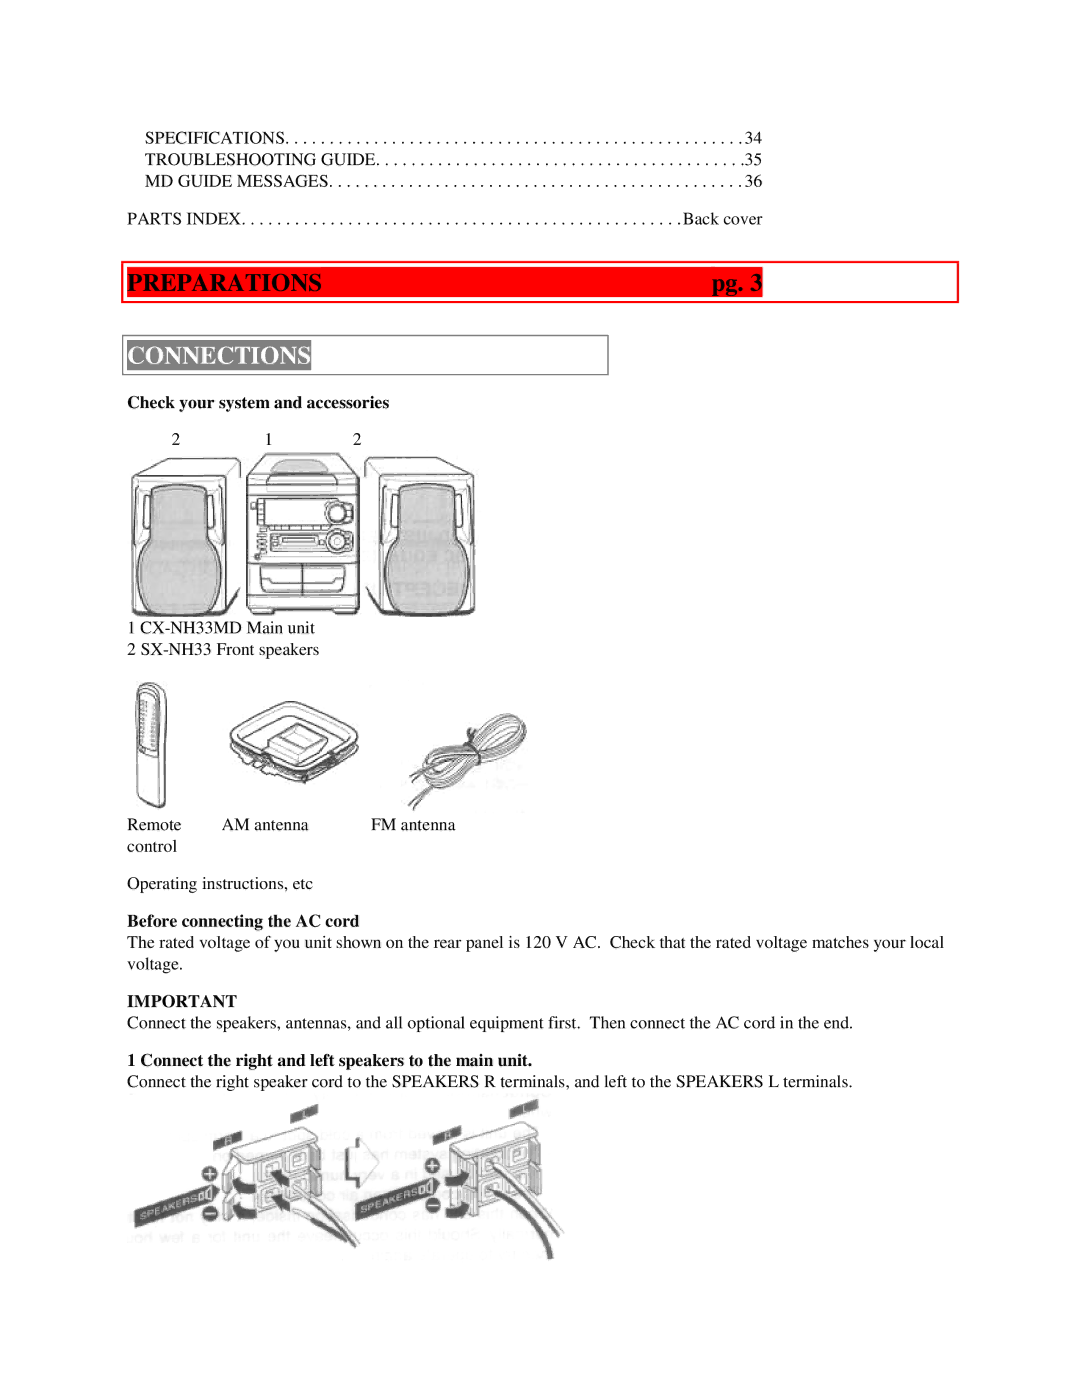
Check your system and accessories
212
1
2
Remote | AM antenna | FM antenna |
control |
|
|
Operating instructions, etc
Before connecting the AC cord
The rated voltage of you unit shown on the rear panel is 120 V AC. Check that the rated voltage matches your local voltage.
IMPORTANT
Connect the speakers, antennas, and all optional equipment first. Then connect the AC cord in the end.
1 Connect the right and left speakers to the main unit.
Connect the right speaker cord to the SPEAKERS R terminals, and left to the SPEAKERS L terminals.