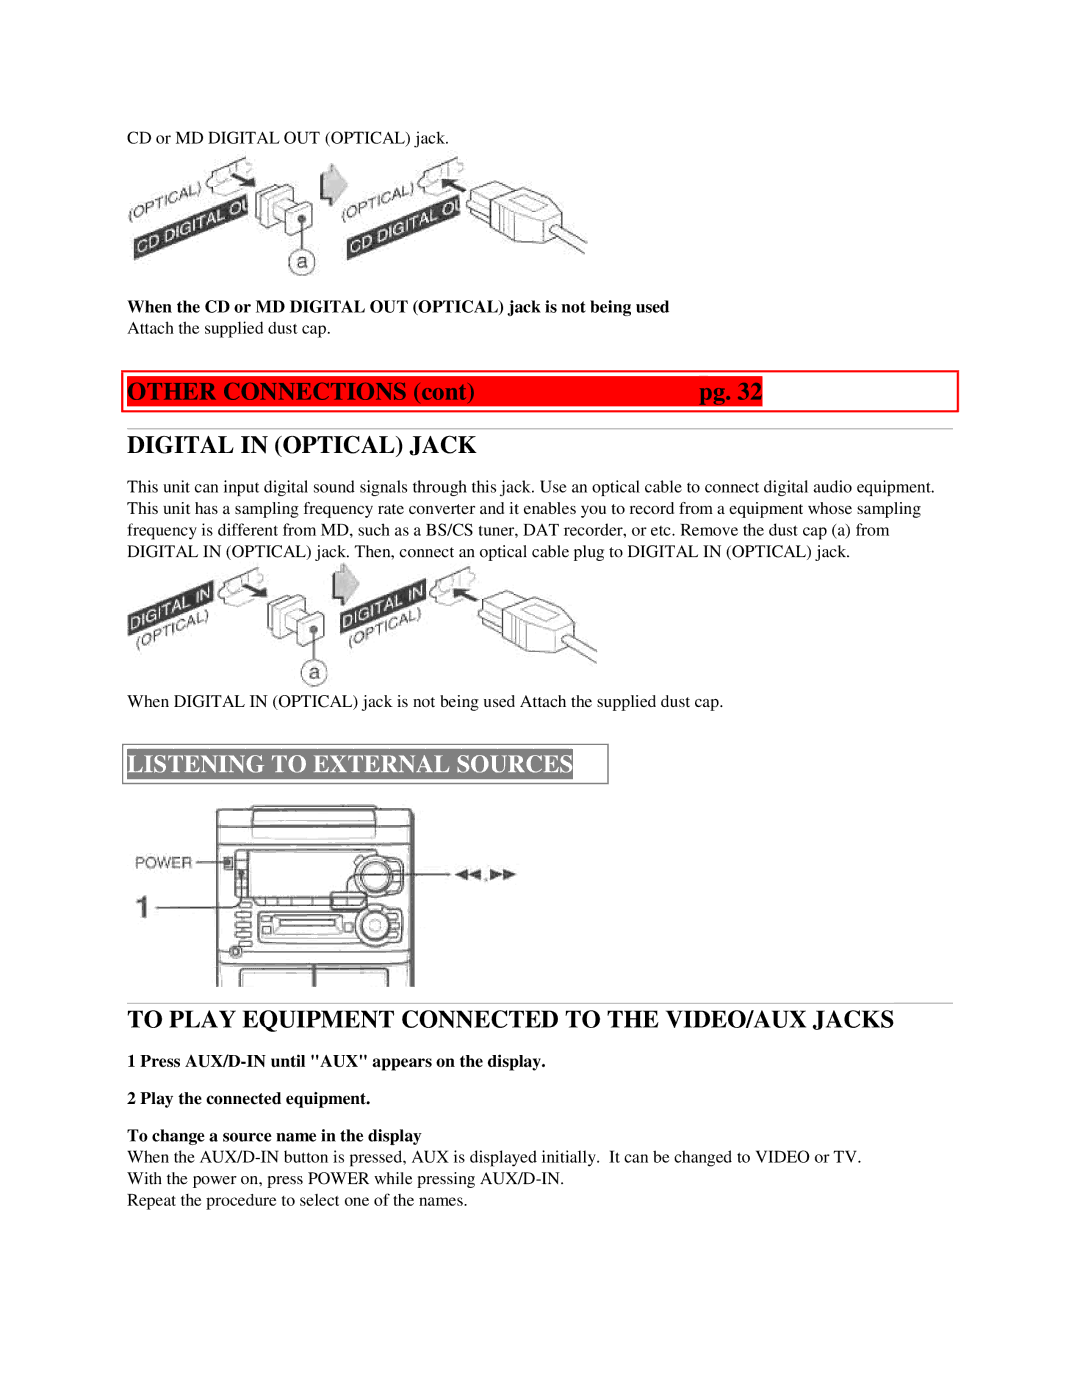
aiwa
XR-H33MD
ENGLISH pg
MD/CD STEREO SYSTEM
PRECAUTIONS
Installation
Electric Power
Owners record
PRECAUTIONS cont.pg
TABLE OF CONTENTS
3 AC power cord
Maintenance
CLOCK AND TIMER
RADIO RECEPTION
TAPE PLAYBACK
CD PLAYING
PREPARATIONS
CONNECTIONS
Check your system and accessories
Before connecting the AC cord
PREPARATIONS cont
To position the antennas FM feeder antenna
AM loop antenna
To stand the AM antenna on a surface
REMOTE CONTROL
CONNECTING AN OUTDOOR ANTENNA
When to replace batteries
To use SHIFT on the remote control
BEFORE OPERATION
To cancel DEMO mode
To turn the unit on
To turn the unit off
AUDIO ADJUSTMENTS
VOLUME
SOUND
SUPER T-BASSSYSTEM
MANUAL TUNING
RADIO RECEPTION
To cancel the selected mode
To select with the remote control
PRESETTING STATIONS
RADIO RECEPTION cont
When an FM stereo broadcast contains noise
To change the AM tuning interval
PRESET NUMBER TUNING
Selecting a preset number on the main unit
To clear a preset station
2 Press theSET button to store the station
TAPE PLAYBACK
BASIC OPERATIONS
1 Press the TAPE button and press the
EJECT mark to open the cassette holder
TAPE PLAYBACK cont
CONTINUOUS PLAY
When tapes are loaded in both decks
To set the tape counter to
BASIC OPERATIONS
CD PLAYINGpg
About cassette tapes
PLAYING DISCS
LOADING DISCS
To play all discs in the disc compartment, press
CD PLAYING cont.pg. RANDOM/REPEAT PLAY
Selecting a track with the remote control
To check the remaining time
Replacing discs during play
PROGRAMMED PLAY
Press the RANDOM/REPEAT button repeatedly
MD PLAYING pg
BASIC OPERATIONS
4Repeat steps 2 and 3 to program other tracks
5Press the button to start play
1 Press the MD button
3 Press
MD PLAYING contpg. RANDOM/REPEAT PLAY
To select a track with the remote control
To play a disc at double speed
To check the remaining time
Page
TAPE RECORDING
BASIC RECORDING
To clear the program
To add tracks to the program
INSERTING BLANK SPACES
RECORDING cont.pg
DUBBING A TAPE MANUALLY
To record from a connected source
DUBBING THE WHOLE TAPE
1Press TAPE
To stop dubbing
1Press TAPE
RECORDING cont
AI EDIT RECORDING
3 Press the SYNC DUB button to start recording
To stop dubbing
RECORDING cont
To stop the recording
To clear the edit program
Time on cassette tapes and editing time
1 Insert the tape into deck
PROGRAMMED EDIT RECORDING
2Press the CD button and load the CDs
MD RECORDING
RECORDING A WHOLE CD
To stop recording
To change the program of each side
Display information during recording
To stop recording
Registering index marks automatically
RECORDING ONLY ONE TRACK OF A CD
MD RECORDING cont
AUTO FIRST TRACKS RECORDING OF CDS
To record on a previously recorded MD
3 Press the CDMD button twiceto start recording
PROGRAMMED RECORDING OF CDS
Display information during recording
RECORDING THREE CDS CONTINUOUSLYz
MD RECORDING cont
5 Repeat step 4 to program other tracks
6 Press the CDMD button to start recording
5 Within 10 seconds, press the ENTER button
6 Press zMD REC
7 Press the to start recording
To add index marks during recording
RECORDING FROM A TAPE, THE
RADIO OR CONNECTED EQUIPMENT
MD RECORDING cont
3 Press the MODE button
EXTENDED RECORDING - MONAURAL
RECORDING
MD RECORDING cont
6 Press the zMD REC button
3 Press MODE three times
5 Within 10 seconds, press the ENTER button
6 Press MODE twice
8 Within 10 seconds, press the ENTER button
EXTENDED TIMER RECORDING
WHAT IS AN MD MINIDISC?
TYPE OF MD
MD RECORDING cont
THE LIMITATIONS OF MD
Quick random access
Track numbers may not be registered properly
Digital inputs may be acceptable
MD EDITpg
REGISTERING THE DISC TITLE AND TRACK TITLE
REGISTERING THE DISC TITLE
4 Enter a letter, number or symbol
REGISTERING THE TRACK TITLES
6 Press ENTER
MD EDITING cont
DIVIDING A TRACK
4 Enter a letter, number of symbol
3 Within 10 seconds, press the ENTER button
1 Press the MD button and insert an MD
4 Within 10 seconds, press ENTER
6 Press ENTER
4 Press
COMBINING TWO TRACKS
MD EDITING cont
1 Press the MD button and insert an MD
4 Within 10 seconds,press the ENTER button
1 Press the MD button and insert an MD
CHANGING THE ORDER OF THE TRACKS
4 Within 10 seconds,press the ENTER button
ERASING TRACKS
ERASING ALL TRACKS ON A DISC
ERASING A SINGLE TRACK
MD EDITING cont
CLOCK AND TIMER
SETTING THE CLOCK
1 Press the MD button and insert an MD
4 Within 10 seconds,press the enter button
SETTING THE TIMER
To switch to the 24-hourstandard
To display the current time
If the clock display flashes
CLOCK AND TIMER cont
SETTING THE TIMER RECORDING
To cancel timer standby mode temporarily
Using the unit while the timer is set
SETTING THE SLEEP TIMER
CLOCK AND TIMER cont
5 Prepare the source
1 Press SLEEP while pressing SHIFT
CONNECTING OPTIONAL EQUIPMENT
OTHER CONNECTIONS
VIDEO/AUX JACKS
CD DIGITAL OUT /MD DIGITAL OUT OPTICAL JACKS
OTHER CONNECTIONS cont
DIGITAL IN OPTICAL JACK
LISTENING TO EXTERNAL SOURCES
1Press AUX/D-INuntil AUX appears on the display
CARE AND MAINTENANCE
GENERAL
To clean the cabinet
To clean the heads and tape paths
SPECIFICATIONS
GENERAL cont
Care of tapes
Care of MDs
Speaker system SX-NH33
TROUBLESHOOTING GUIDE
TUNER SECTION
pg.35
GENERAL cont
CASSETTE DECK SECTION
CD PLAYER SECTION
MD RECORDER SECTION
The tape does not run
MD GUIDE MESSAGES
To reset
GENERAL cont
PARTS INDEX
back cover
GENERAL cont
For assistance and information