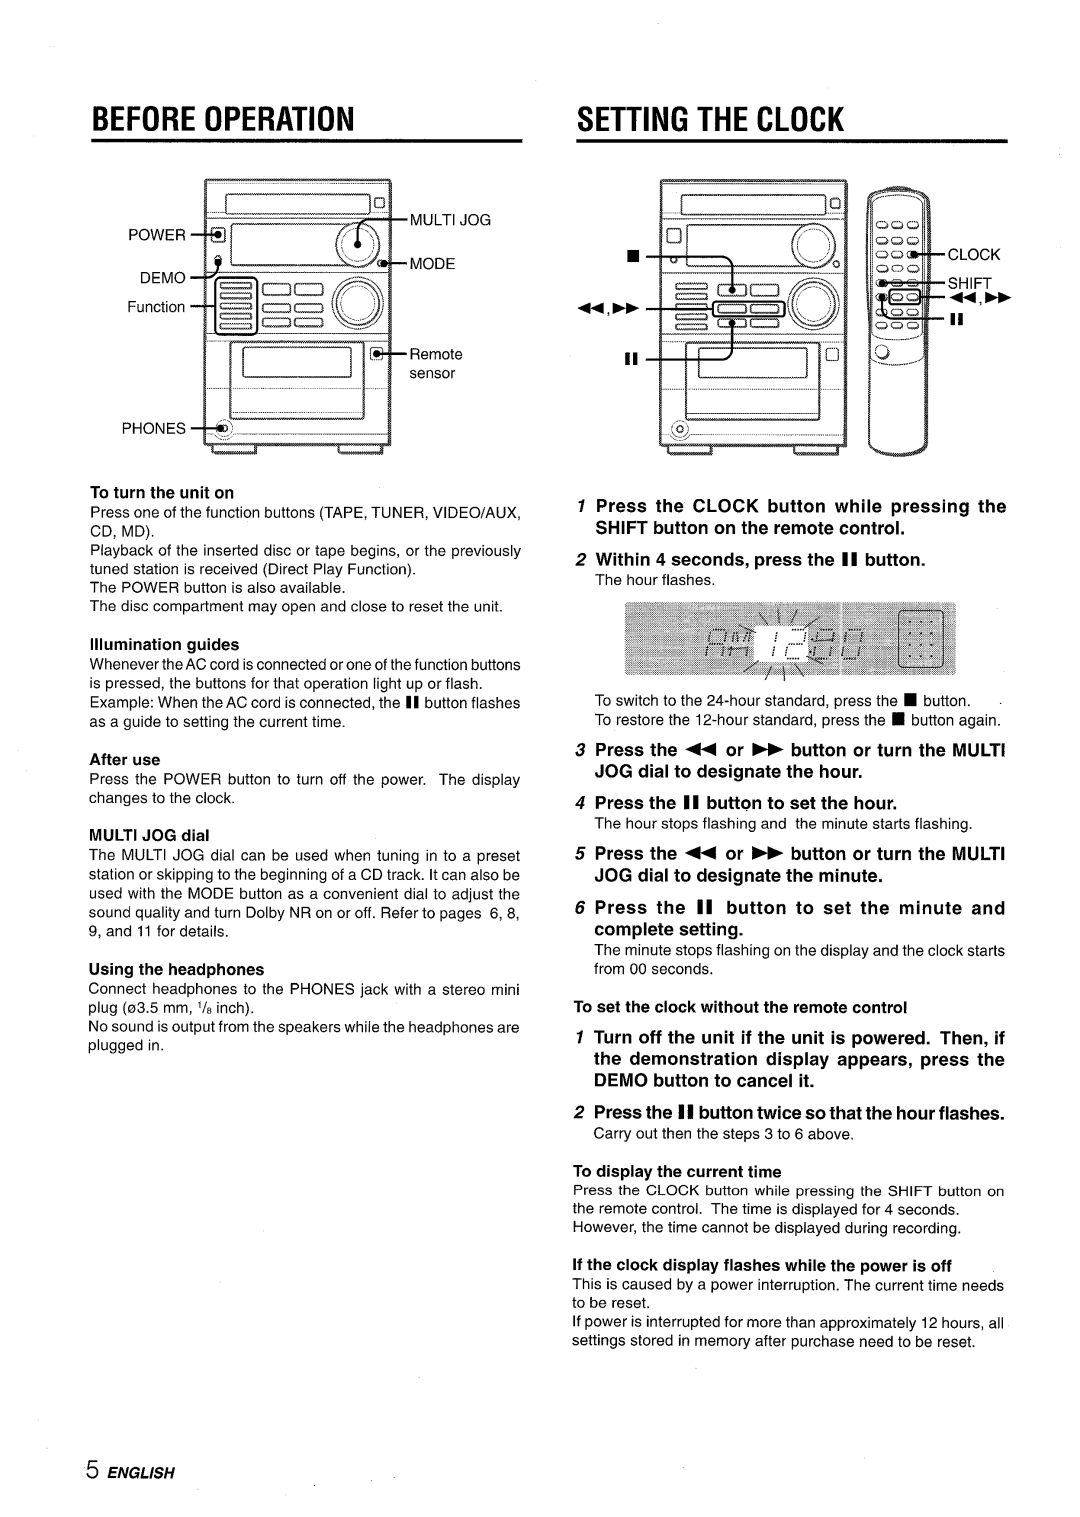
United States and Puerto Rico
call toll free I-800 -BUY-AIWA
For assistance and information
aiiif
Installation
PRECAUTIONS
Explanation of Graphical Symbols
Electric Power
TIMER
TABLE OF CONTENTS
Check your system and accessories
7t%&u#waAv#&uashf?tzsm
CONNECTIONS
Before connecting the AC cord
To cancel the demonstration
3 Connect the AC cord to an AC outlet
When to replace the batteries
CONNECTING AN OUTDOOR ANTENNA
REMOTE CONTROL
Using the remote control
SHIFT button on the remote control
SETTING THE CLOCK
Using the headphones
6 Press the II button to set the minute and complete setting
ENGLISH6
A13JUSTINGTHEVOLUME
SOUND ADJUSTMENT DURING RECORDING
~BIJIJsTING THE SOUND
To change the AM tuning interval
MANUAL TUNING
When an FM stereo broadcast contains noise
1 Press the TUNER/BAND button repeatedly to select the desired band n
2 Press the numbered buttons to select a preset number
PFIESETTING STATIONS
PRESET NUMBER TUNING
Other methods to tune in to a preset station
OPERATION
To start play when the power is off Direct Play
Selecting a track with the remote control
LOADING DISCS
REIPEAT PLAY
on the remote control
RANDOM PLAY
PROGRAMMED PLAY
PLAYING BACK A TAPE
To start play when the power is off Direct Play Function
INSERTING TAPES
Use Type I normal, Type II high/CrOd OrTwe Iv metal
About cassette tapes
When the D indicator on the display is appearing, press the
MUSIC SENSOR
DOLBY NR system
BASIC RECORDING
To start recording with the remote control
1 ““”’”””!’ J
INSERTING BLANK SPACES
4 Press the numbered buttons to designate the tape length
Al EDIT RECORDING
3 Press the EDIT/CHECK button once while pressing the SHIFT button
5 First press the @ button and then press the
6 Repeat step 5 for the rest of the tracks for side A
PROGRAMMED EDIT RECORDING
3,7 4,5
3 Press the EDIT/CHECK button twice while pressing the SHIFT button
2 esignate the hour of the timer-on time by
SETTING THE TIMER
TIMER RECORDING
3 m......-.-.’
To check the time remaining until the power is turned off
SETTING THE SLEEP TIMER
CONNECTING OPTIONAL EQUIPMENT
To cancel the sleep timer
To clean the heads and tape paths
CARE AND MAINTENANCE
To clean the cabinet
LISTENING TO EXTERNAL SOURCES
AM tuner section Tuning range Usable sensitivity Antenna
SPECIFICATIONS
Main unit XR-M35 FM tuner section Tuning range
Amplifier section Power output Total harmonic distortion Inputs
TROUBLESHOOTING GUIDE
PARTS INDEX
ENGLISH20
PRECAUCIONES
ADVERTENCIA
1 ESPANOL
SONIDO
INDICE
PREPARACIONES
RECEPCION
7 Conecte Ios cables del altavoz a la unidad
CONEXIONES
3 Conecte el cable de alimentacion de C.A. a una
3 ESPANOL
Para conectar otro equipo optional + pagina
CCNEXION DE UNA ANTENA EXTERIOR
CONTROL REMOTO
ESPANOL
rr”’” ‘“”””’”’’”””’””’”””””””””””””””””””””-”
ANTES DE LA OPERACION
DEL RELOJ
1 Presione el boton CLOCK mientras presiona el
REALZAR SONIDOS AGUDOS
AJWTE DEL VOLUMEN
AJUSTE DEL SONIDO
REALZAR SONIDOS GRAVIES
Para buscar rapidamente una emisora Busqueda Automatic
SINTONIZACION MANUAL
2 Presione el boton ++ 0- para seleccionar una emisora
Cuando una emision en FM estereo contenga ruido
1 Presione elbotonTUNER/BAND para seleccionar
PREAJUSTE DE EMISORAS
SINTONIZACION MEDIANTE NUMERO DE PREAJUSTE
una banda y presione el boton + o ›~ para seleccionar una emisora
REPRODUCTION DE UN DISCO
OPERACION
INTRODUCTION DE UN DISCO
de la etiqueta hacia arriba y cierre el compartimiento
REPROD!JCCION PROGRAMADA
REPRODIJCCION ALEATORIA
REPETITION DE LA REPRODUCC16N
en modo de
2 Presione el boton + para iniciar la reproduction
INSERCION DE CINTAS
REPRODUCTION DE UNA CINTA
@l”m~
Wanda, aparezca el indicador + en la pantalla, presione el
SENSOR MUSICAL
Cuanda, aparezca e! indicador D en la pantalla, presione el
Acerca de Ias cintas de casete
GRABACION BASICA
INSERCION DE ESPACIOS EN BLANCO
1 Inserte la cinta que vaya a grabar en la pletina
que se visualice “CD” y cargue un disco
GRABACION CON EDICION Al
2 Presione el boton CD de la unidad principal para
bot6n SHIFT
continuation el boton E antes de que pasen
GRABACION CON EDICION PROGRAMADA
3,7 4,5 3,7M
6 Repita el paso 5 para el resto de las pistas de la cara A
1,2,3,42,4
Para cancelar el modo de standby del telmporizador temporalmente
AJUSTE DEL TEMPORIZADOR
GRABACION CON EL TEMPORIZADOR
CONEXION DE UN EQUIPO OPCIONAL
Para cancelar el temporizador de apagado
AJUSTE DEL TEMPORIZADOR DE APAGADO
TOMAS VI DEO/AUX Y MD
~CIUIDADO.Y MANTENIMIENTO
1 ~G=/ c‘’
ma L
POWER Lam
Unidad principal XR-M35
PRECAUTION
ESPECIFICACIONES
Seccion del sintonizador de FM
El sonido es asimetrico o no alcanza el volumen suficiente
Glh PARA LA SOLUCION DE PROBLEMAS
Ocurre un error en la pantalla o un mai funcionamiernto
Para resetear la unidad
AVERTISSEMENT
Explication des symboles
Installation
5 Penetration d’objets et de liquide- Veillez a ce qu’aucunobjet
+?&.@@@@@g&&@&g&&@4@
Veriliei! votre chaine et ses accessoires
DES MATIERES
W?t --ien
1 Connectez Ies cordons des haut-parleurs a I’unite principal
CONNEXIONS
Avant de connecter Ie cordon secteur
2 Connectez Ies antennes fournies
Utilisation de la telecommande
TkLECOMMANDE
Pour installer l’antenne AM sur une surface
CONNEX1ON D’UNE ANTENNE EX@RIEIJRE
REGLAGE DE L’HORLOGE
Pour regler I’horloge saris la telecommande
AVANT L’UTILISATION
Pour aliumer I’appareil
ACCENTUATION DES AIGUS
REGLAGE DU VOLUME
REGLAGE IN SON
ACCENTUATION DES GRAVES
2“ w - J
Lorsque vous utilisez la telecommande, appuyez plusieurs
ACCORD MANUEL
1 Appuyez plusieurs foissur latouche TUNER
ACCORD SUR LES NUMEROS PRkREGLES
Autres faqons de selectionner une station prereglee
PRfF1~GLAGE DES STATIONS
seleclionrner une bande, puis appuyez sur la
CHARGEMENT DU DISCWE
Selection d’une piste avec la telecommande
UTILISATION
LECTURE D’UN DISQUE
LECTURE REPETEE
eur la Itouchr? SHIFT sur la telecommande
LECTURE ALEATOIRE
L.ECTIJRE PROGRAMMED
LECTURE D’UNE CASSETTE
EJECT u““”””””””’u””””’””
@“E3q
INSERTION DES CASSETTES
Au sujet des cassettes
13ETECTEUR DE IVIUSIQUE
Quand 11’indicateur appara~t sur I’affichage, appuyez sur
Systeme de reduction du bruit DOLBY NR
3 Appuyez a plusieurs reprises sur la touche MODE
ENREGISTREMENT DE BASE
INSERTION D’ESPACES VIDES
5 Appuyez sur la touche pour commencer I’enregistrement
Appluyez une fois sur la touche EDIT/CHECK tout
ENRKWTREMENT AVEC NIONITAGE Al
MODE et Ie cadran MULTI JOG. Consultez la
en a,ppuyant sur la touche SHIFT
8 Appuyez sur la touche puis sur la touche
ENREGISTREMENT AVEC MONTAGE PROGRAMME
5 Appuyez sur Ies touches numerotees afin de programmer une piste
clans Ies 2 secondes qui suivent afin de commencer I’enregistrement
Appuyezsur latouche TIMER touten appuyantsur la toucheSHIFT
I’appa-reil apres avoir regle Ie volume et la tonalit6
6 Appuyez sur la touche POWER afin d’allumer
REGLAGE DE LA MIIWTERIE
CONNEXION D’UN APPAREIL
REGLAGE DE LA MINUTERIE DE
SOMMEILOPTIONNEL
PRISES VIDEO/AUX ET PRISES MD
Soin des disques
FCOIMTE DE sOURcEs EXTERNES
2 Utilisez I’appareil connecte
Pour nettoyer Ies t&es de lecture et Ies voies de defilement la bande
Specifications
SPECIFICATIONS
Rapport signal / bruit
DOLBY NR
GENERALITES II n’y a pas de son
MJIIIIE DE DEPISTAGE DES IIEFAUTS
INDEX
Le son wt inaudible ou bien I’appareil s’eteint brusquoment
Page
Page
Printed in China