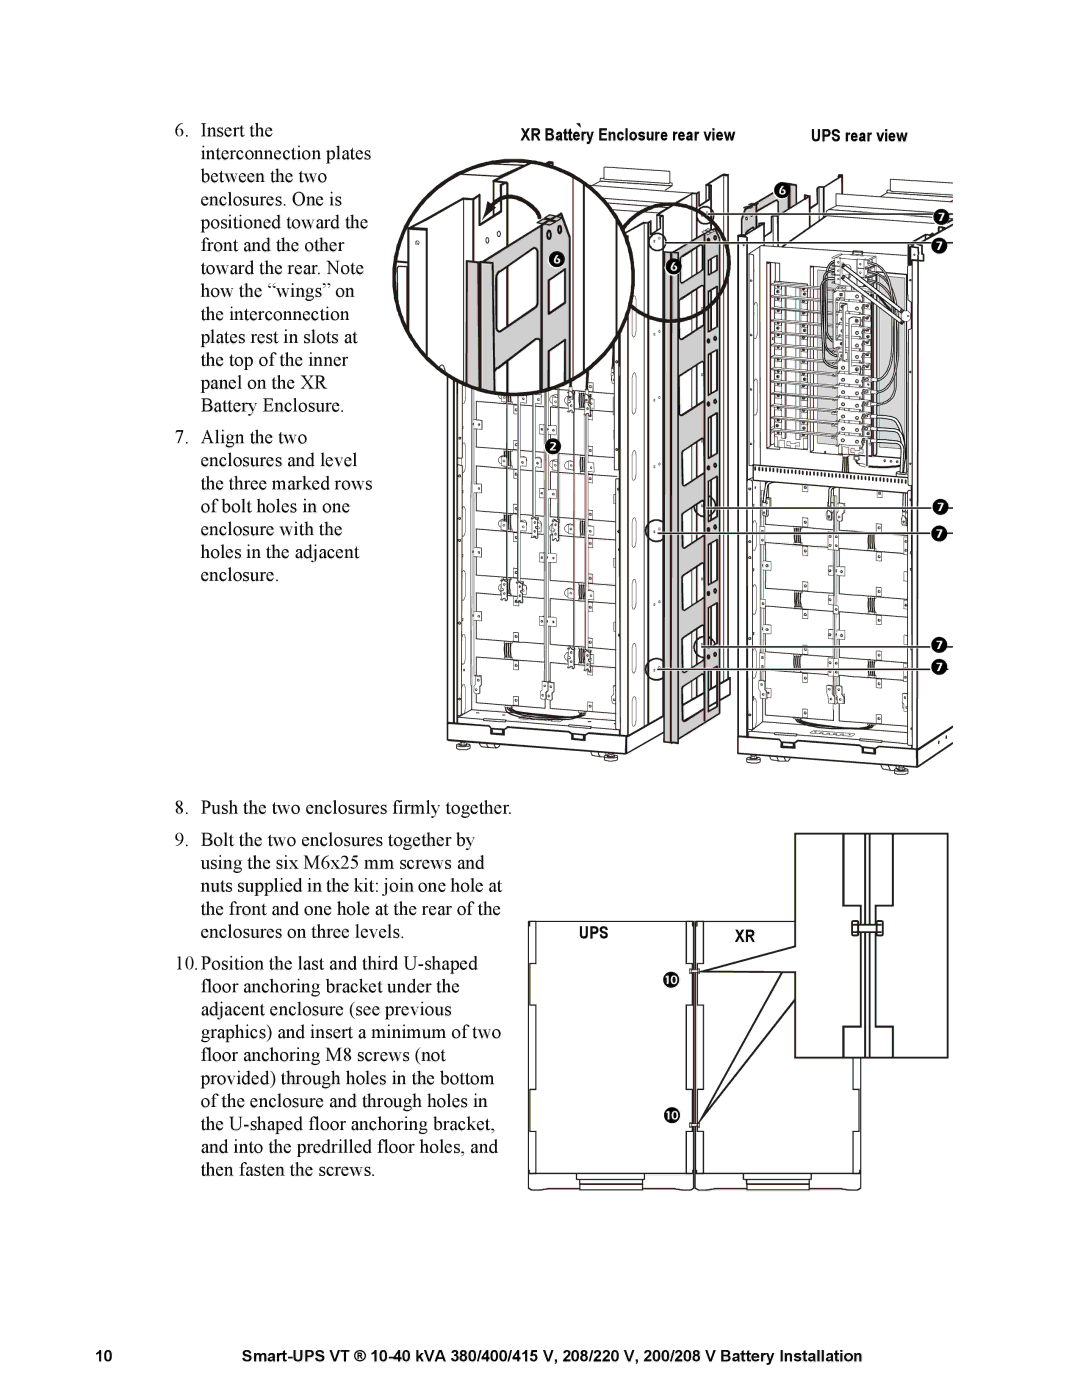
6. Insert the | XR Battery Enclosure rear view | UPS rear view | |
interconnection plates |
|
|
|
between the two |
|
| |
enclosures. One is |
|
| |
|
|
| |
positioned toward the |
|
| |
front and the other | |
| |
toward the rear. Note | |
| |
|
| ||
how the “wings” on |
|
|
|
the interconnection |
|
|
|
plates rest in slots at |
|
|
|
the top of the inner |
|
|
|
panel on the XR |
|
|
|
Battery Enclosure. |
|
|
|
7. | Align the two | |
| enclosures and level | |
|
| |
| the three marked rows |
|
| of bolt holes in one | |
| enclosure with the | |
| holes in the adjacent |
|
| enclosure. |
|
|
| |
|
| |
8.Push the two enclosures firmly together.
9.Bolt the two enclosures together by using the six M6x25 mm screws and nuts supplied in the kit: join one hole at
the front and one hole at the rear of the |
|
|
|
|
|
|
|
|
|
|
enclosures on three levels. | UPS |
|
|
|
|
|
| XR | ||
10.Position the last and third |
|
| |
|
|
|
|
|
| |
floor anchoring bracket under the |
|
|
|
|
|
|
|
| ||
|
|
|
|
|
|
|
|
|
| |
adjacent enclosure (see previous |
|
|
|
|
|
|
|
|
|
|
graphics) and insert a minimum of two |
|
|
|
|
|
|
|
|
|
|
floor anchoring M8 screws (not |
|
|
|
|
|
|
|
|
|
|
provided) through holes in the bottom |
|
|
|
|
|
|
|
|
|
|
of the enclosure and through holes in |
|
| | |||||||
the |
|
| ||||||||
|
|
|
|
|
|
|
|
|
| |
|
|
|
|
|
|
|
|
|
| |
and into the predrilled floor holes, and |
|
|
|
|
|
|
|
|
|
|
then fasten the screws. |
|
|
|
|
|
|
|
|
|
|
|
|
|
|
|
|
|
|
|
|
|
10 |
