Camera Setting
After the hardware has been installed, insert the attached CD in the computer and execute IP FINDER.EX following the steps below to search and change the IP address of the camera.
1.Start the machine.
Execute the IP Finder.exe from the attached CD.
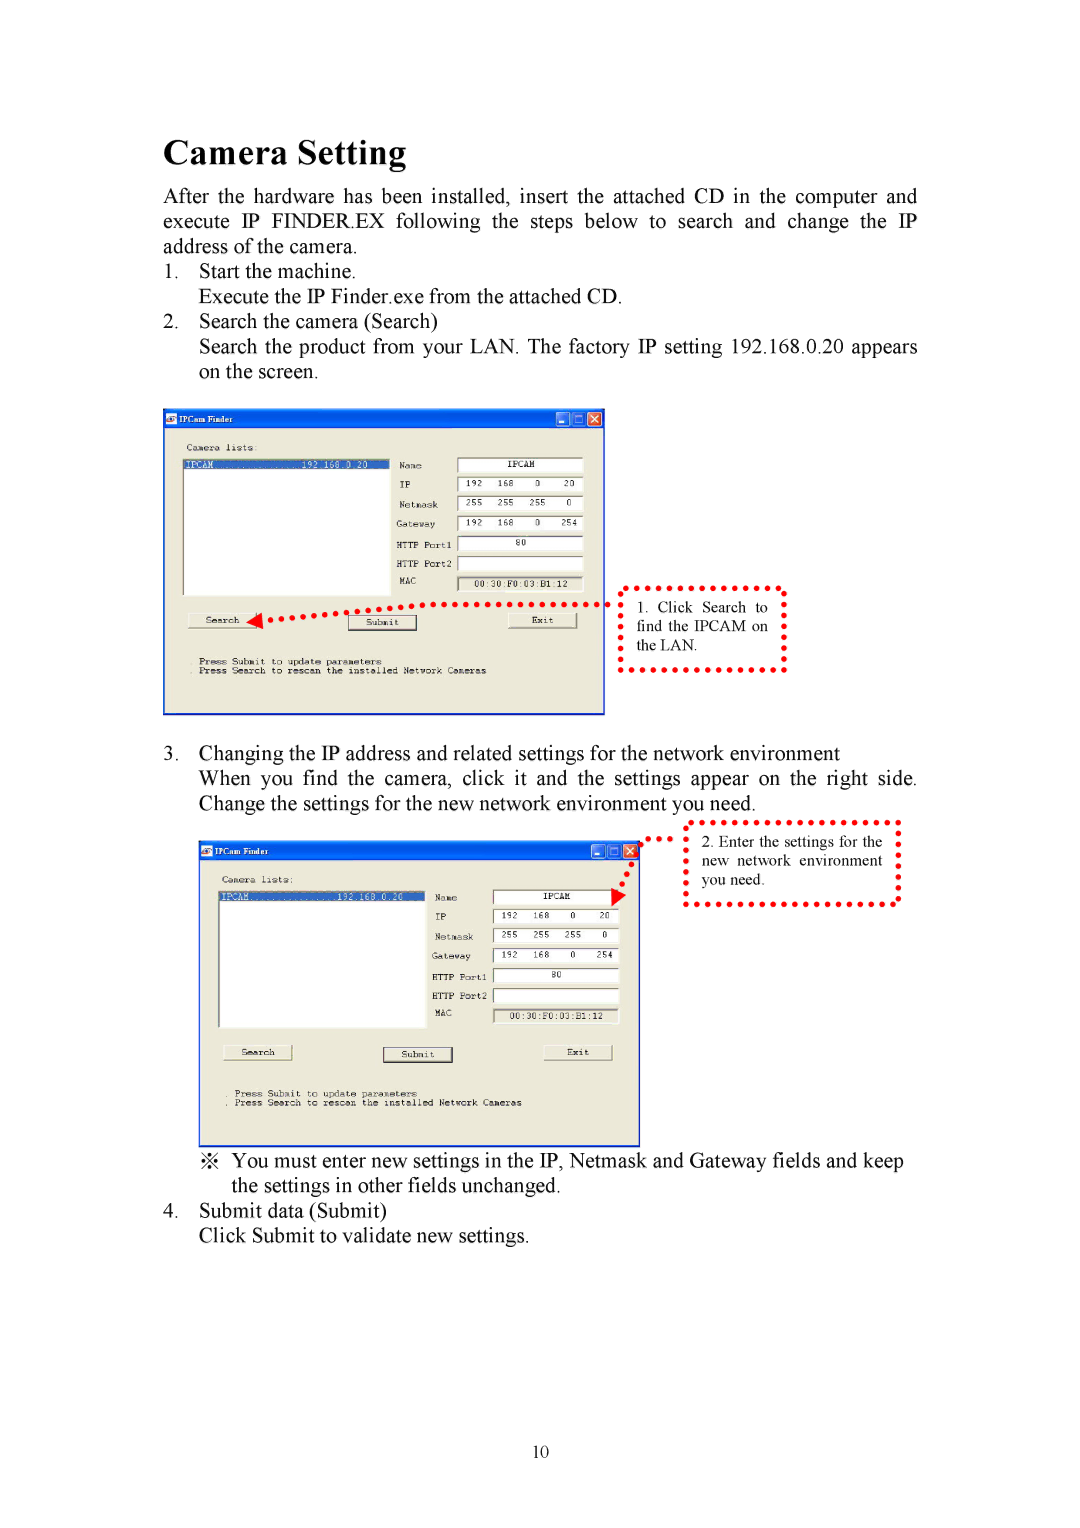
2.Search the camera (Search)
Search the product from your LAN. The factory IP setting 192.168.0.20 appears on the screen.
1. Click Search to find the IPCAM on the LAN.
3.Changing the IP address and related settings for the network environment
When you find the camera, click it and the settings appear on the right side. Change the settings for the new network environment you need.
2.Enter the settings for the new network environment you need.
※You must enter new settings in the IP, Netmask and Gateway fields and keep the settings in other fields unchanged.
4.Submit data (Submit)
Click Submit to validate new settings.
10