INSTALLATION | INSTALLATION |
6Connect the power adapter to the telephone.
Use only the power adapter provided with this product. To obtain a replacement, call 1 800
Plug one end of the power adapter into the jack labeled ADAPTER on the back of the phone.
7Check for dial tone.
Lift the handset and listen for a dial tone. If you cannot hear a dial tone, turn to IN CASE OF DIFFICULTY in this manual.
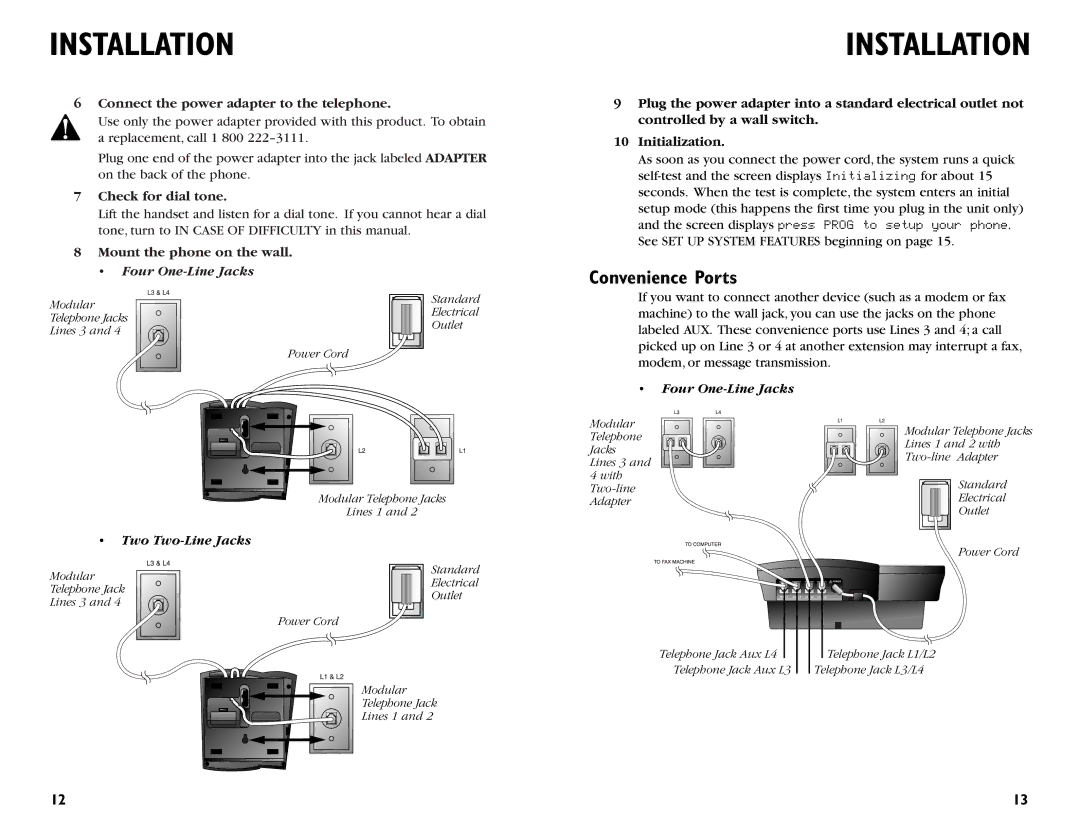
8Mount the phone on the wall.
• Four One-Line Jacks
Modular | Standard | |
Electrical | ||
Telephone Jacks | ||
Outlet | ||
Lines 3 and 4 | ||
| ||
| Power Cord |
9Plug the power adapter into a standard electrical outlet not controlled by a wall switch.
10Initialization.
As soon as you connect the power cord, the system runs a quick
Convenience Ports
If you want to connect another device (such as a modem or fax machine) to the wall jack, you can use the jacks on the phone labeled AUX. These convenience ports use Lines 3 and 4; a call picked up on Line 3 or 4 at another extension may interrupt a fax, modem, or message transmission.
•Four
| Modular | Modular Telephone Jacks | |
| Telephone | ||
| Lines 1 and 2 with | ||
| Jacks | ||
| Adapter | ||
| Lines 3 and | ||
|
|
| |
| 4 with |
| Standard |
|
| ||
Modular Telephone Jacks |
| Electrical | |
Adapter |
| ||
Lines 1 and 2 |
|
| Outlet |
•Two Two-Line Jacks
Power Cord
Modular
Telephone Jack
Lines 3 and 4
Standard
Electrical
Outlet
Power Cord
Telephone Jack Aux L4
Telephone Jack Aux L3
Modular
Telephone Jack
Lines 1 and 2
Telephone Jack L1/L2 Telephone Jack L3/L4
12 | 13 |
