DS72 Host Module
22.Select the ‘Gateway Address’ option and type the assigned Gateway address and press ‘Enter’.
23.Press ‘Enter’ until you are asked to ‘Accept Changes’. Type ‘Y’ to accept changes.
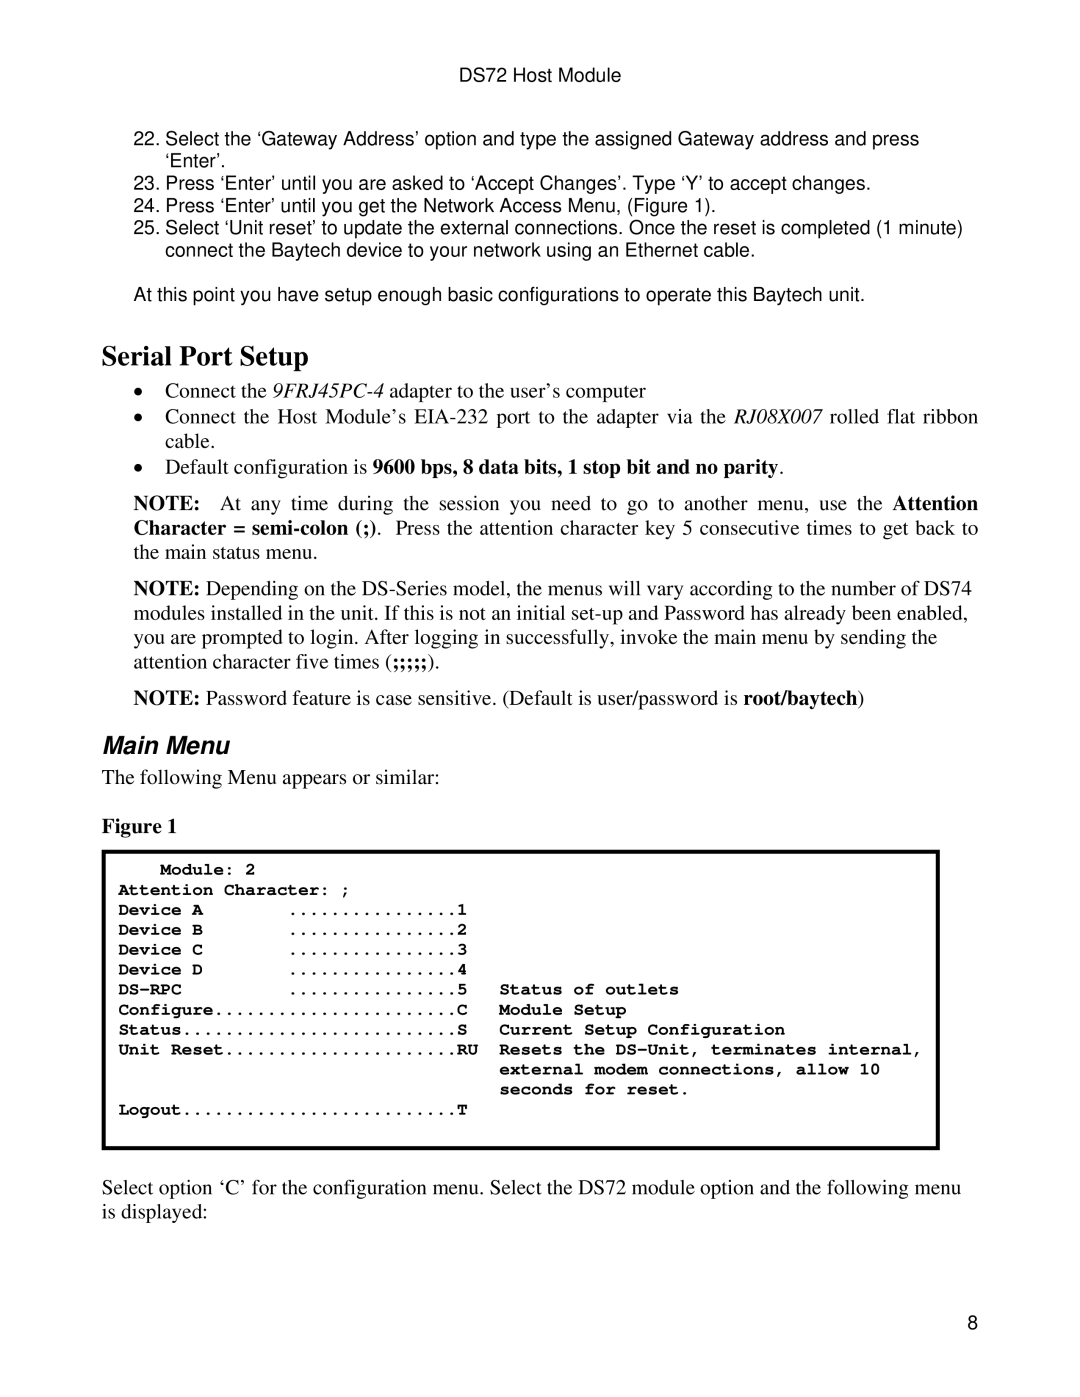
24.Press ‘Enter’ until you get the Network Access Menu, (Figure 1).
25.Select ‘Unit reset’ to update the external connections. Once the reset is completed (1 minute) connect the Baytech device to your network using an Ethernet cable.
At this point you have setup enough basic configurations to operate this Baytech unit.
Serial Port Setup
•Connect the
•Connect the Host Module’s
•Default configuration is 9600 bps, 8 data bits, 1 stop bit and no parity.
NOTE: At any time during the session you need to go to another menu, use the Attention Character =
NOTE: Depending on the
NOTE: Password feature is case sensitive. (Default is user/password is root/baytech)
Main Menu
The following Menu appears or similar:
Figure 1
Module: 2 |
|
|
Attention Character: ; | 1 |
|
Device A |
| |
Device B | 2 |
|
Device C | 3 |
|
Device D | 4 | Status of outlets |
| 5 | |
Configure | C | Module Setup |
Status | S | Current Setup Configuration |
Unit Reset | RU | Resets the |
|
| external modem connections, allow 10 |
Logout | T | seconds for reset. |
|
Select option ‘C’ for the configuration menu. Select the DS72 module option and the following menu is displayed:
8