Remote control
English
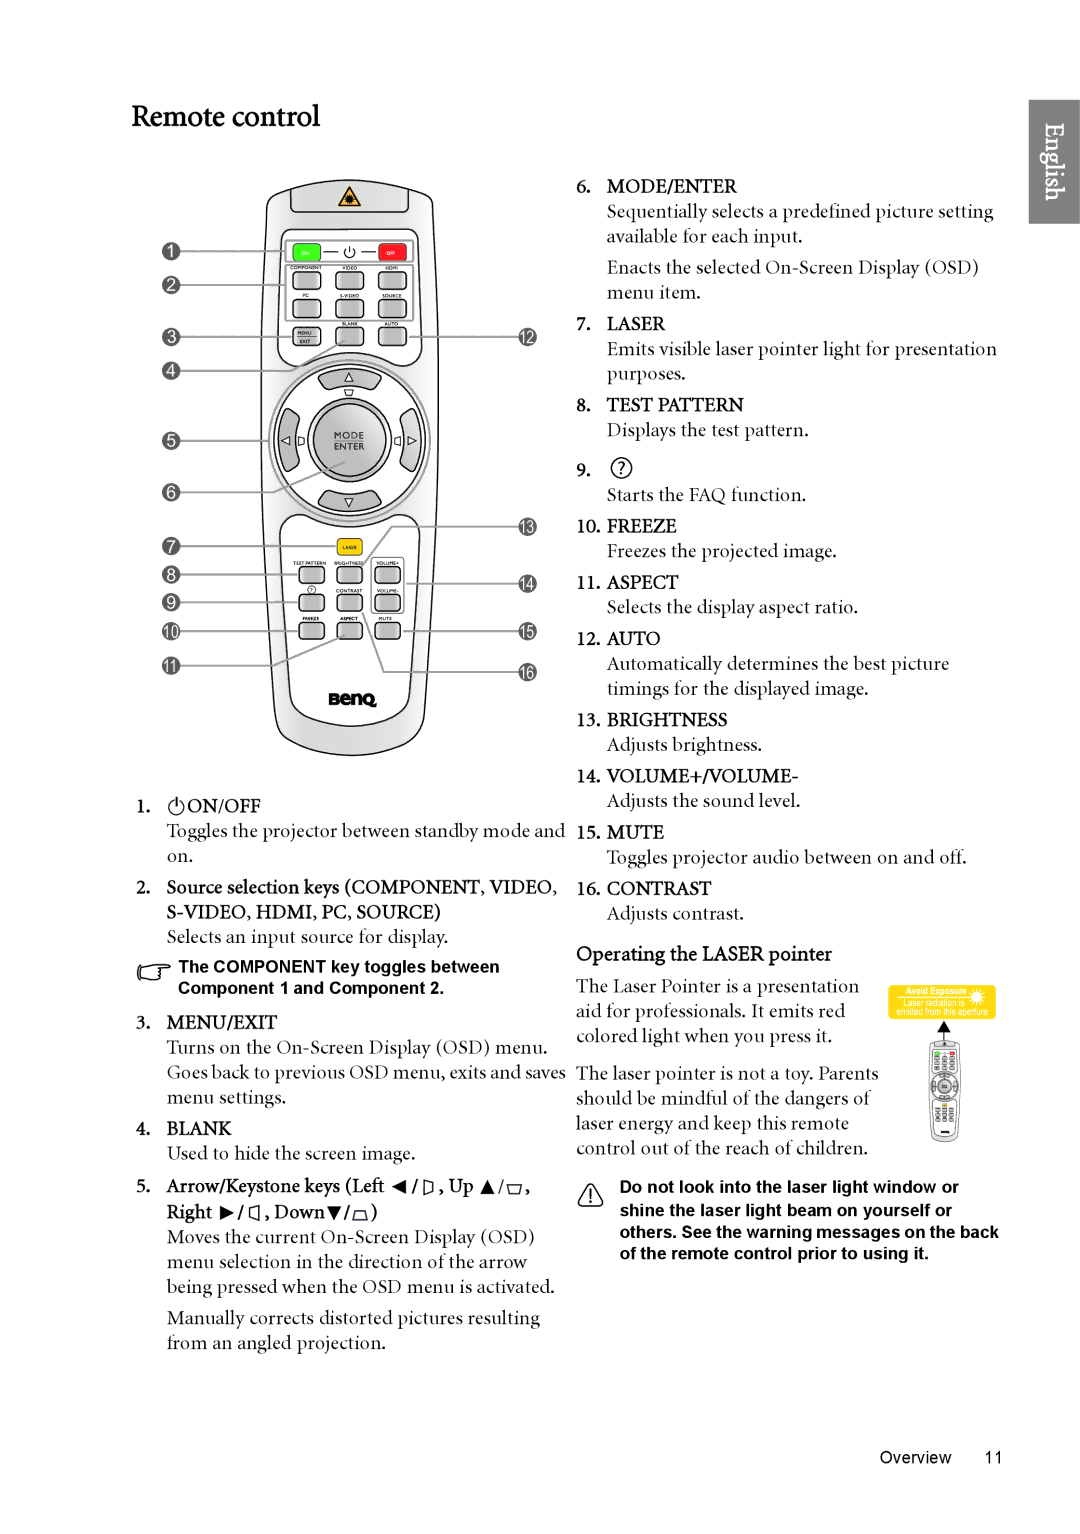
1
2
3 ![]()
![]()
![]()
![]()
![]() 12
12
4 |
| |
5 |
| |
6 |
| |
7 | 13 | |
| ||
8 | 14 | |
9 | ||
| ||
10 | 15 | |
11 | 16 | |
|
1. II ON/OFF
Toggles the projector between standby mode and on.
2.Source selection keys (COMPONENT, VIDEO,
Selects an input source for display.
The COMPONENT key toggles between
Component 1 and Component 2.
3.MENU/EXIT
Turns on the
4.BLANK
Used to hide the screen image.
5.Arrow/Keystone keys (Left ![]() /
/ ![]() , Up
, Up ![]() /
/![]() ,
,
Right ![]() /
/ ![]() , Down
, Down![]() /
/![]() )
)
Moves the current
Manually corrects distorted pictures resulting from an angled projection.
6.MODE/ENTER
Sequentially selects a predefined picture setting available for each input.
Enacts the selected
7.LASER
Emits visible laser pointer light for presentation purposes.
8.TEST PATTERN Displays the test pattern.
9.![]()
Starts the FAQ function.
10.FREEZE
Freezes the projected image.
11.ASPECT
Selects the display aspect ratio.
12.AUTO
Automatically determines the best picture timings for the displayed image.
13.BRIGHTNESS Adjusts brightness.
14.VOLUME+/VOLUME- Adjusts the sound level.
15.MUTE
Toggles projector audio between on and off.
16.CONTRAST Adjusts contrast.
Operating the LASER pointer
The Laser Pointer is a presentation aid for professionals. It emits red colored light when you press it.
The laser pointer is not a toy. Parents should be mindful of the dangers of laser energy and keep this remote control out of the reach of children.
Do not look into the laser light window or shine the laser light beam on yourself or others. See the warning messages on the back of the remote control prior to using it.
Overview 11