English
Correcting picture distortion
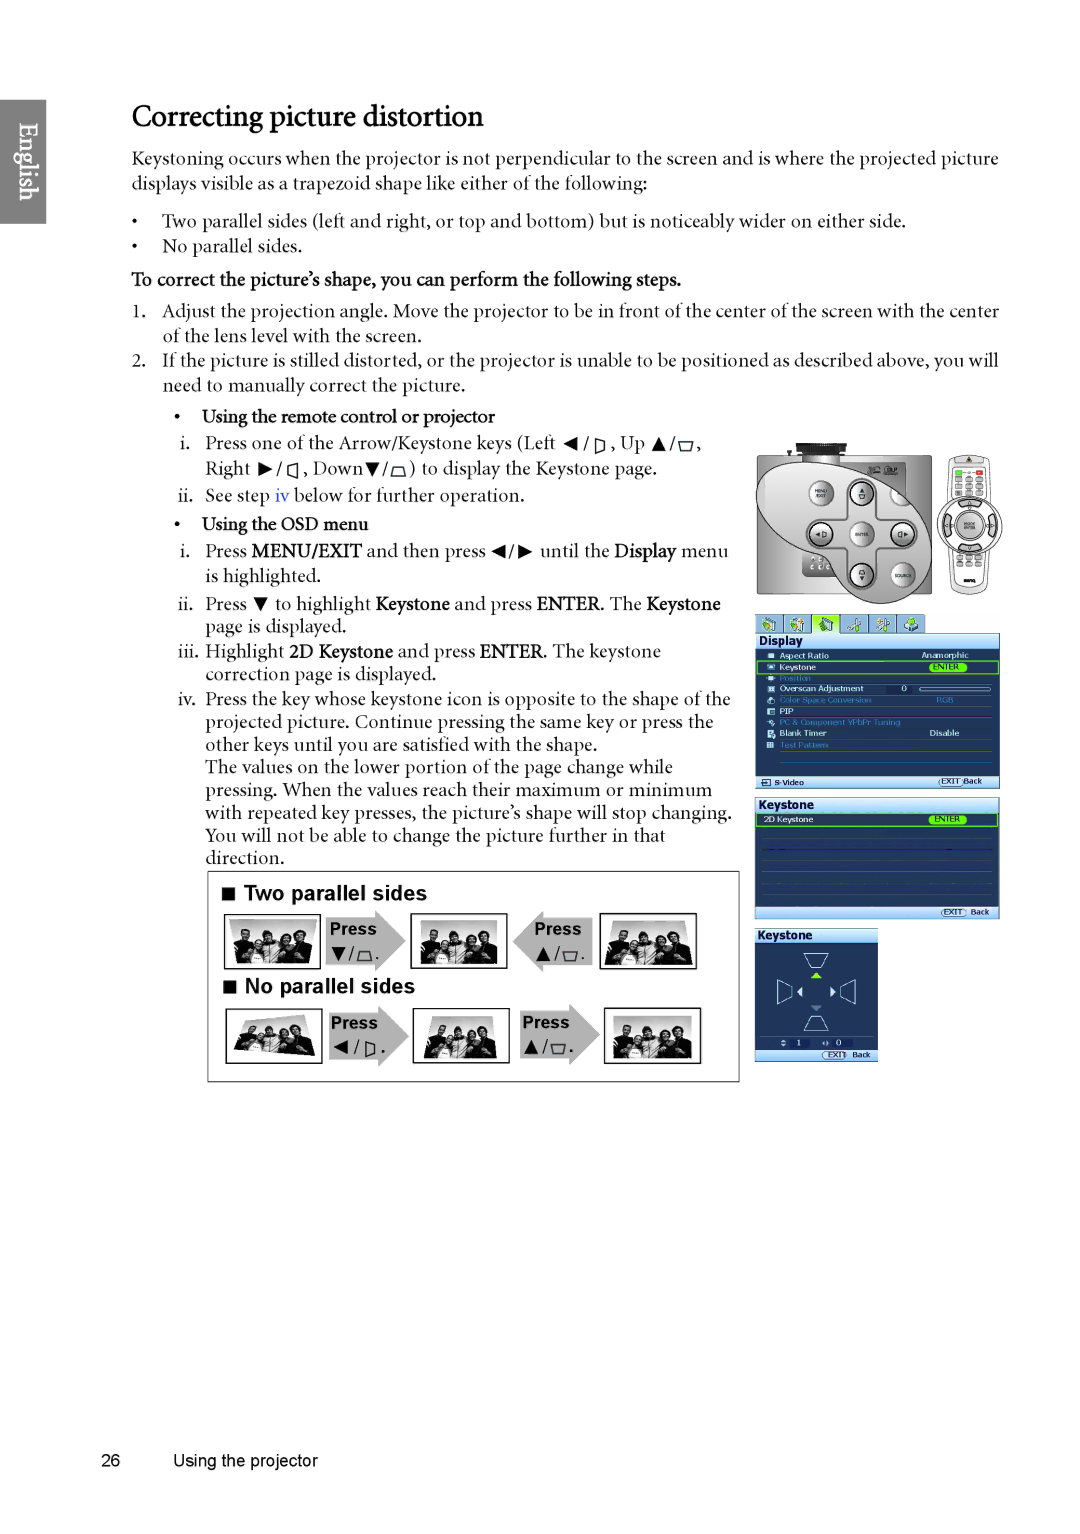
Keystoning occurs when the projector is not perpendicular to the screen and is where the projected picture displays visible as a trapezoid shape like either of the following:
•Two parallel sides (left and right, or top and bottom) but is noticeably wider on either side.
•No parallel sides.
To correct the picture’s shape, you can perform the following steps.
1.Adjust the projection angle. Move the projector to be in front of the center of the screen with the center of the lens level with the screen.
2.If the picture is stilled distorted, or the projector is unable to be positioned as described above, you will need to manually correct the picture.
•Using the remote control or projector
i. Press one of the Arrow/Keystone keys (Left ![]() /
/ ![]() , Up
, Up ![]() /
/![]() , Right
, Right ![]() /
/ ![]() , Down
, Down![]() /
/![]() ) to display the Keystone page.
) to display the Keystone page.
ii. See step iv below for further operation.
• Using the OSD menu
i. Press MENU/EXIT and then press ![]() /
/ ![]() until the Display menu is highlighted.
until the Display menu is highlighted.
ii.Press ![]() to highlight Keystone and press ENTER. The Keystone page is displayed.
to highlight Keystone and press ENTER. The Keystone page is displayed.
iii.Highlight 2D Keystone and press ENTER. The keystone correction page is displayed.
iv.Press the key whose keystone icon is opposite to the shape of the projected picture. Continue pressing the same key or press the other keys until you are satisfied with the shape.
The values on the lower portion of the page change while pressing. When the values reach their maximum or minimum with repeated key presses, the picture’s shape will stop changing. You will not be able to change the picture further in that direction.
Display
Aspect Ratio | Anamorphic |
Keystone | ENTER |
Position |
|
Overscan Adjustment | 0 |
Color Space Conversion | RGB |
PIP |
|
PC & Component YPbPr Tuning |
|
Blank Timer | Disable |
Test Pattern |
|
EXIT Back | |
Keystone |
|
2D Keystone | ENTER |
Two parallel sides |
|
| EXIT | Back |
|
|
| ||
Press | Press | Keystone |
|
|
/ . | / . |
|
|
|
No parallel sides |
|
|
|
|
Press | Press |
|
|
|
/ . | / . |
| EXIT Back |
|
|
| 1 | 0 |
|
26 Using the projector
