Maintenance and service
space which is likely to experience freezing temperatures, all water must be drained from the heater. If precautions are not taken, resulting damage will not be covered under the warranty. NOTE: Use of agents such as
1.Press ON/OFF switch on the water heater to turn OFF the heater and unplug power supply cord. The display should be blank.
2.Shut off gas supply to heater.
3.Shut off the water supply to the water heater using installer supplied shutoff valve.
4.Open hot water taps to drain the plumbing system. If water continues to flow after 5 minutes, a plumbing crossover is present and must be corrected before proceeding.
5.Open service valves (if available) or disconnect inlet and outlet water pipes from the water heater. Place a small bucket underneath the water heater to catch residual water remaining inside the water heater.
6.Using an air compressor, blow short bursts of air (100psi max) through the outlet water connection until there is no water present coming through the inlet water connection of the heater.
7.Reconnect water fittings and return heater to service when danger of freezing has past.
6.3Mineral scale build-up
Periodic descaling may be necessary in areas with high mineral content in the water. Scale buildup in the heat exchanger may result in lower flow rates, error codes of A7 and E9 and boiling sounds (knocking and banging) in the heat exchanger.
Descaling using a pump
1.Disconnect electrical supply from the water heater.
2.Shut off the water supply to the water heater using (installer supplied) shutoff valve.
3.Open hot water taps to drain and relieve pressure from the plumbing system.
4.Drain water from the unit's heat exchanger by disconnecting inlet and outlet water connections from the heater.
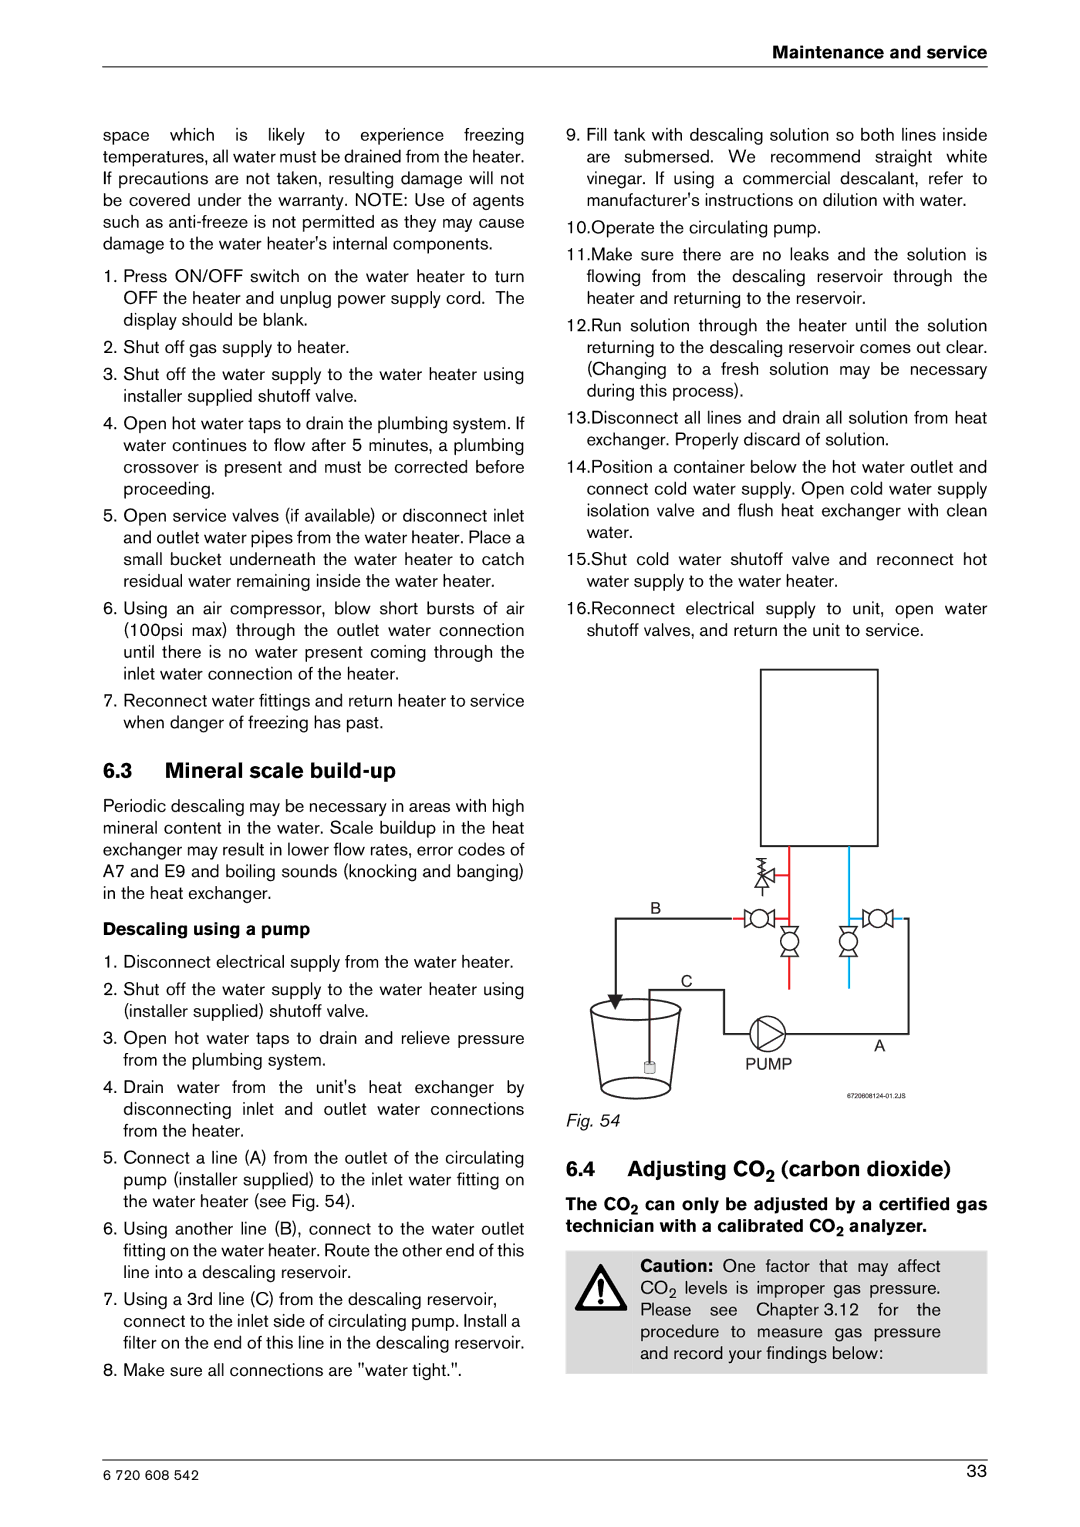
5.Connect a line (A) from the outlet of the circulating pump (installer supplied) to the inlet water fitting on the water heater (see Fig. 54).
6.Using another line (B), connect to the water outlet fitting on the water heater. Route the other end of this line into a descaling reservoir.
7.Using a 3rd line (C) from the descaling reservoir, connect to the inlet side of circulating pump. Install a filter on the end of this line in the descaling reservoir.
8.Make sure all connections are "water tight.".
9.Fill tank with descaling solution so both lines inside are submersed. We recommend straight white vinegar. If using a commercial descalant, refer to manufacturer's instructions on dilution with water.
10.Operate the circulating pump.
11.Make sure there are no leaks and the solution is flowing from the descaling reservoir through the heater and returning to the reservoir.
12.Run solution through the heater until the solution returning to the descaling reservoir comes out clear. (Changing to a fresh solution may be necessary during this process).
13.Disconnect all lines and drain all solution from heat exchanger. Properly discard of solution.
14.Position a container below the hot water outlet and connect cold water supply. Open cold water supply isolation valve and flush heat exchanger with clean water.
15.Shut cold water shutoff valve and reconnect hot water supply to the water heater.
16.Reconnect electrical supply to unit, open water shutoff valves, and return the unit to service.
Fig. 54
6.4Adjusting CO2 (carbon dioxide)
The CO2 can only be adjusted by a certified gas technician with a calibrated CO2 analyzer.
Caution: One factor that may affect CO2 levels is improper gas pressure. Please see Chapter 3.12 for the procedure to measure gas pressure and record your findings below:
6 720 608 542 | 33 |