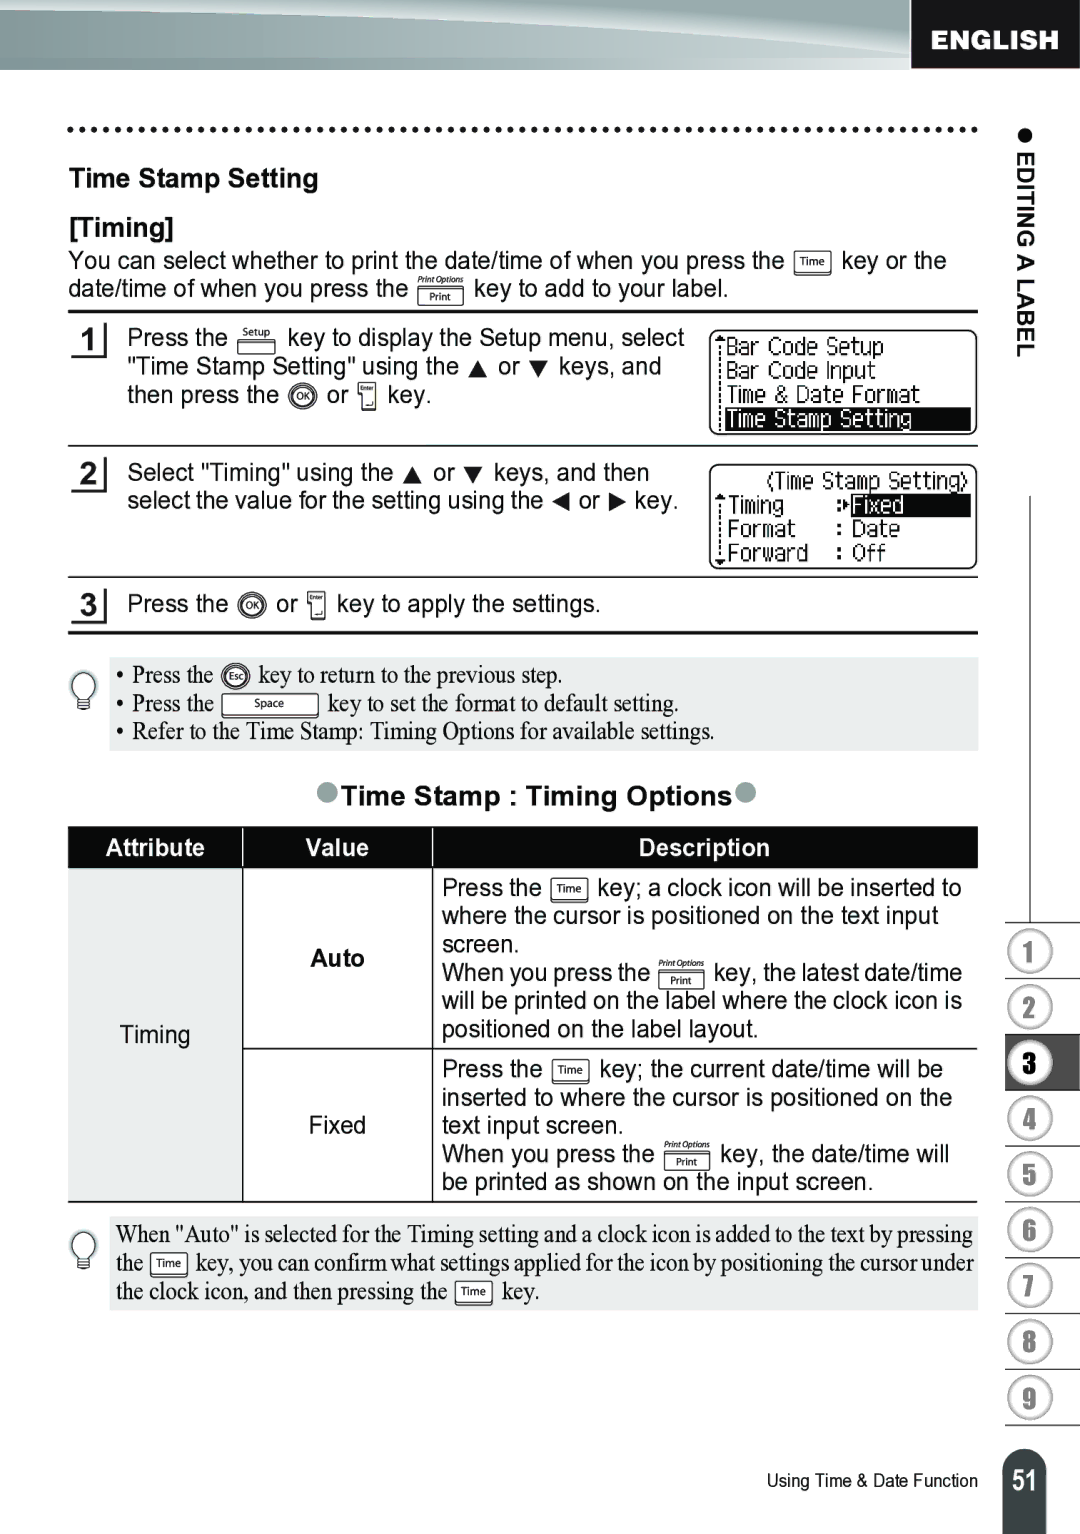
Time Stamp Setting [Timing]
You can select whether to print the date/time of when you press the ![]() key or the
key or the
date/time of when you press the ![]() key to add to your label.
key to add to your label.
1Press the ![]() key to display the Setup menu, select "Time Stamp Setting" using the
key to display the Setup menu, select "Time Stamp Setting" using the ![]() or
or ![]() keys, and then press the
keys, and then press the ![]() or
or ![]() key.
key.
2Select "Timing" using the ![]() or
or ![]() keys, and then select the value for the setting using the
keys, and then select the value for the setting using the ![]() or
or ![]() key.
key.
3Press the  or
or  key to apply the settings.
• | Press the | key to return to the previous step. |
• | Press the | key to set the format to default setting. |
• Refer to the Time Stamp: Timing Options for available settings.
z EDITING A LABEL
zTime Stamp : Timing Optionsz
Attribute | Value |
| Description | |
|
| Press the | key; a clock icon will be inserted to | |
|
| where the cursor is positioned on the text input | ||
| Auto | screen. |
|
|
| When you press the | key, the latest date/time | ||
|
| |||
|
| will be printed on the label where the clock icon is | ||
Timing |
| positioned on the label layout. | ||
|
| Press the | key; the current date/time will be | |
| Fixed | inserted to where the cursor is positioned on the | ||
| text input screen. |
| ||
|
| When you press the | key, the date/time will | |
|
| be printed as shown on the input screen. | ||
When "Auto" is selected for the Timing setting and a clock icon is added to the text by pressing
the ![]() key, you can confirm what settings applied for the icon by positioning the cursor under
key, you can confirm what settings applied for the icon by positioning the cursor under
the clock icon, and then pressing the ![]() key.
key.
1
2
3
4
5
6
7
8
9
Using Time & Date Function
51 |
