Installing the Device
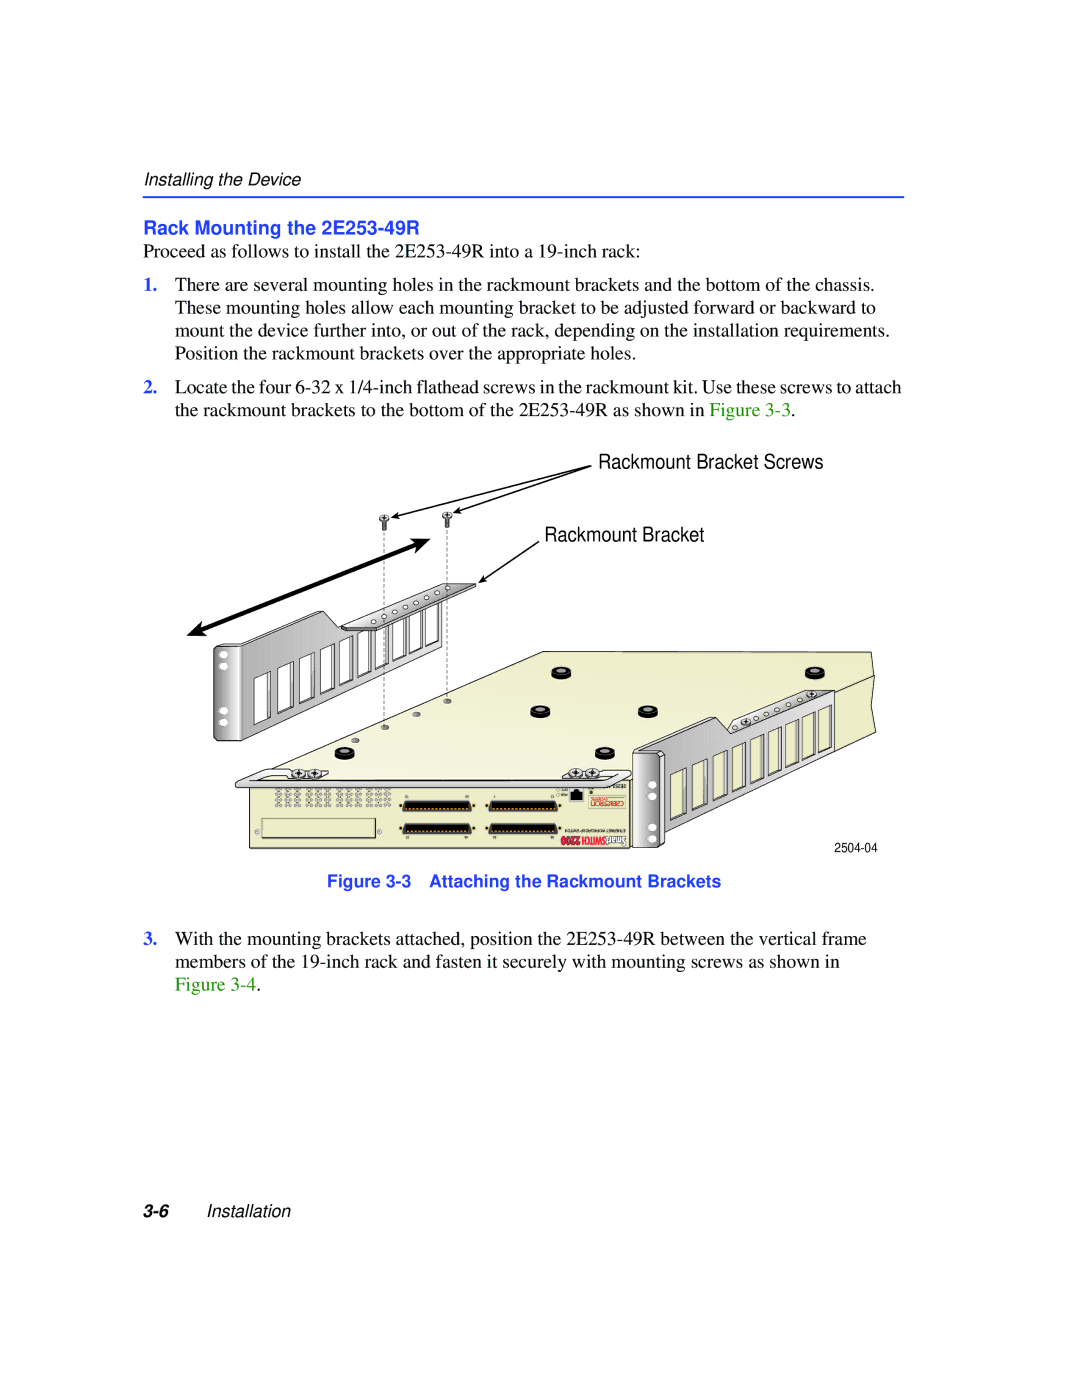
Rack Mounting the 2E253-49R
Proceed as follows to install the
1.There are several mounting holes in the rackmount brackets and the bottom of the chassis. These mounting holes allow each mounting bracket to be adjusted forward or backward to mount the device further into, or out of the rack, depending on the installation requirements. Position the rackmount brackets over the appropriate holes.
2.Locate the four
Rackmount Bracket Screws
Rackmount Bracket
46 | 42 | 38 | 34 | 30 | 26 |
47 | 43 | 39 | 35 | 31 | 27 |
48 | 44 | 40 | 36 | 32 | 28 |
22 | 18 | 14 | 10 | 6 | 2 |
|
23 | 19 | 15 | 11 | 7 | 3 | 13 |
24 | 20 | 16 | 12 | 8 | 4 |
|
24
| CPU |
1 | PWR |
12 |
RESET |
SWITCH WORKGROUP ETHERNET
37 | 48 | 25 | 36 |
Figure 3-3 Attaching the Rackmount Brackets
3.With the mounting brackets attached, position the