S T E P 3
Adjusting the Image with Gamma Settings
An image scanned with
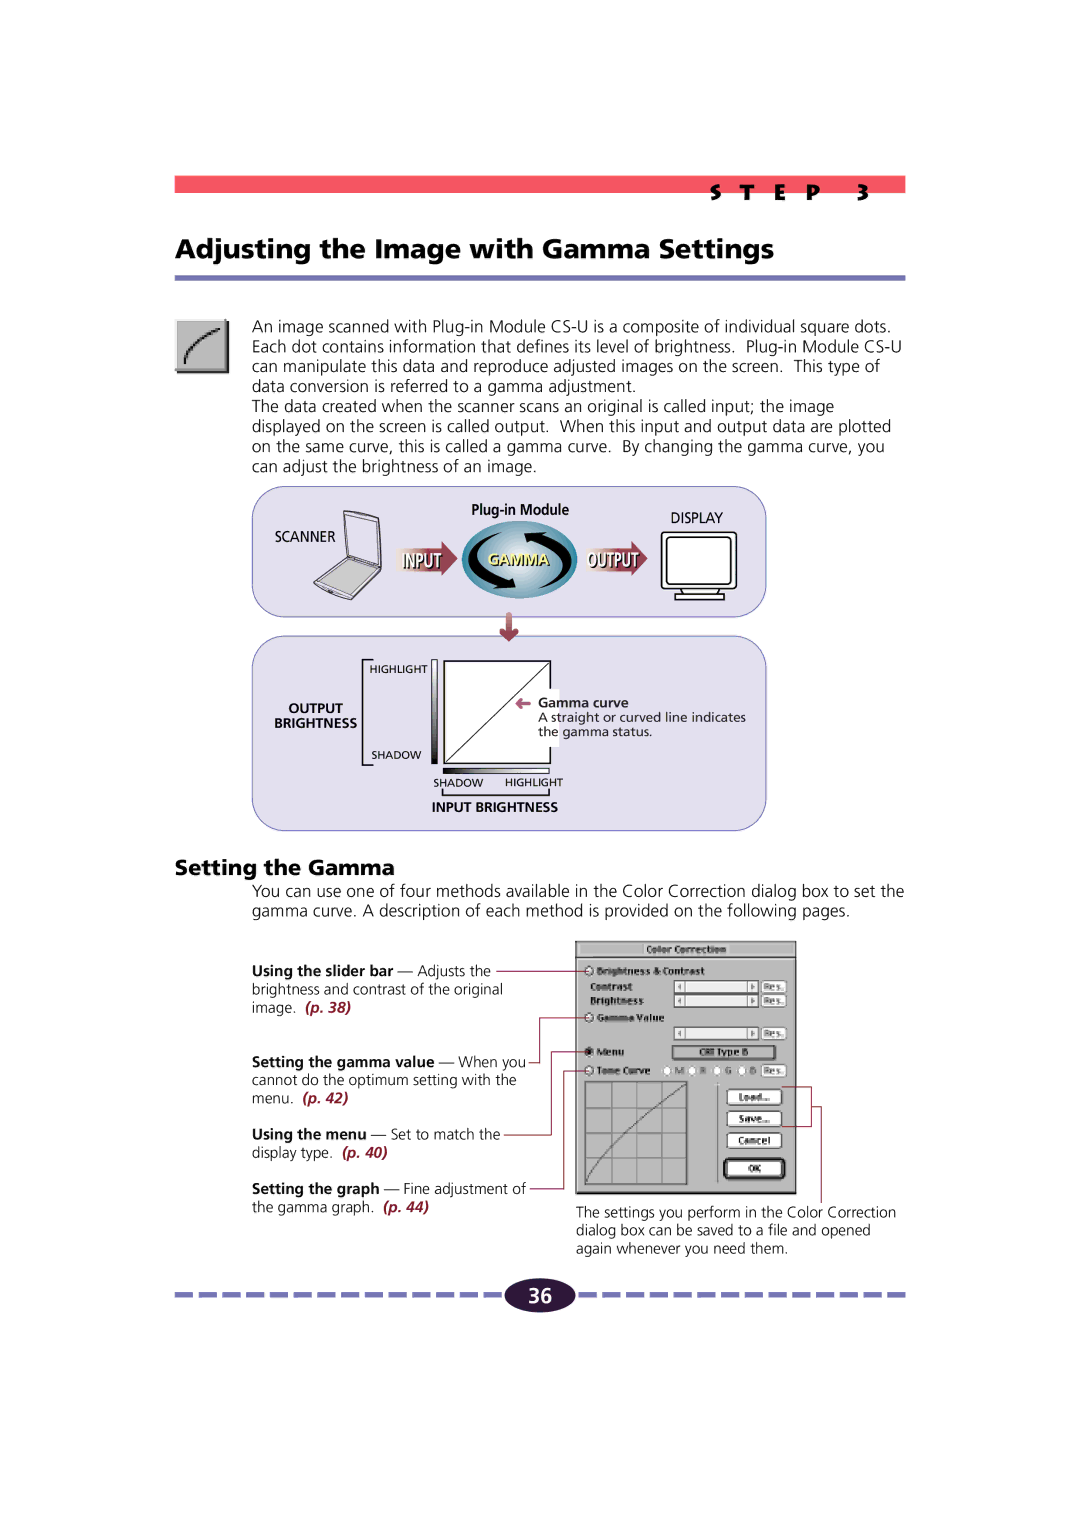
The data created when the scanner scans an original is called input; the image displayed on the screen is called output. When this input and output data are plotted on the same curve, this is called a gamma curve. By changing the gamma curve, you can adjust the brightness of an image.
| DISPLAY |
|
SCANNER
OUTPUT
BRIGHTNESS
HIGHLIGHT ![]()
![]() Gamma curve
Gamma curve
A straight or curved line indicates the gamma status.
SHADOW
SHADOW HIGHLIGHT
INPUT BRIGHTNESS
Setting the Gamma
You can use one of four methods available in the Color Correction dialog box to set the gamma curve. A description of each method is provided on the following pages.
Using the slider bar — Adjusts the brightness and contrast of the original image. (p. 38)
Setting the gamma value — When you cannot do the optimum setting with the menu. (p. 42)
Using the menu — Set to match the display type. (p. 40)
Setting the graph — Fine adjustment of
the gamma graph. (p. 44)The settings you perform in the Color Correction dialog box can be saved to a file and opened again whenever you need them.
![]()
![]()
![]()
![]()
![]()
![]()
![]()
![]()
![]()
![]()
![]()
![]()
![]()
![]()
![]() 36
36 ![]()
![]()
![]()
![]()
![]()
![]()
![]()
![]()
![]()
![]()
![]()
![]()
![]()
![]()
![]()
