Scanning Procedures
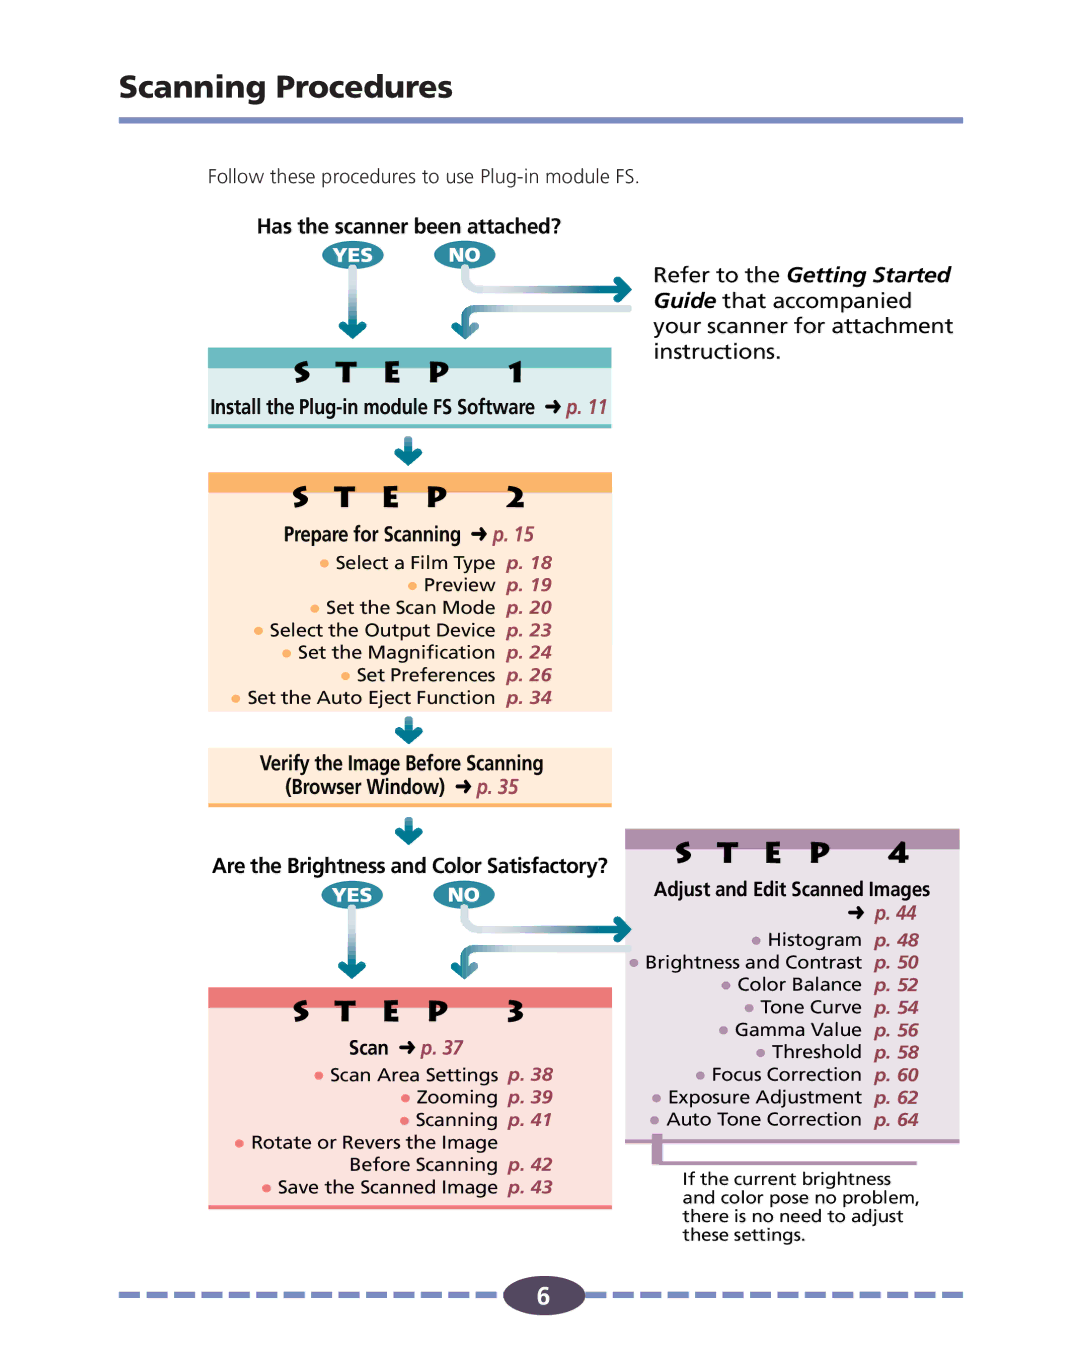
Follow these procedures to use
Has the scanner been attached?
Refer to the Getting Started Guide that accompanied your scanner for attachment instructions.
S T E P 1
Install the
S T E P 2
Prepare for Scanning ➜ p. 15
•Select a Film Type p. 18
•Preview p. 19
•Set the Scan Mode p. 20
•Select the Output Device p. 23
•Set the Magnification p. 24
•Set Preferences p. 26
•Set the Auto Eject Function p. 34
Verify the Image Before Scanning
(Browser Window) ➜ p. 35
Are the Brightness and Color Satisfactory?
S T E P 3
Scan ➜ p. 37
•Scan Area Settings p. 38
•Zooming p. 39
•Scanning p. 41
•Rotate or Revers the Image Before Scanning p. 42
•Save the Scanned Image p. 43
S T E P 4
Adjust and Edit Scanned Images
➜ p. 44
•Histogram p. 48
•Brightness and Contrast p. 50
•Color Balance p. 52
•Tone Curve p. 54
•Gamma Value p. 56
•Threshold p. 58
•Focus Correction p. 60
•Exposure Adjustment p. 62
•Auto Tone Correction p. 64
If the current brightness and color pose no problem, there is no need to adjust these settings.
6
![]()
![]()
![]()
![]() 6
6 ![]()
![]()
![]()
![]()
![]()
![]()
![]()
![]()
![]()
![]()
![]()
![]()
![]()
![]()
![]()