Chapter 4 Replacing Components
Replacing a Fan Tray
Se n d d o c u m e n t c o m m e n t s t o n ex u s 3 k - d o c f e e d b a ck @ c i sc o . c o m
Caution Be sure that the replacement fan tray has the correct direction of airflow, which means that it takes in air from the cold aisle and exhausts air to the hot aisle. It must also have the same direction of airflow as the power supplies. Otherwise, an overtemperature condition can occur.
This section includes the following topics:
•Removing a Fan Tray, page 4-5
•Installing a Fan Tray, page 4-6
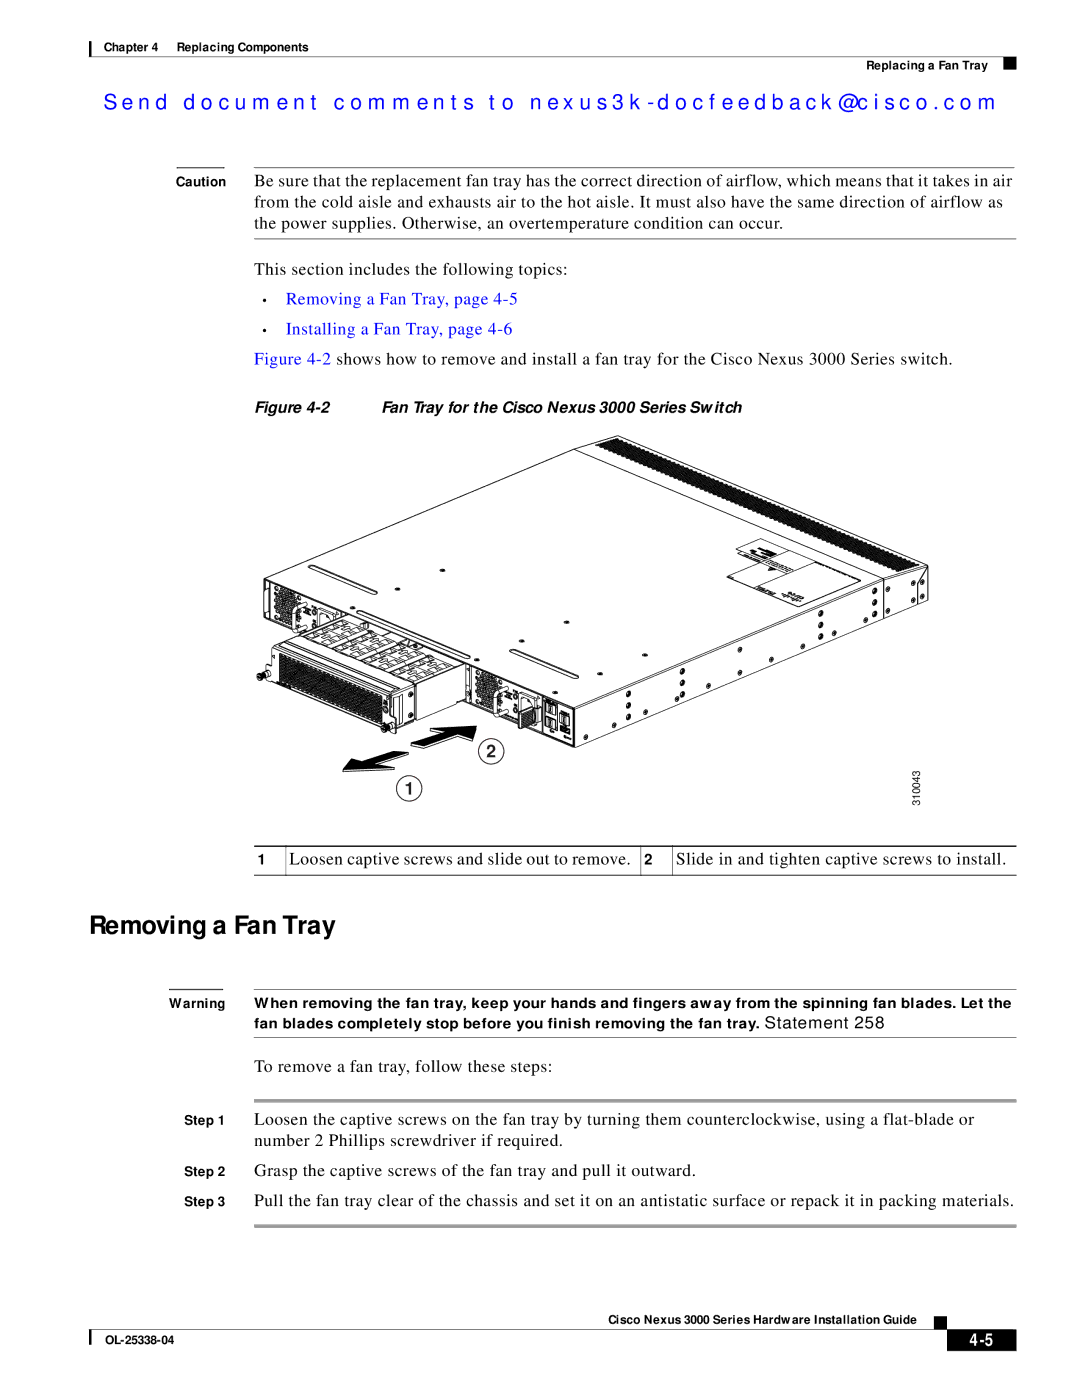
Figure 4-2 shows how to remove and install a fan tray for the Cisco Nexus 3000 Series switch.
Figure 4-2 Fan Tray for the Cisco Nexus 3000 Series Switch
1
2
1 | 310043 |
|
Loosen captive screws and slide out to remove. 2 Slide in and tighten captive screws to install.
Removing a Fan Tray
Warning When removing the fan tray, keep your hands and fingers away from the spinning fan blades. Let the fan blades completely stop before you finish removing the fan tray. Statement 258
To remove a fan tray, follow these steps:
Step 1 Loosen the captive screws on the fan tray by turning them counterclockwise, using a
Step 2 Grasp the captive screws of the fan tray and pull it outward.
Step 3 Pull the fan tray clear of the chassis and set it on an antistatic surface or repack it in packing materials.
Cisco Nexus 3000 Series Hardware Installation Guide
|
|
| |
|
|