Chapter 2 Installing the Cisco Nexus 3000 Series Switches
Starting the Switch
Se n d d o c u m e n t c o m m e n t s t o n ex u s 3 k - d o c f e e d b a ck @ c i sc o . c o m
Step 5 If you are installing a switch with a DC power supply, connect the power supply to a DC power source as follows:
a.Verify that the DC power source is turned off at the circuit breaker.
b.Remove the clear plastic safety cover that prevents you from touching the negative
(+) terminals on the power supply.
c.Determine whether the terminals are correctly labeled. As shown in Figure
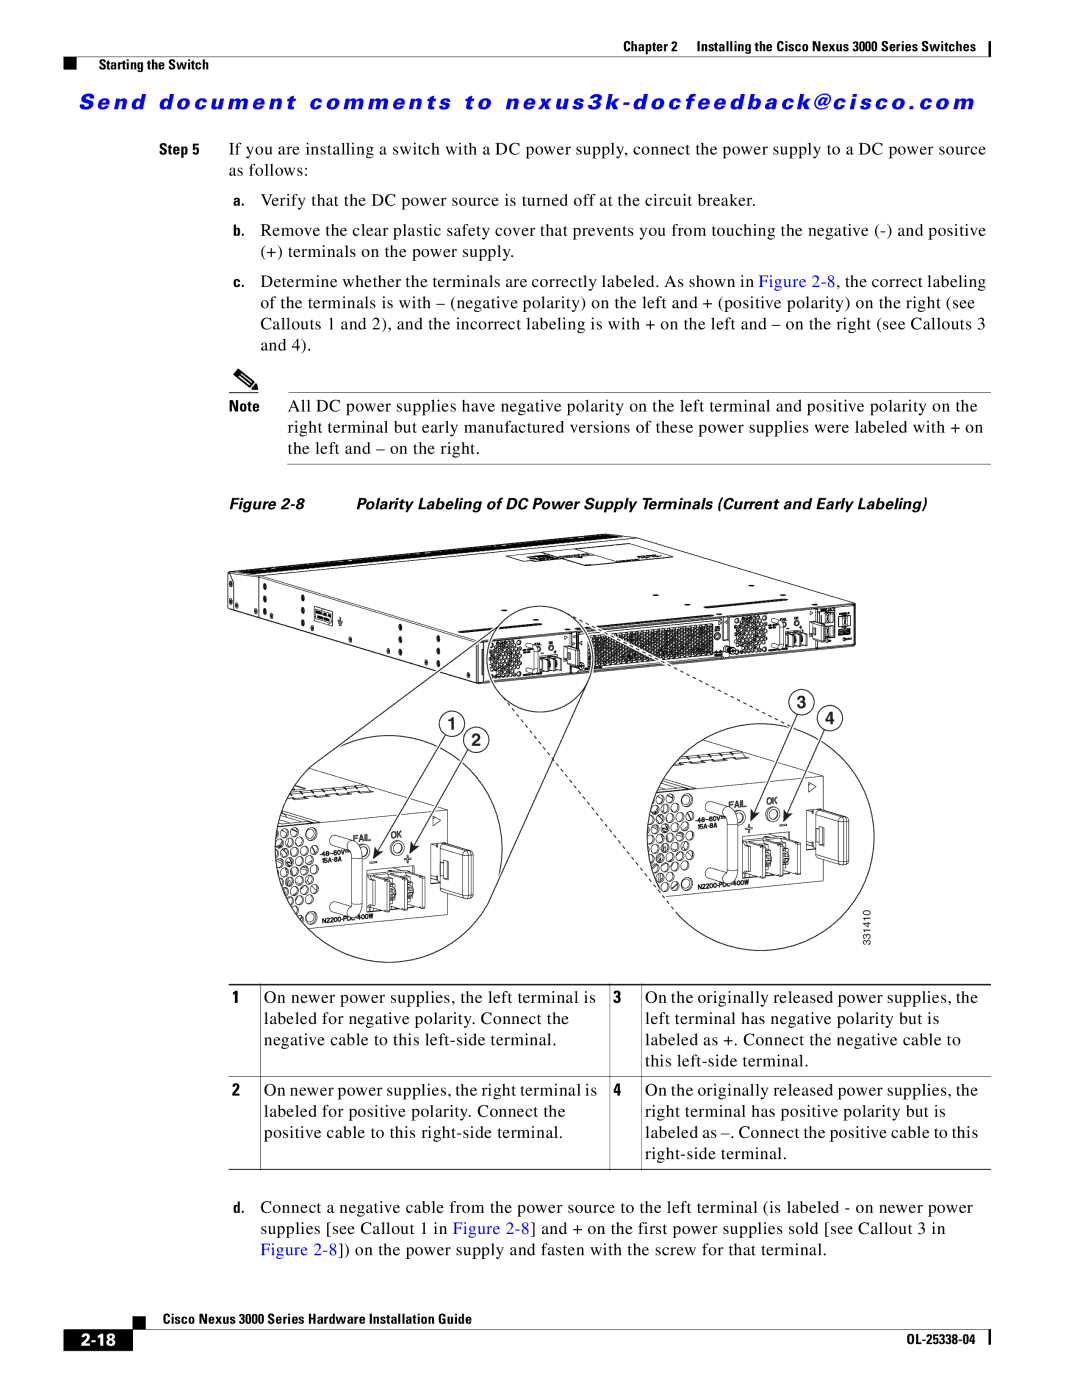
Note All DC power supplies have negative polarity on the left terminal and positive polarity on the right terminal but early manufactured versions of these power supplies were labeled with + on the left and – on the right.
Figure 2-8 Polarity Labeling of DC Power Supply Terminals (Current and Early Labeling)
| 3 | |
1 | 4 | |
2 | ||
|
|
|
| 331410 |
1 | On newer power supplies, the left terminal is | 3 | On the originally released power supplies, the |
| labeled for negative polarity. Connect the |
| left terminal has negative polarity but is |
| negative cable to this |
| labeled as +. Connect the negative cable to |
|
|
| this |
2 | On newer power supplies, the right terminal is | 4 | On the originally released power supplies, the |
| labeled for positive polarity. Connect the |
| right terminal has positive polarity but is |
| positive cable to this |
| labeled as |
|
|
|
d.Connect a negative cable from the power source to the left terminal (is labeled - on newer power supplies [see Callout 1 in Figure
| Cisco Nexus 3000 Series Hardware Installation Guide |